Snapper 2137 manual Initial Assembly & Installation, Install Cross-Over Tubes

Models: 2137

1 26
Download 26 pages 42.3 Kb
Page 17
Image 17
Install Cross-Over Tubes

Initial Assembly & Installation

A

B

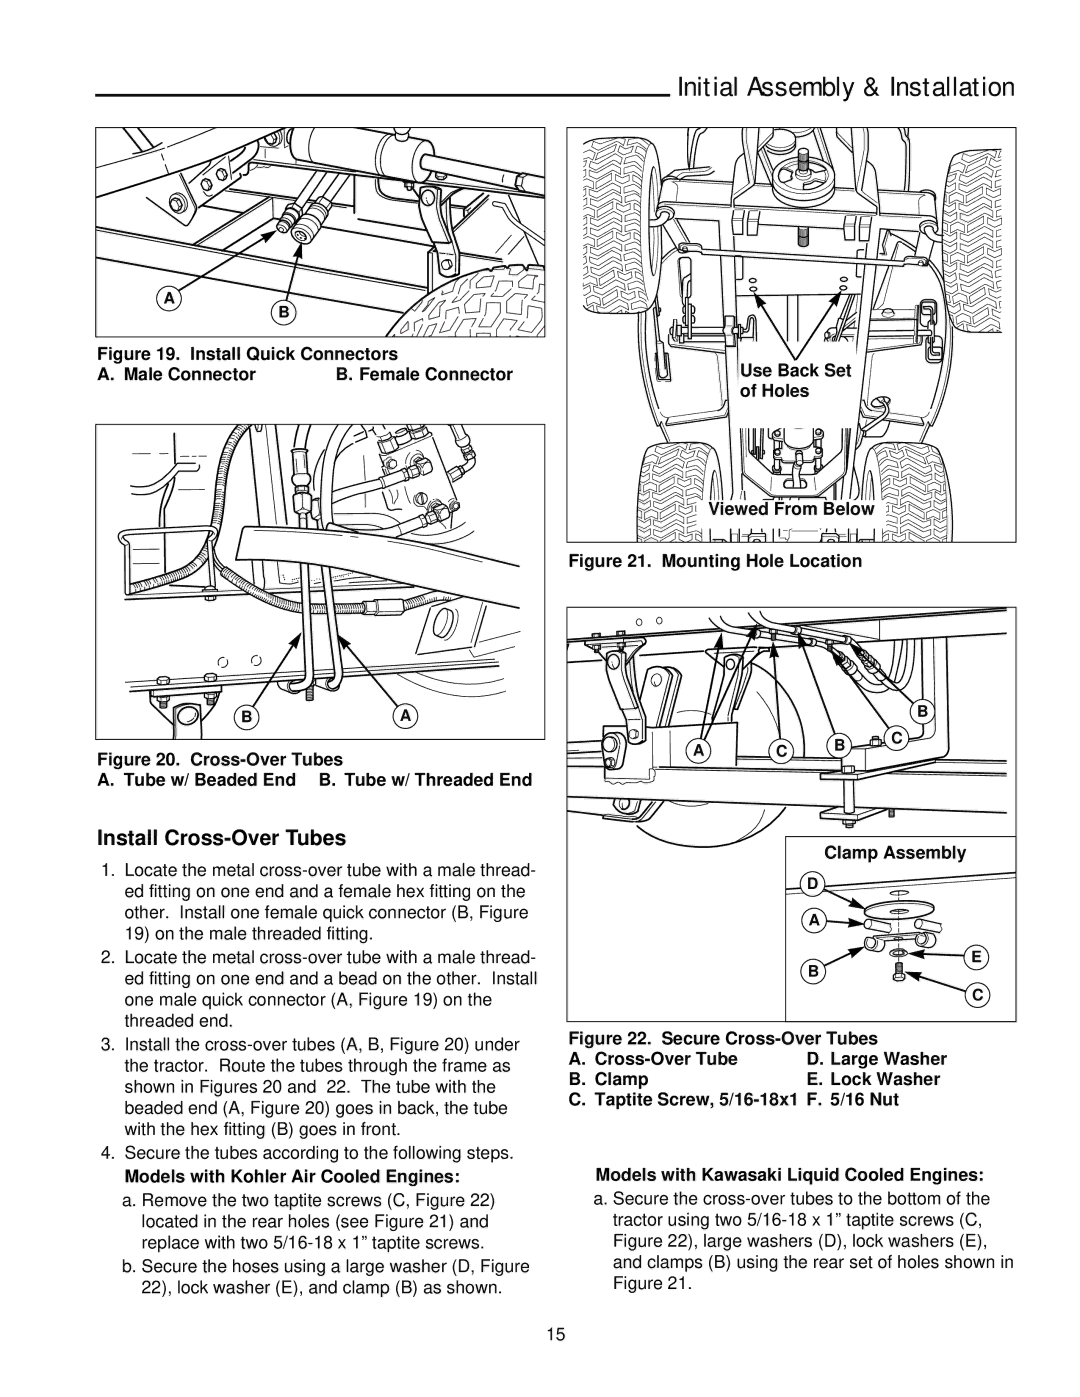
Figure 19. Install Quick Connectors

A. Male Connector

B. Female Connector

B

A

Figure 20. Cross-Over Tubes

A. Tube w/ Beaded End B. Tube w/ Threaded End

Install Cross-Over Tubes

1.Locate the metal cross-over tube with a male thread- ed fitting on one end and a female hex fitting on the other. Install one female quick connector (B, Figure 19) on the male threaded fitting.

2.Locate the metal cross-over tube with a male thread- ed fitting on one end and a bead on the other. Install one male quick connector (A, Figure 19) on the threaded end.

3.Install the cross-over tubes (A, B, Figure 20) under the tractor. Route the tubes through the frame as shown in Figures 20 and 22. The tube with the beaded end (A, Figure 20) goes in back, the tube with the hex fitting (B) goes in front.

4.Secure the tubes according to the following steps.

Use Back Set

of Holes

Viewed From Below

Figure 21. Mounting Hole Location


B

A

C

B

C


Clamp Assembly


D


A


B

E


C

Figure 22. Secure Cross-Over Tubes

A.

Cross-Over Tube

D. Large Washer

B.

Clamp

E. Lock Washer

C. Taptite Screw, 5/16-18x1 F. 5/16 Nut

Models with Kohler Air Cooled Engines:

a. Remove the two taptite screws (C, Figure 22) located in the rear holes (see Figure 21) and replace with two 5/16-18 x 1” taptite screws.

b. Secure the hoses using a large washer (D, Figure 22), lock washer (E), and clamp (B) as shown.

Models with Kawasaki Liquid Cooled Engines:

a. Secure the cross-over tubes to the bottom of the tractor using two 5/16-18 x 1” taptite screws (C, Figure 22), large washers (D), lock washers (E), and clamps (B) using the rear set of holes shown in Figure 21.

15

Page 17
Image 17
Snapper 2137 manual Initial Assembly & Installation, Install Cross-Over Tubes