•Select the from and to zones from the From Zone and To Zone menus.
•Select the service or group of services affected by the access rule from the Service list. If the service is not listed, you must define the service in the Add Service window. Select Create New Service or Create New Group to display the Add Service window or Add Service Group window.
•Select the source of the traffic affected by the access rule from the Source list. Selecting Create New Network displays the Add Address Object window.
•Select the destination of the traffic affected by the access rule from the Destination list. Selecting Create New Network displays the Add Address Object window.
•From the Users Allowed menu, add the user or user group affected by the access rule.
•Select a schedule from the Schedule menu. The default schedule is Always on.
•Enter any comments to help identify the access rule in the Comments field.
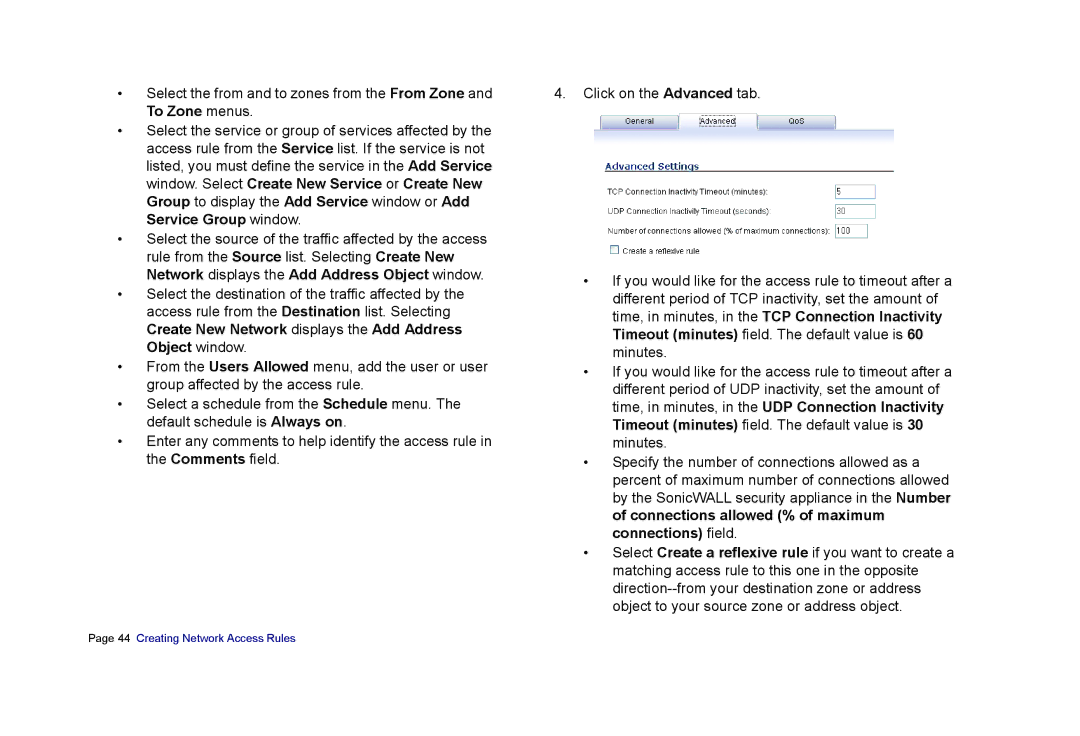
4.Click on the Advanced tab.
•If you would like for the access rule to timeout after a different period of TCP inactivity, set the amount of time, in minutes, in the TCP Connection Inactivity Timeout (minutes) field. The default value is 60 minutes.
•If you would like for the access rule to timeout after a different period of UDP inactivity, set the amount of time, in minutes, in the UDP Connection Inactivity Timeout (minutes) field. The default value is 30 minutes.
•Specify the number of connections allowed as a percent of maximum number of connections allowed by the SonicWALL security appliance in the Number of connections allowed (% of maximum connections) field.
•Select Create a reflexive rule if you want to create a matching access rule to this one in the opposite