Recording From CDs
Fading In or Out 
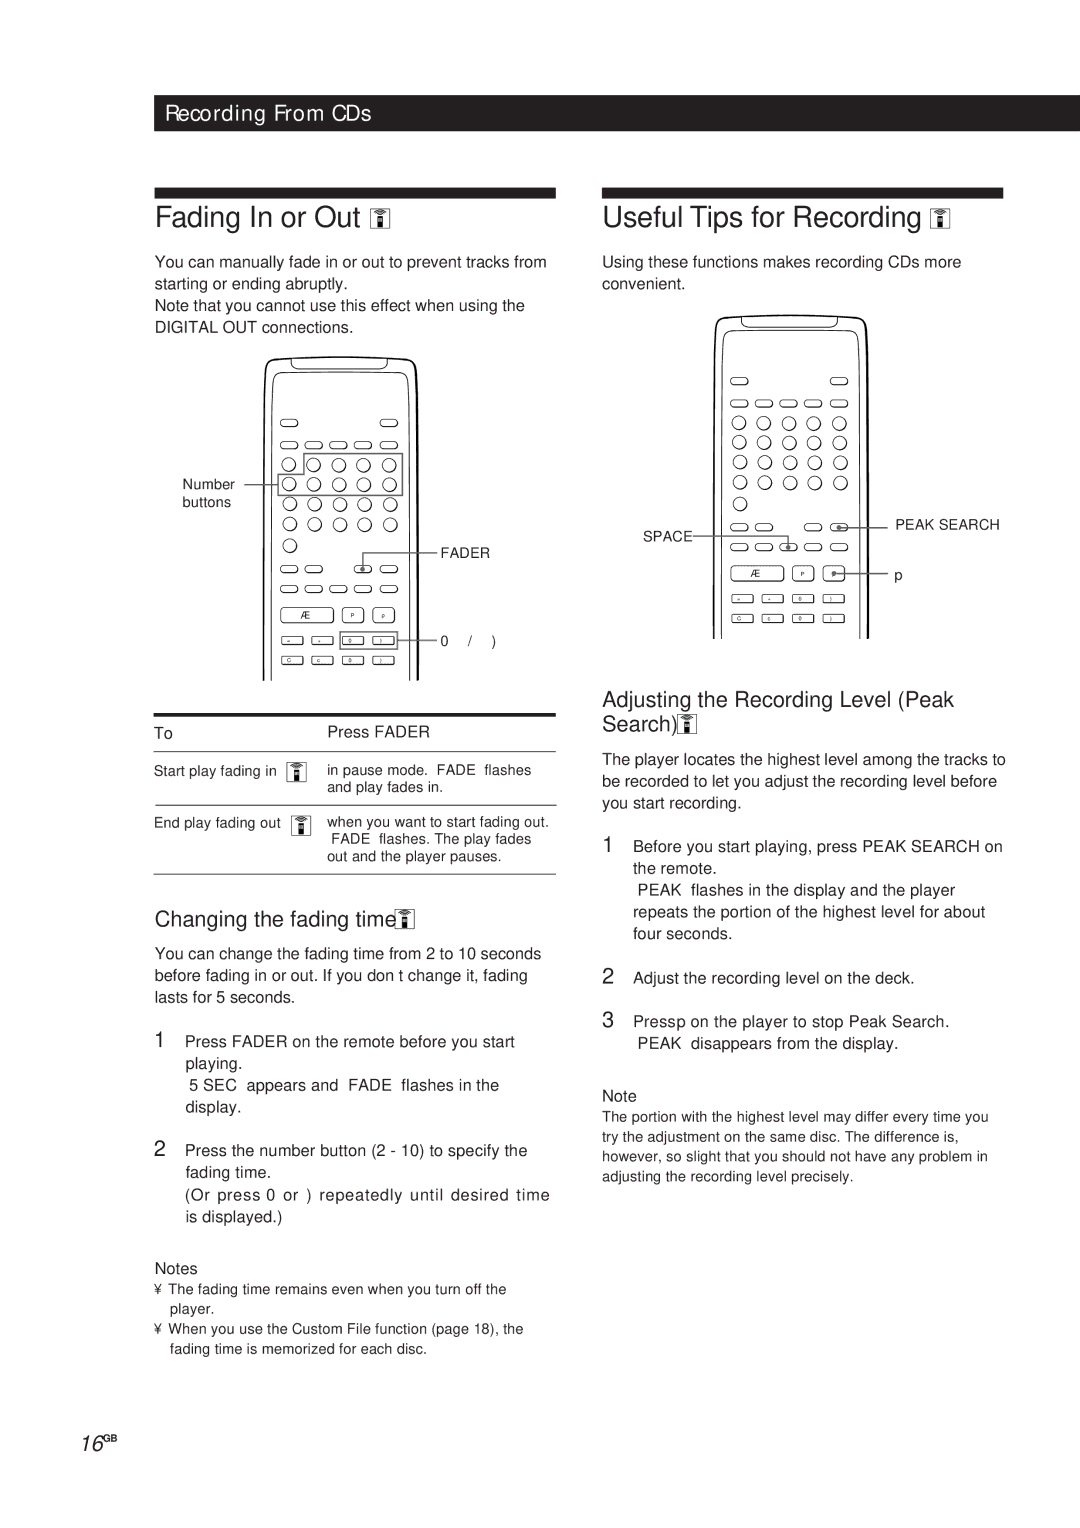
You can manually fade in or out to prevent tracks from
Useful Tips for Recording 
Using these functions makes recording CDs more
starting or ending abruptly.
Note that you cannot use this effect when using the DIGITAL OUT connections.
Number ![]()
![]() buttons
buttons ![]()
FADER
convenient.
SPACE
![]()
![]() PEAK SEARCH
PEAK SEARCH
| Æ | P | p |
|
|
|
= | + | 0 | ) | 0 | / | ) |
C | c | 0 | ) |
|
|
|
To | Press FADER | |
|
| |
Start play fading in | in pause mode. “FADE” flashes | |
|
| and play fades in. |
|
|
|
End play fading out | when you want to start fading out. | |
|
| “FADE” flashes. The play fades |
|
| out and the player pauses. |
|
|
|
Changing the fading time 


You can change the fading time from 2 to 10 seconds before fading in or out. If you don’t change it, fading lasts for 5 seconds.
1Press FADER on the remote before you start playing.
“5 SEC” appears and “FADE” flashes in the display.
2Press the number button (2 - 10) to specify the fading time.
(Or press 0 or ) repeatedly until desired time is displayed.)
Notes
•The fading time remains even when you turn off the player.
•When you use the Custom File function (page 18), the fading time is memorized for each disc.
| Æ | P | p | p |
= | + | 0 | ) |
|
C | c | 0 | ) |
|
Adjusting the Recording Level (Peak Search) 


The player locates the highest level among the tracks to be recorded to let you adjust the recording level before you start recording.
1Before you start playing, press PEAK SEARCH on the remote.
“PEAK” flashes in the display and the player repeats the portion of the highest level for about four seconds.
2Adjust the recording level on the deck.
3Press p on the player to stop Peak Search. “PEAK” disappears from the display.
Note
The portion with the highest level may differ every time you try the adjustment on the same disc. The difference is, however, so slight that you should not have any problem in adjusting the recording level precisely.
16GB
