HEAVY DUTY COUNTERLINE | INSTALLATION |
Step 2d: Installation on Floor Stand (24", 36", and 48" Models)
The 24", 36", and 48" appliances may be installed on top of an optional floor stand (for 60" and 72" griddles, go to Step 2e on page 15). The floor stand is shipped in a separate crate and must be assembled, as follows:
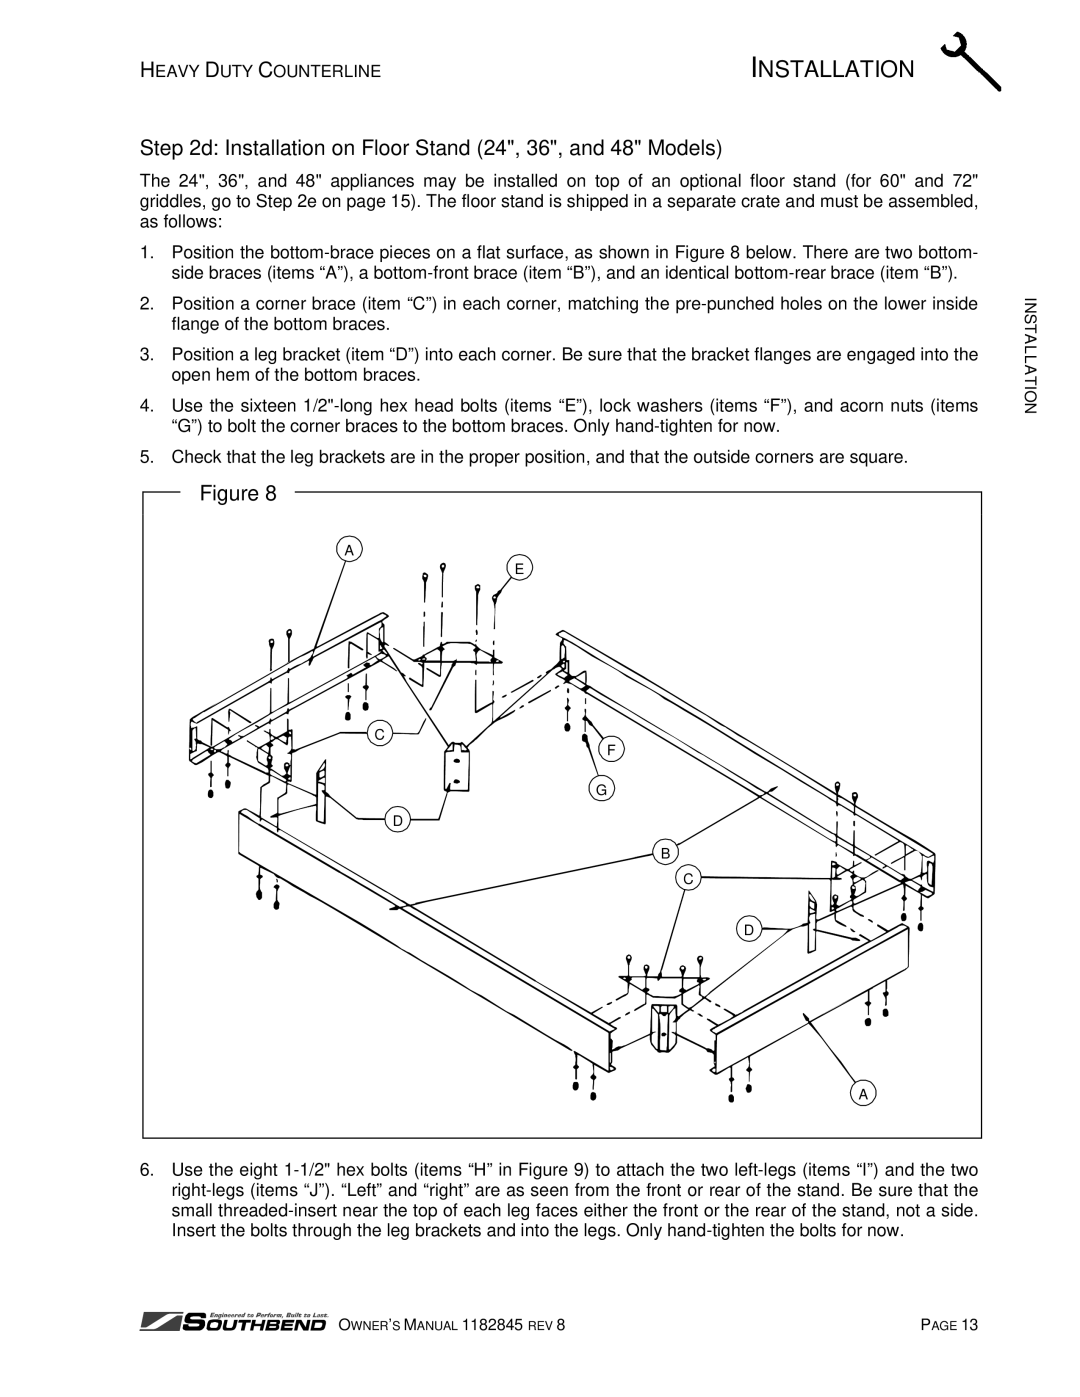
1.Position the bottom-brace pieces on a flat surface, as shown in Figure 8 below. There are two bottom- side braces (items “A”), a bottom-front brace (item “B”), and an identical bottom-rear brace (item “B”).
2.Position a corner brace (item “C”) in each corner, matching the pre-punched holes on the lower inside flange of the bottom braces.
3.Position a leg bracket (item “D”) into each corner. Be sure that the bracket flanges are engaged into the open hem of the bottom braces.
4.Use the sixteen 1/2"-long hex head bolts (items “E”), lock washers (items “F”), and acorn nuts (items “G”) to bolt the corner braces to the bottom braces. Only hand-tighten for now.
5.Check that the leg brackets are in the proper position, and that the outside corners are square.
6.Use the eight 1-1/2" hex bolts (items “H” in Figure 9) to attach the two left-legs (items “I”) and the two right-legs (items “J”). “Left” and “right” are as seen from the front or rear of the stand. Be sure that the small threaded-insert near the top of each leg faces either the front or the rear of the stand, not a side. Insert the bolts through the leg brackets and into the legs. Only hand-tighten the bolts for now.
OWNER’S MANUAL 1182845 REV 8 | PAGE 13 |

