For Machines Mfg. Since 7/09

P R E P A R A T I O N

EVS Toolroom Lathes


Locking


Power Source

Disconnect Switch

Machine

Conduit

Conduit


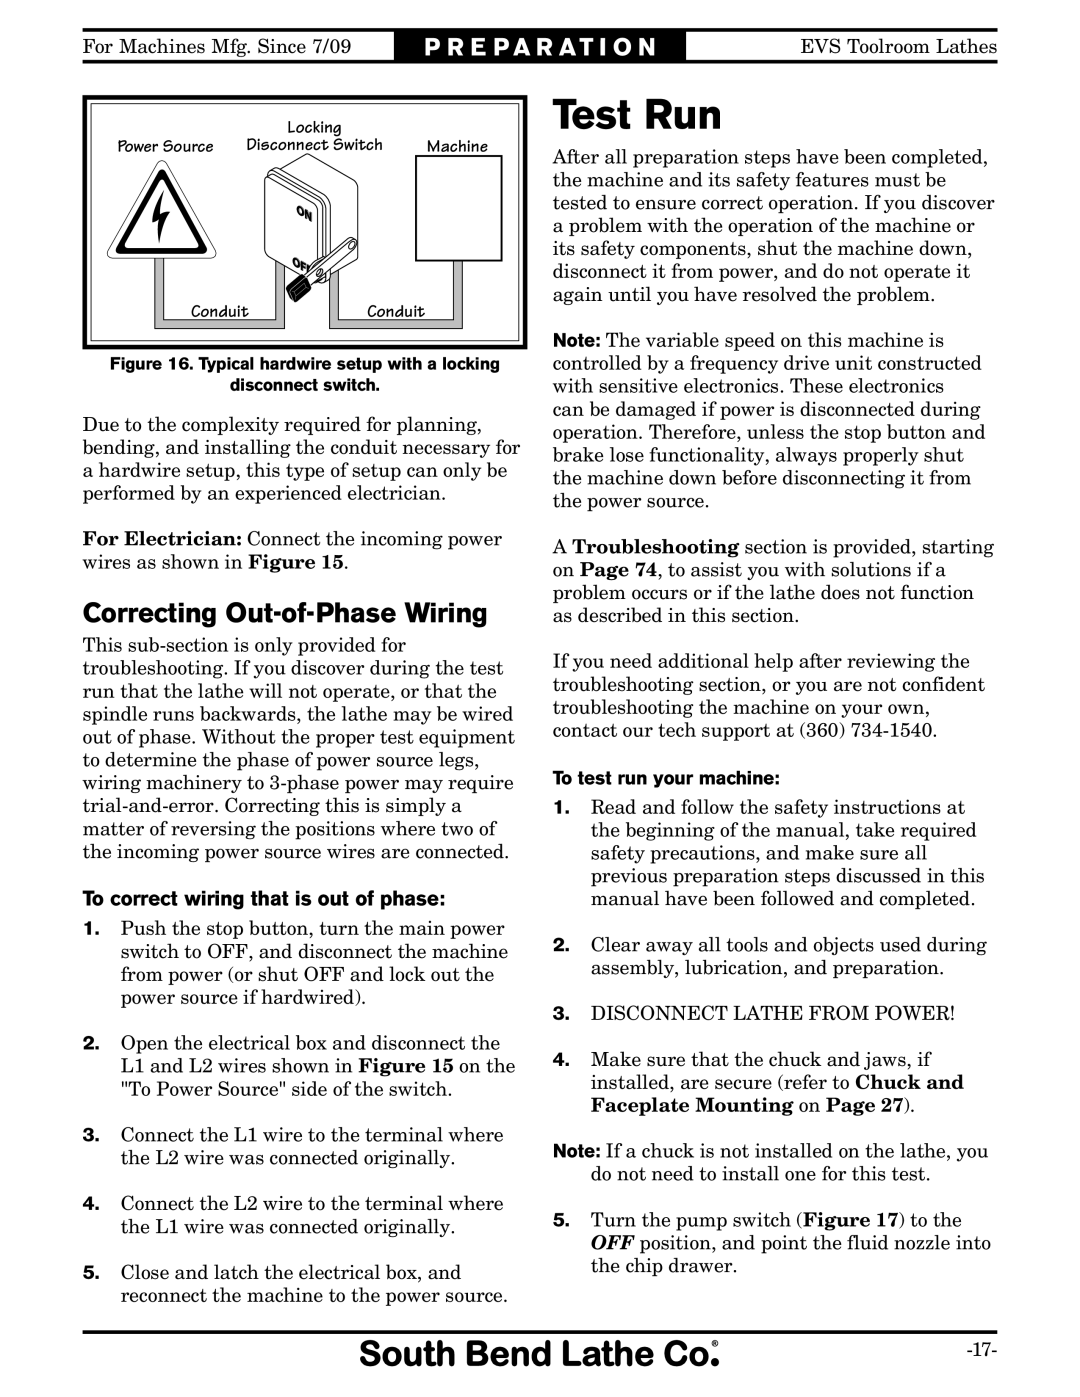
Figure 16. Typical hardwire setup with a locking

disconnect switch.

Due to the complexity required for planning, bending, and installing the conduit necessary for a hardwire setup, this type of setup can only be performed by an experienced electrician.

For Electrician: Connect the incoming power wires as shown in Figure 15.

Correcting Out-of-Phase Wiring

This sub-section is only provided for troubleshooting. If you discover during the test run that the lathe will not operate, or that the spindle runs backwards, the lathe may be wired out of phase. Without the proper test equipment to determine the phase of power source legs, wiring machinery to 3-phase power may require trial-and-error. Correcting this is simply a matter of reversing the positions where two of the incoming power source wires are connected.

To correct wiring that is out of phase:

1.Push the stop button, turn the main power switch to OFF, and disconnect the machine from power (or shut OFF and lock out the power source if hardwired).

2.Open the electrical box and disconnect the L1 and L2 wires shown in Figure 15 on the "To Power Source" side of the switch.

3.Connect the L1 wire to the terminal where the L2 wire was connected originally.

4.Connect the L2 wire to the terminal where the L1 wire was connected originally.

5.Close and latch the electrical box, and reconnect the machine to the power source.

Test Run

After all preparation steps have been completed, the machine and its safety features must be tested to ensure correct operation. If you discover a problem with the operation of the machine or its safety components, shut the machine down, disconnect it from power, and do not operate it again until you have resolved the problem.

Note: The variable speed on this machine is controlled by a frequency drive unit constructed with sensitive electronics. These electronics can be damaged if power is disconnected during operation. Therefore, unless the stop button and brake lose functionality, always properly shut the machine down before disconnecting it from the power source.

A Troubleshooting section is provided, starting on Page 74, to assist you with solutions if a problem occurs or if the lathe does not function as described in this section.

If you need additional help after reviewing the troubleshooting section, or you are not confident troubleshooting the machine on your own, contact our tech support at (360) 734-1540.

To test run your machine:

1.Read and follow the safety instructions at the beginning of the manual, take required safety precautions, and make sure all previous preparation steps discussed in this manual have been followed and completed.

2.Clear away all tools and objects used during assembly, lubrication, and preparation.

3.DISCONNECT LATHE FROM POWER!

4.Make sure that the chuck and jaws, if installed, are secure (refer to Chuck and Faceplate Mounting on Page 27).

Note: If a chuck is not installed on the lathe, you do not need to install one for this test.

5.Turn the pump switch (Figure 17) to the OFF position, and point the fluid nozzle into the chip drawer.

-17-

Page 19
Image 19
Southbend SB1015, SB1014, SB1038, SB1037 Test Run, Correcting Out-of-Phase Wiring, To correct wiring that is out of phase

SB1037, SB1038, SB1012, SB1015, SB1013 specifications

The Southbend SB1012 is a versatile and efficient commercial range designed specifically for the rigorous demands of professional kitchens. This powerful cooking appliance features a robust construction and advanced technologies that cater to chefs who require precision and reliability in their culinary endeavors.

One of the standout features of the SB1012 is its powerful burners, which come equipped with heavy-duty cast-iron grates. The range typically includes four open burners that deliver exceptional heat output. This allows chefs to achieve quick boiling, searing, and simmering, thereby ensuring perfect cooking results every time. The burners are designed to provide consistent heat distribution, reducing the chance of hot spots and uneven cooking.

The Southbend SB1012 also incorporates a 12-inch griddle, adding another layer of versatility to its functionality. The griddle is constructed from high-quality materials that provide even heat and withstand high temperatures, making it suitable for cooking everything from pancakes to stir-fried dishes. The grease trough and easy-to-clean design contribute to the overall efficiency of the kitchen.

In addition to its cooking surfaces, the SB1012 features a spacious oven compartment, designed to accommodate larger pans and dishes. With a temperature range that typically goes up to 500 degrees Fahrenheit, the oven is ideal for baking, roasting, and other cooking techniques that require precise temperature control. The inclusion of a built-in temperature gauge helps chefs monitor cooking conditions at a glance.

Durability is a hallmark of the Southbend SB1012. The range is constructed from heavy-duty stainless steel, which not only enhances its aesthetic appeal but also ensures resistance to wear and tear in a busy kitchen environment. The removable ovens and easy-access components facilitate straightforward cleaning and maintenance, ensuring the equipment remains in peak condition even after extensive use.

To further improve user experience, the Southbend SB1012 is designed with safety features in mind. The range often includes pilot lights for easy ignition, and the heavy-duty construction minimizes the risk of accidental damage.

In summary, the Southbend SB1012 combines powerful cooking performance with durable construction and ease of use, making it a preferred choice for professional kitchens looking to optimize their cooking capabilities. Its advanced features, versatility, and reliability are tailored to meet the high standards of culinary professionals.