Chapter 4 - Repairs and Replacements
6.Loosen the gauge bracket nuts and remove the gauge from the door.
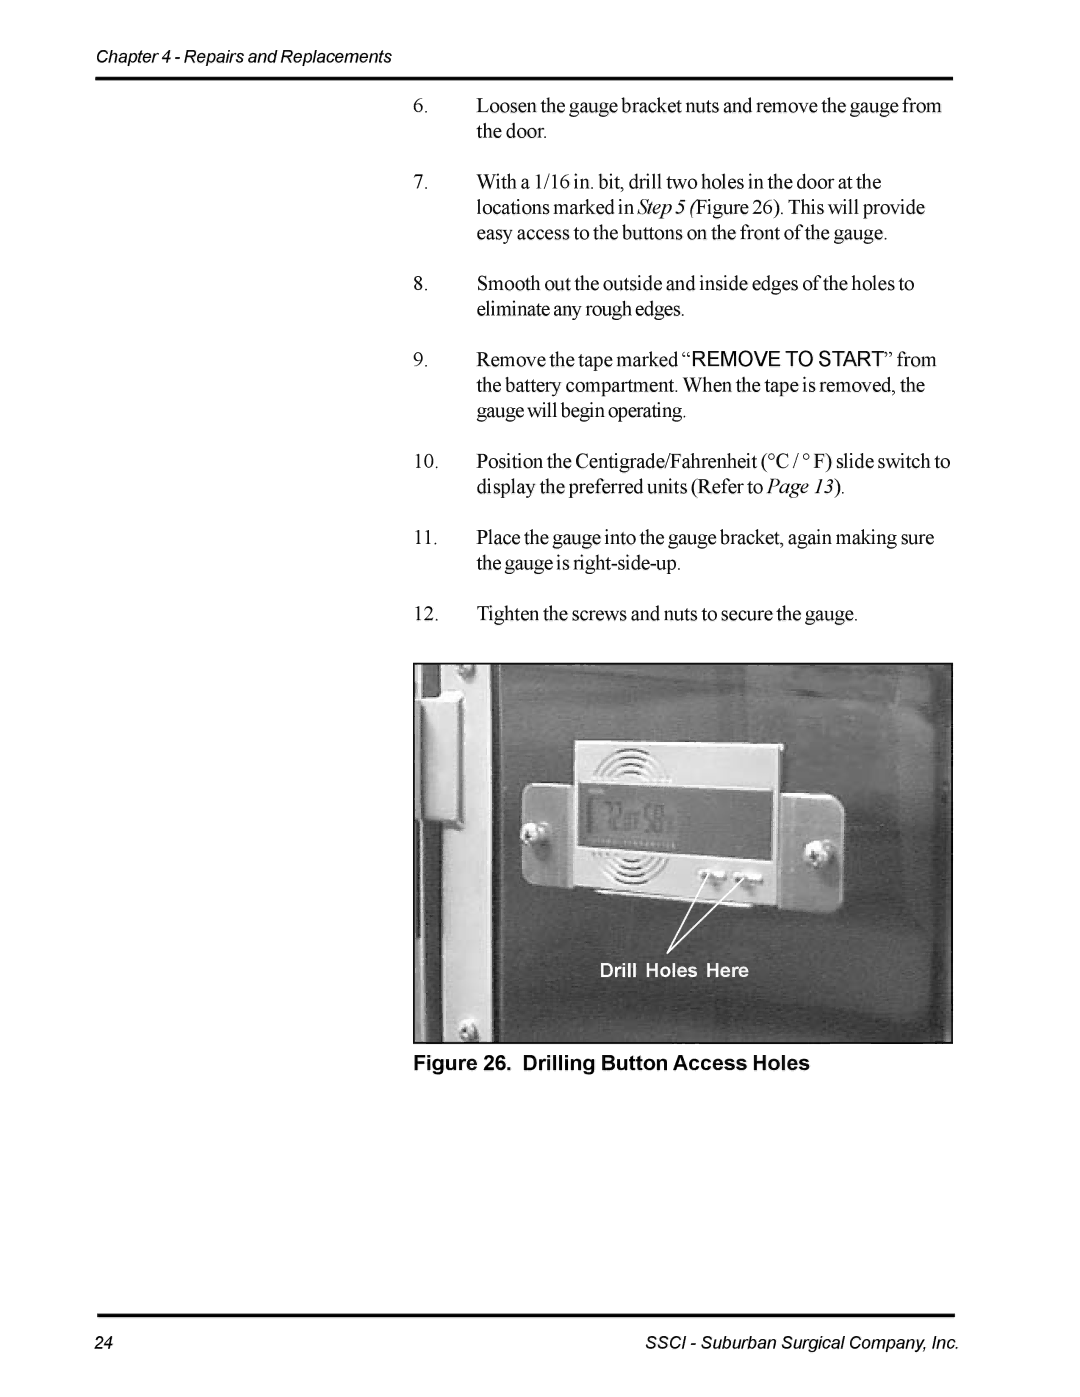
7.With a 1/16 in. bit, drill two holes in the door at the locations marked in Step 5 (Figure 26). This will provide easy access to the buttons on the front of the gauge.
8.Smooth out the outside and inside edges of the holes to eliminate any rough edges.
9.Remove the tape marked “REMOVE TO START” from the battery compartment. When the tape is removed, the gauge will begin operating.
10.Position the Centigrade/Fahrenheit (°C / ° F) slide switch to display the preferred units (Refer to Page 13).
11.Place the gauge into the gauge bracket, again making sure the gauge is
12.Tighten the screws and nuts to secure the gauge.
Drill Holes Here
Figure 26. Drilling Button Access Holes
24 | SSCI - Suburban Surgical Company, Inc. |
