Headrest
Fitting
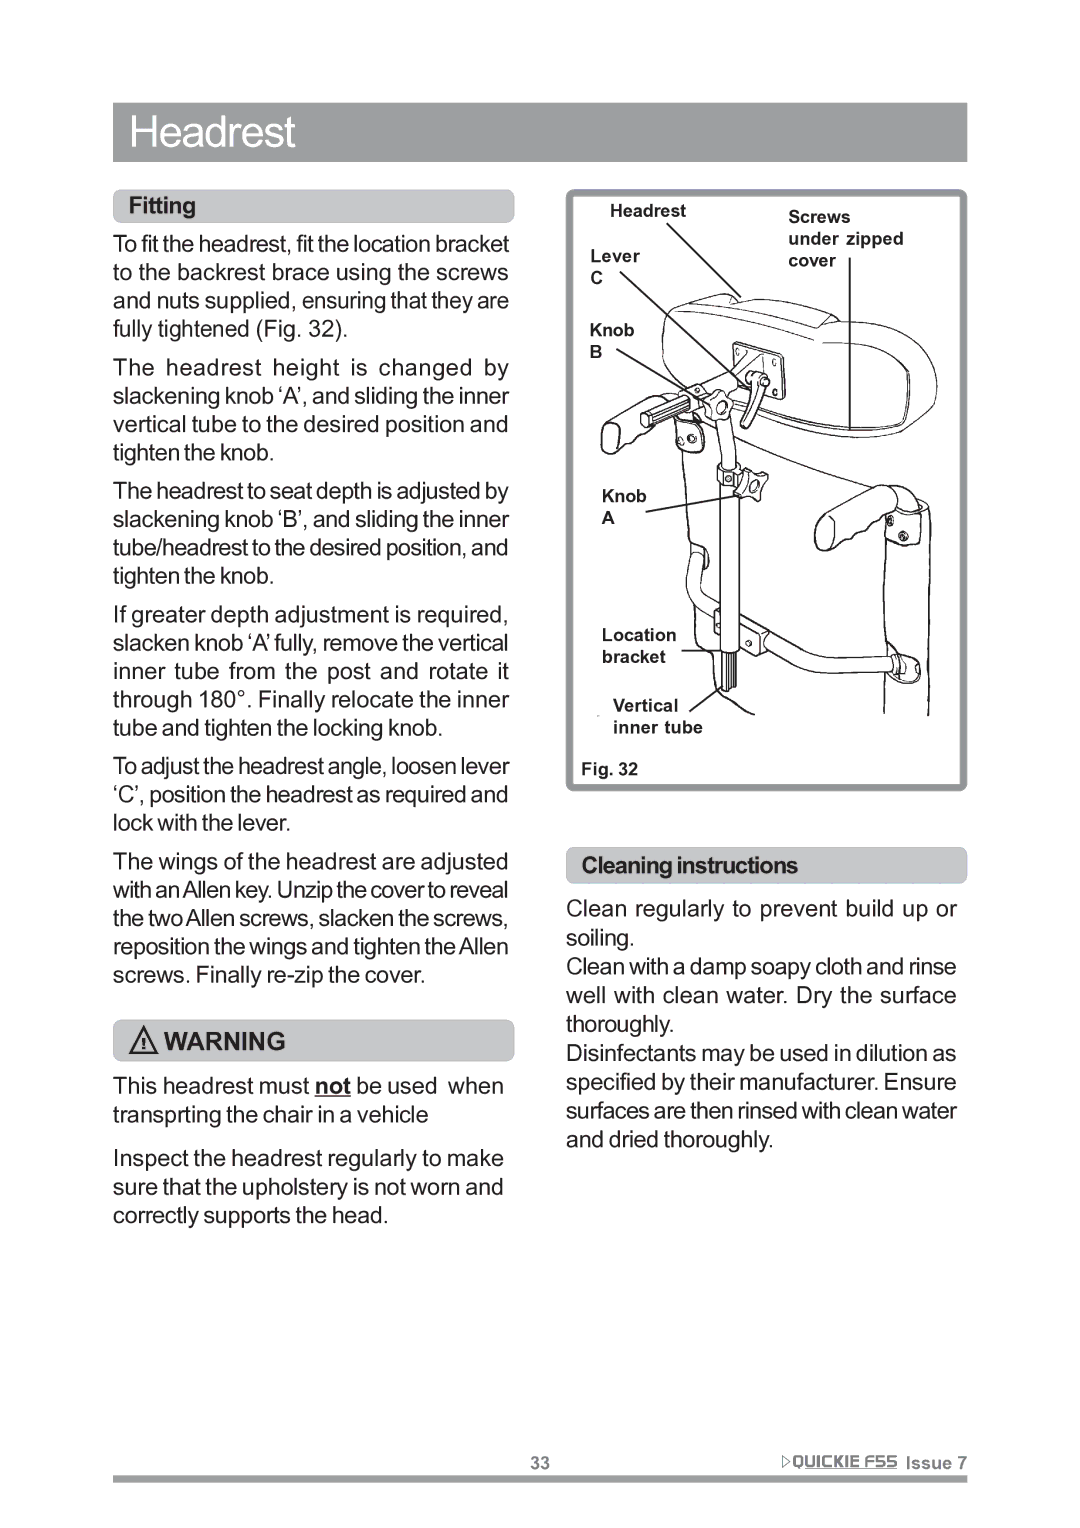
To fit the headrest, fit the location bracket to the backrest brace using the screws and nuts supplied, ensuring that they are fully tightened (Fig. 32).
The headrest height is changed by slackening knob ‘A’, and sliding the inner vertical tube to the desired position and tighten the knob.
The headrest to seat depth is adjusted by slackening knob ‘B’, and sliding the inner tube/headrest to the desired position, and tighten the knob.
If greater depth adjustment is required, slacken knob ‘A’ fully, remove the vertical inner tube from the post and rotate it through 180°. Finally relocate the inner tube and tighten the locking knob.
To adjust the headrest angle, loosen lever ‘C’, position the headrest as required and lock with the lever.
The wings of the headrest are adjusted with anAllen key. Unzip the cover to reveal the twoAllen screws, slacken the screws, reposition the wings and tighten the Allen screws. Finally
![]() WARNING
WARNING
This headrest must not be used when transprting the chair in a vehicle
Inspect the headrest regularly to make sure that the upholstery is not worn and correctly supports the head.
Headrest | Screws |
Lever | under zipped |
cover | |
C |
|
Knob |
|
B |
|
Knob
A
Location bracket
Vertical inner tube
Fig. 32
Cleaning instructions
Clean regularly to prevent build up or soiling.
Clean with a damp soapy cloth and rinse well with clean water. Dry the surface thoroughly.
Disinfectants may be used in dilution as specified by their manufacturer. Ensure surfaces are then rinsed with clean water and dried thoroughly.
33 | Issue 7 |
|
|