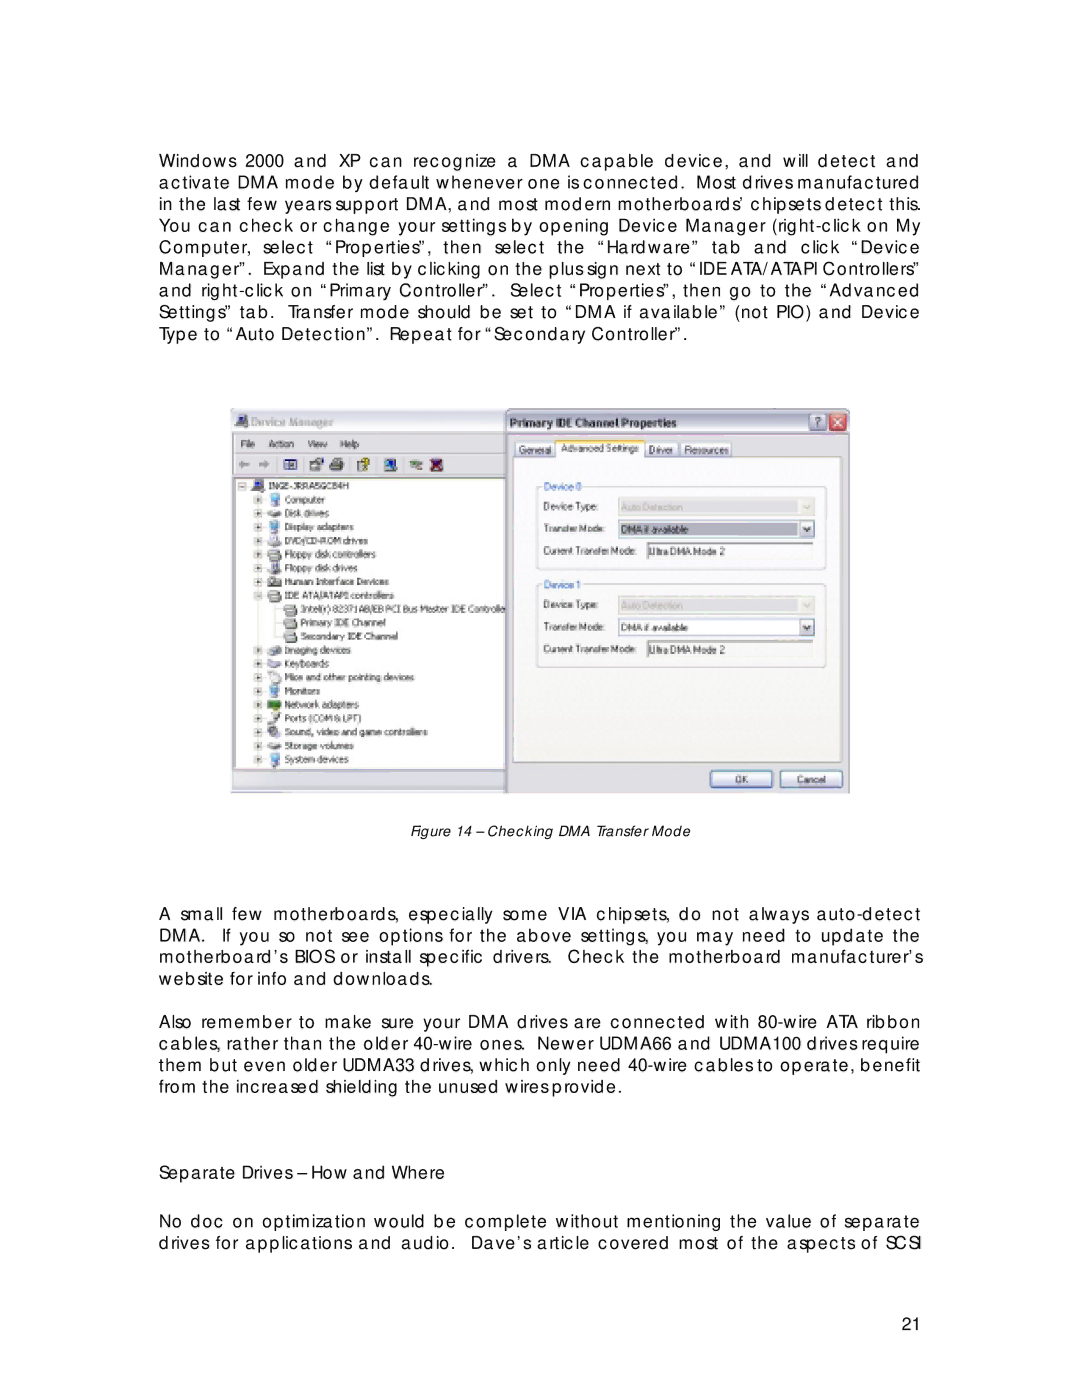
Windows 2000 and XP can recognize a DMA capable device, and will detect and activate DMA mode by default whenever one is connected. Most drives manufactured in the last few years support DMA, and most modern motherboards’ chipsets detect this. You can check or change your settings by opening Device Manager (right-click on My Computer, select “Properties”, then select the “Hardware” tab and click “Device Manager”. Expand the list by clicking on the plus sign next to “IDE ATA/ATAPI Controllers” and right-click on “Primary Controller”. Select “Properties”, then go to the “Advanced Settings” tab. Transfer mode should be set to “DMA if available” (not PIO) and Device Type to “Auto Detection”. Repeat for “Secondary Controller”.
Figure 14 – Checking DMA Transfer Mode
A small few motherboards, especially some VIA chipsets, do not always auto-detect DMA. If you so not see options for the above settings, you may need to update the motherboard’s BIOS or install specific drivers. Check the motherboard manufacturer’s website for info and downloads.
Also remember to make sure your DMA drives are connected with 80-wire ATA ribbon cables, rather than the older 40-wire ones. Newer UDMA66 and UDMA100 drives require them but even older UDMA33 drives, which only need 40-wire cables to operate, benefit from the increased shielding the unused wires provide.
Separate Drives – How and Where
No doc on optimization would be complete without mentioning the value of separate drives for applications and audio. Dave’s article covered most of the aspects of SCSI
21