Copying Your Tapes (Dubbing)
Connection
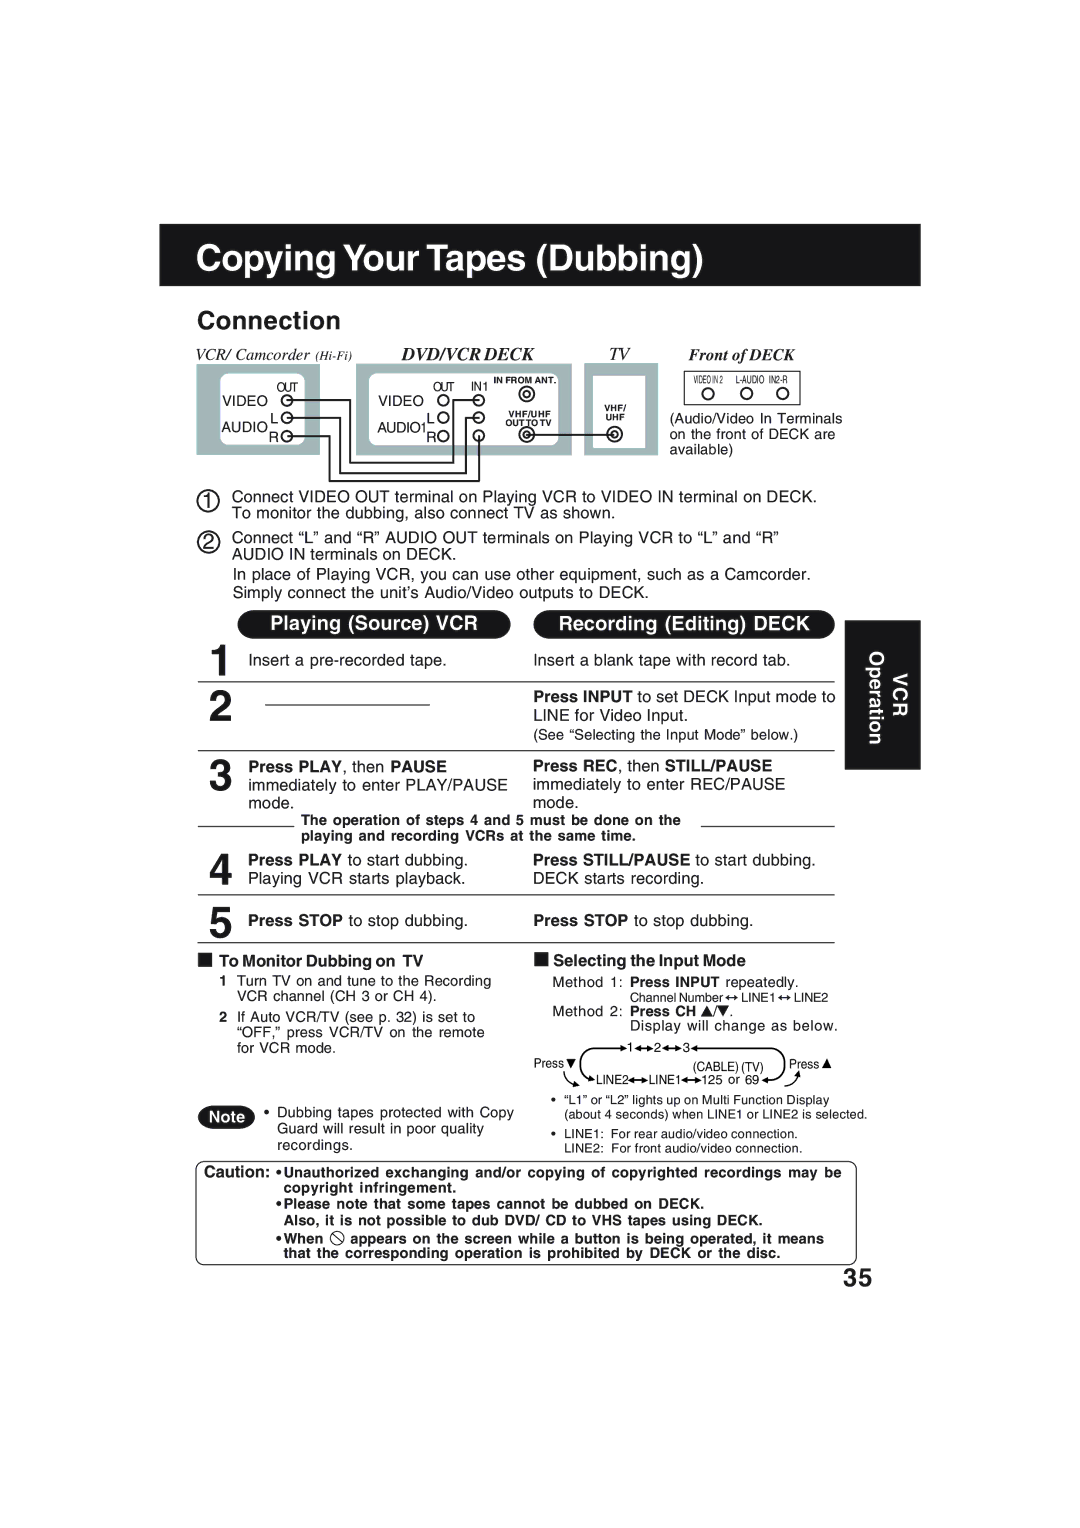
VCR/ Camcorder | DVD/VCR DECK | ||
OUT | OUT | IN1 IN FROM ANT. | |
VIDEO | VIDEO | VHF/UHF | |
AUDIO L | AUDIO1L | ||
OUT TO TV | |||
R | R |
| |
TV
VHF/
UHF
Front of DECK
VIDEO IN 2
(Audio/Video In Terminals on the front of DECK are available)
1Connect VIDEO OUT terminal on Playing VCR to VIDEO IN terminal on DECK. To monitor the dubbing, also connect TV as shown.
2Connect “L” and “R” AUDIO OUT terminals on Playing VCR to “L” and “R” AUDIO IN terminals on DECK.
In place of Playing VCR, you can use other equipment, such as a Camcorder. Simply connect the unit’s Audio/Video outputs to DECK.
1 |
| Playing (Source) VCR | Recording (Editing) DECK | |
Insert a | Insert a blank tape with record tab. | |||
2 |
|
|
| Press INPUT to set DECK Input mode to |
|
|
| LINE for Video Input. | |
|
|
|
| (See “Selecting the Input Mode” below.) |
|
|
|
|
|
| Press PLAY, then PAUSE | Press REC, then STILL/PAUSE | ||
3 immediately to enter PLAY/PAUSE | immediately to enter REC/PAUSE | |||
| mode. | mode. | ||
The operation of steps 4 and 5 must be done on the playing and recording VCRs at the same time.
VCR Operation
4 | Press PLAY to start dubbing. | Press STILL/PAUSE to start dubbing. | |||
Playing VCR starts playback. | DECK starts recording. | ||||
5 | Press STOP to stop dubbing. | Press STOP to stop dubbing. | |||
| To Monitor Dubbing on TV |
|
| Selecting the Input Mode | |
|
|
| |||
|
|
| |||
1Turn TV on and tune to the Recording VCR channel (CH 3 or CH 4).
2If Auto VCR/TV (see p. 32) is set to “OFF,” press VCR/TV on the remote for VCR mode.
Note • Dubbing tapes protected with Copy Guard will result in poor quality recordings.
Method 1: Press INPUT repeatedly.
Channel Number ↔ LINE1 ↔ LINE2
Method 2: Press CH  /
/  .
.
Display will change as below.
1 | 2 | 3 |
|
Press |
| (CABLE) (TV) | Press |
LINE2 | LINE1 | 125 or 69 |
|
•“L1” or “L2” lights up on Multi Function Display (about 4 seconds) when LINE1 or LINE2 is selected.
•LINE1: For rear audio/video connection.
LINE2: For front audio/video connection.
Caution: • Unauthorized exchanging and/or copying of copyrighted recordings may be copyright infringement.
•Please note that some tapes cannot be dubbed on DECK.
Also, it is not possible to dub DVD/ CD to VHS tapes using DECK.
•When ![]() appears on the screen while a button is being operated, it means that the corresponding operation is prohibited by DECK or the disc.
appears on the screen while a button is being operated, it means that the corresponding operation is prohibited by DECK or the disc.
35