2002 specifications
Teledyne 2002 represents a significant advancement in the realm of sophisticated instrumentation and systems used across various industries. This innovative platform emerged as a versatile solution for a multitude of applications including environmental monitoring, industrial automation, and scientific research.One of the most notable features of the Teledyne 2002 is its robust data analysis capability. Equipped with powerful processing units, it allows users to conduct real-time data analysis, ensuring accurate and timely results. This is particularly beneficial in fields where immediate decision-making is crucial, such as environmental assessments and industrial quality control.
The technology behind the Teledyne 2002 encompasses a variety of sensors and analytical instruments. Its modular design enables users to customize the system according to their specific needs, integrating various sensors such as gas analyzers, spectrometers, and temperature sensors. This flexibility makes the Teledyne 2002 applicable in diverse settings, from laboratory environments to rugged field conditions.
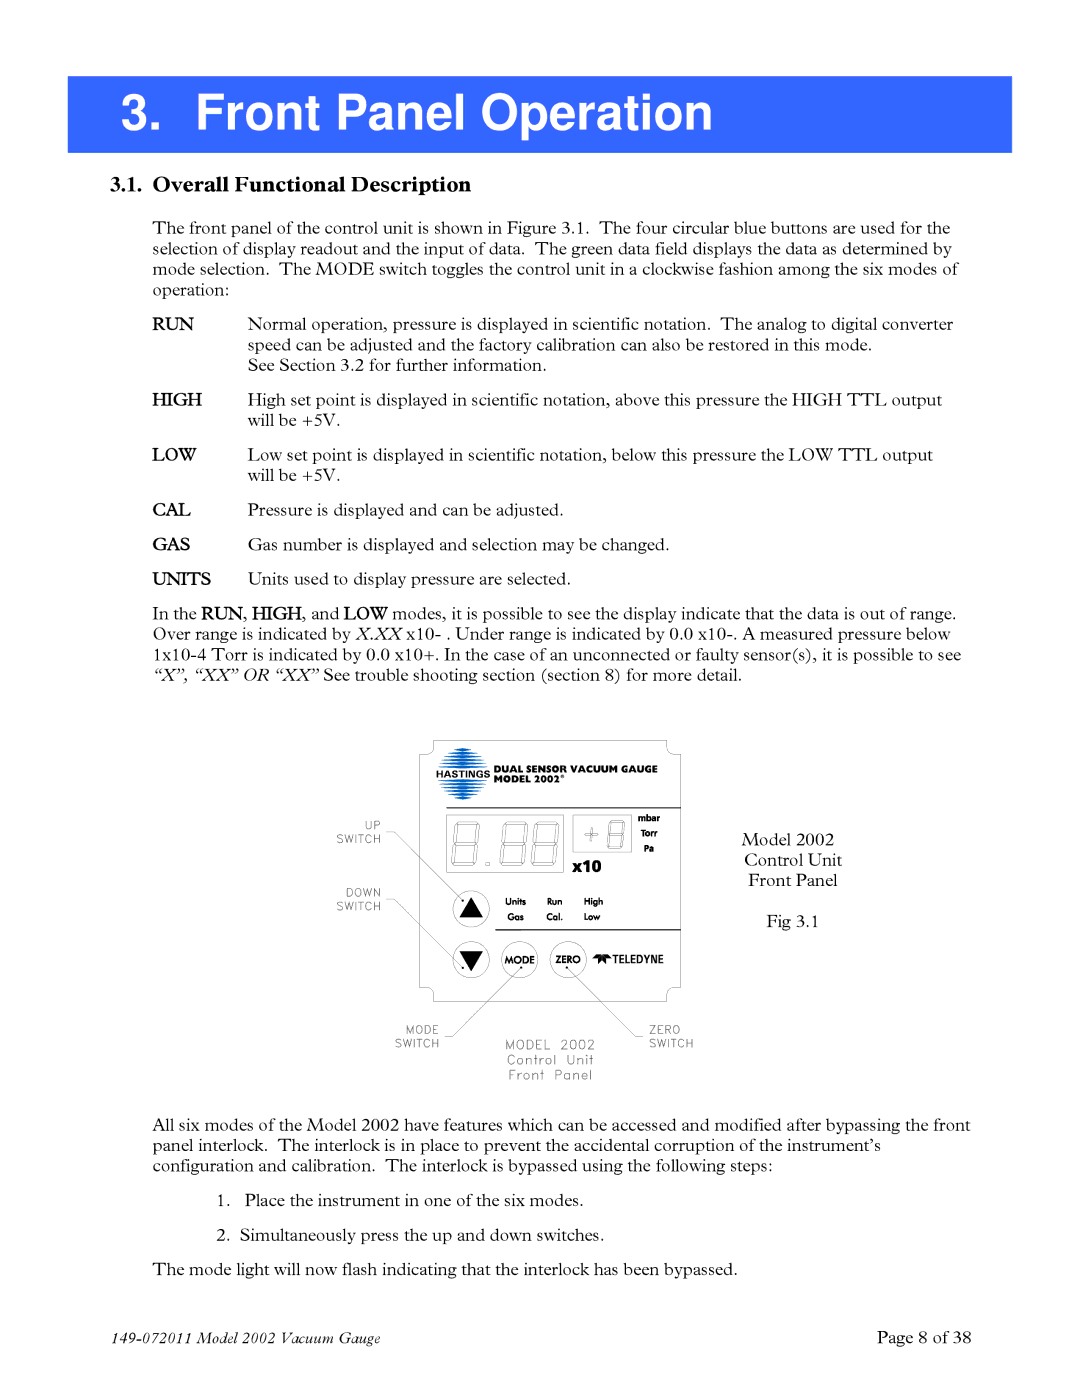
Another characteristic of the Teledyne 2002 is its user-friendly interface. The system is designed with an intuitive control panel and advanced software that provides comprehensive data visualization. This ease of use enhances productivity, allowing operators to facilitate complex analyses without extensive training.
Security and data integrity are also focal points of the Teledyne 2002. The system implements state-of-the-art encryption protocols to protect sensitive data. Moreover, it maintains compliance with industry standards, ensuring that the collected data is reliable and trustworthy.
In addition to its technological features, the Teledyne 2002 is built with durability in mind. The rugged construction allows it to withstand harsh environmental conditions, making it ideal for outdoor applications. Its compact design enables easy transportation, which is essential for fieldwork.
Moreover, the Teledyne 2002 includes connectivity options that facilitate seamless integration with existing systems. It can connect to cloud services, enabling remote monitoring and data storage. This feature not only enhances the functionality of the device but also allows for collaborative data sharing among teams.
Overall, the Teledyne 2002 symbolizes a convergence of advanced technology, user-centric design, and robust performance. With its extensive features and versatility, it stands out as a premier solution for professionals demanding precision and reliability in their analytical endeavors. Whether for environmental monitoring or industrial applications, the Teledyne 2002 is equipped to meet the challenges of modern data analysis.

