Model 3000 | Quickstart Guide |
|
|
1. Place the cell on the holder with the screen side facing down.
Note: There is a small location hole drilled in the holder. This hole mates with a guide pin on the bottom rear of the cell block. The hole in the cell block holder must align with the guide pin on the cell block.
2.Remove power from the instrument.
3.Remove the old sensor (if installed). Discard in accordance with all Federal, State, Local or other regulations which may apply.
4.Purge the analyzer at approximately 1 SCFH flow rate with nitrogen (or applicable sample gas with the sensor holder removed).
5.Remove the new sensor from its double bag storage.
6.Remove the sensor shorting button.
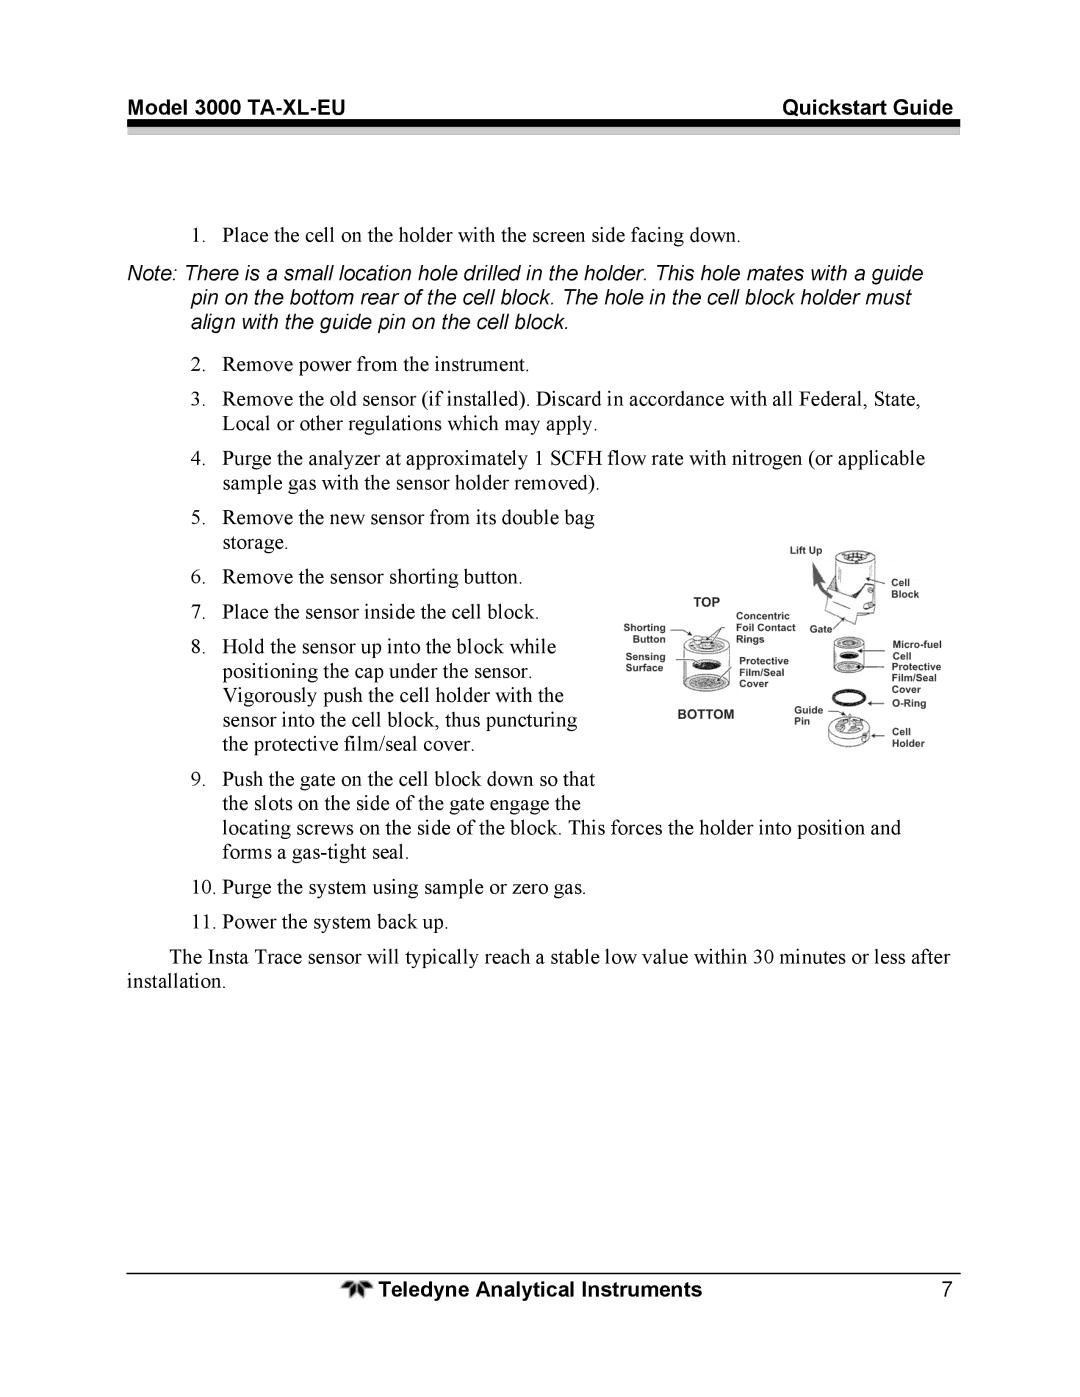
7.Place the sensor inside the cell block.
8.Hold the sensor up into the block while positioning the cap under the sensor. Vigorously push the cell holder with the sensor into the cell block, thus puncturing the protective film/seal cover.
9.Push the gate on the cell block down so that the slots on the side of the gate engage the
locating screws on the side of the block. This forces the holder into position and forms a
10.Purge the system using sample or zero gas.
11.Power the system back up.
The Insta Trace sensor will typically reach a stable low value within 30 minutes or less after installation.
Teledyne Analytical Instruments | 7 |