Quickstart Guide | Trace Oxygen Analyzer |
|
|
•Install 50-Pin Equipment Interface Connector
Connect the 50 pin connector to the mating connector on the rear panel.
•Connect the 9-pin D connector to the RS-232 serial port.
See Section 3.3.2.3 in the Instruction Manual for information on setting up serial communication for this instrument.
Install the Micro-fuel Cell
The Model
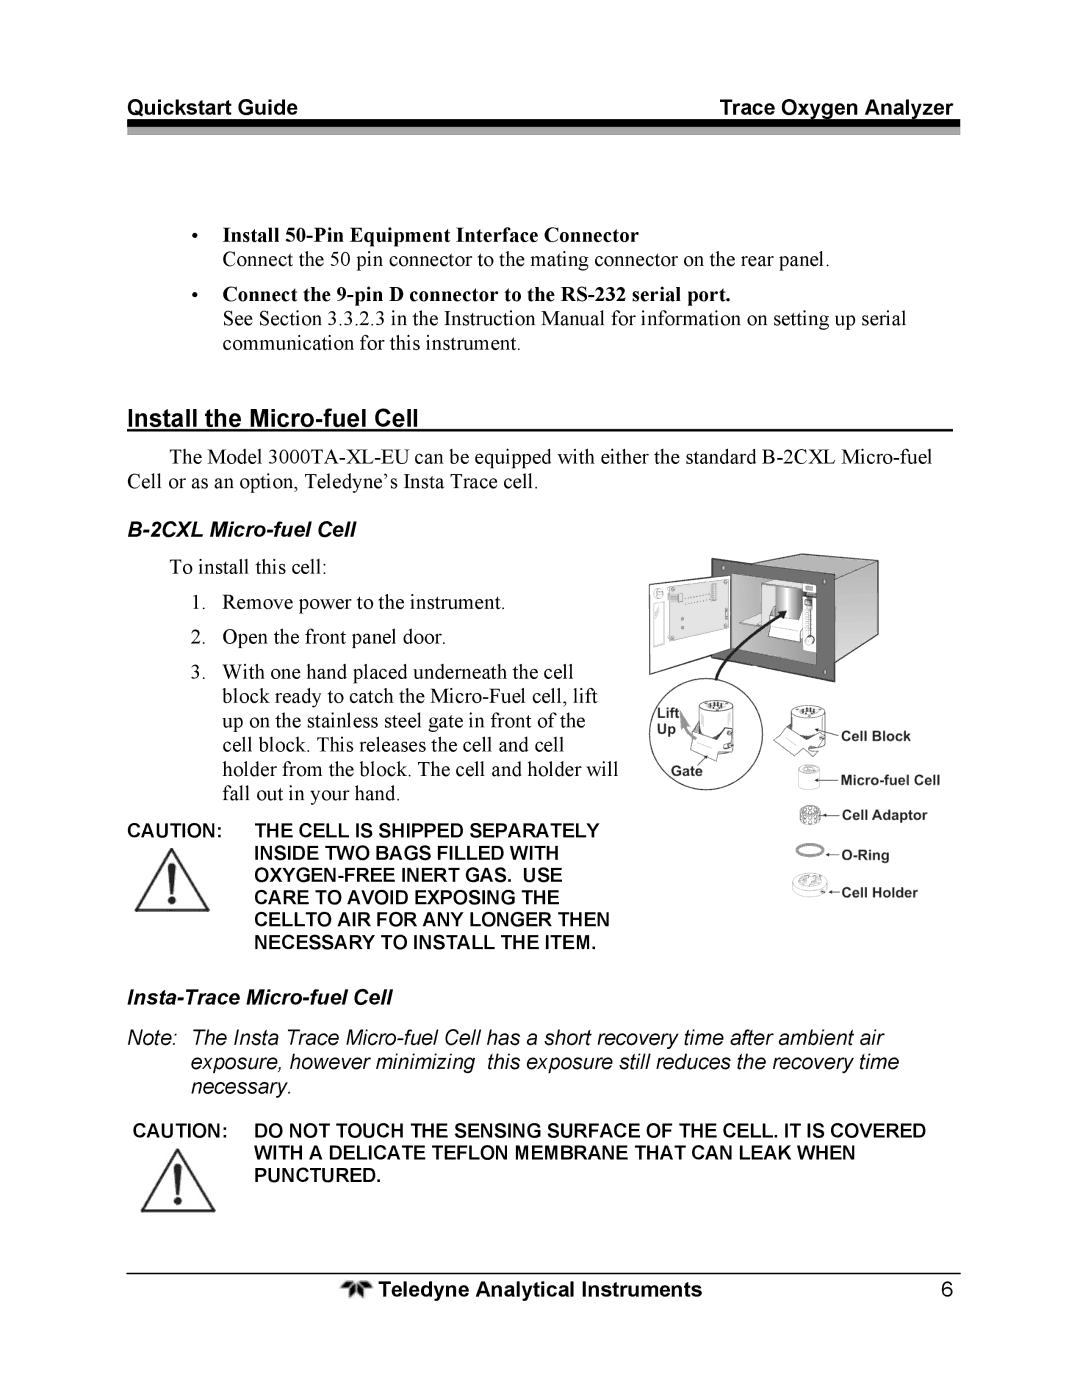
B-2CXL Micro-fuel Cell
To install this cell:
1.Remove power to the instrument.
2.Open the front panel door.
3.With one hand placed underneath the cell block ready to catch the
CAUTION: THE CELL IS SHIPPED SEPARATELY
INSIDE TWO BAGS FILLED WITH
CARE TO AVOID EXPOSING THE
CELLTO AIR FOR ANY LONGER THEN
NECESSARY TO INSTALL THE ITEM.
Insta-Trace Micro-fuel Cell
Note: The Insta Trace
CAUTION: DO NOT TOUCH THE SENSING SURFACE OF THE CELL. IT IS COVERED WITH A DELICATE TEFLON MEMBRANE THAT CAN LEAK WHEN PUNCTURED.
Teledyne Analytical Instruments | 6 |