8.Sidetone - The sidetone is the amount of a user’s own voice that is feed back to their headphones. Both the beltpack and base stations sidetone my be adjusted.
9.Transmit Power - The base transmit power can be set to the following positions:
Normal = The transmit power is 10 dB below maxi- mum power. This is 5 mW typically.
High = The transmit power is at full power. This is 50 mW typically. (Recommended)
10. Beltpack Off Mode - Sets the base station's wired connec- tivity when the beltpack is off, out of communications range or in
Mute ICs - The base drops connectivity to any wired intercom connected to it after 1 second of not receiving communications from a beltpack.
Last IC - The base maintains connectivity to the wired intercoms(s) the beltpack was last at if not receiving communications from a beltpack.
BTN
BTN B - The base connects to the "B" button defined wired intercom(s) when not receiving communications from a beltpack.
BTN C - The base connects to the "C" button defined wired intercom(s) and activates the "C" button options (QB and/or Relay if active) when not receiving com- munications from a beltpack.
11.Default Display - The user may select the normal or alternate status screen for the default display on the base station.
Button Options
The other three tabs in the configuration screen are the settings for the three
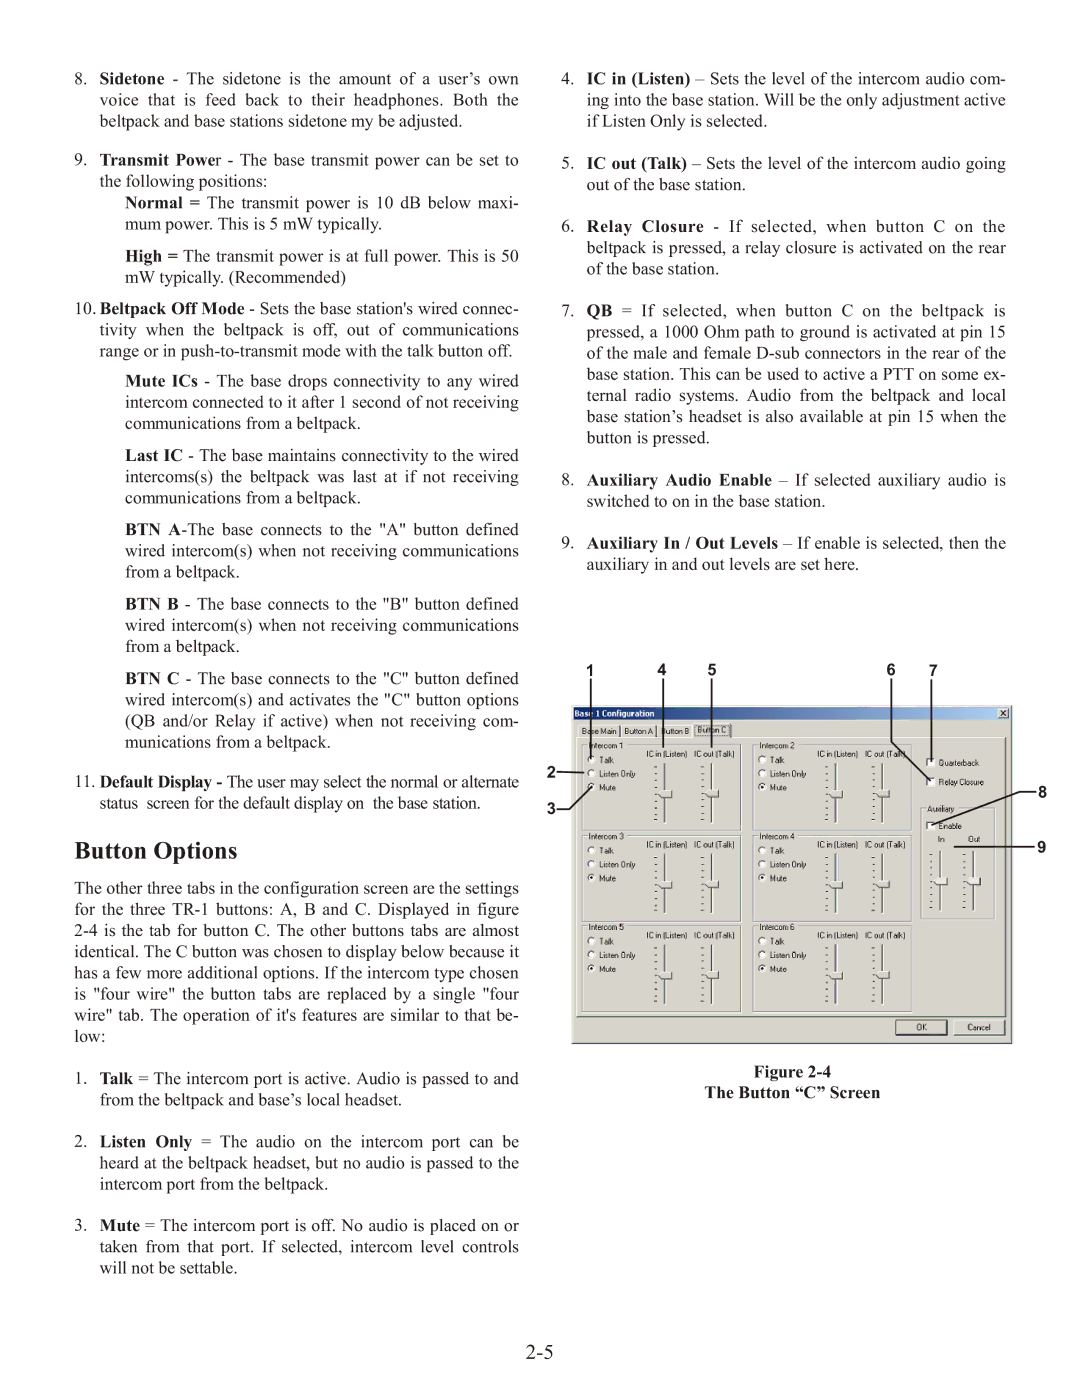
1.Talk = The intercom port is active. Audio is passed to and from the beltpack and base’s local headset.
2.Listen Only = The audio on the intercom port can be heard at the beltpack headset, but no audio is passed to the intercom port from the beltpack.
3.Mute = The intercom port is off. No audio is placed on or taken from that port. If selected, intercom level controls will not be settable.
4.IC in (Listen) – Sets the level of the intercom audio com- ing into the base station. Will be the only adjustment active if Listen Only is selected.
5.IC out (Talk) – Sets the level of the intercom audio going out of the base station.
6.Relay Closure - If selected, when button C on the beltpack is pressed, a relay closure is activated on the rear of the base station.
7.QB = If selected, when button C on the beltpack is pressed, a 1000 Ohm path to ground is activated at pin 15 of the male and female
8.Auxiliary Audio Enable – If selected auxiliary audio is switched to on in the base station.
9.Auxiliary In / Out Levels – If enable is selected, then the auxiliary in and out levels are set here.
1 | 4 | 5 | 6 | 7 |
2![]()
8
3
9
Figure