HELP:
About: | Provides current software version infor- |
| mation. |
Configuration Button
This button creates the configuration of the selected
•Base Main
•Button A
•Button B
•Button C
•Four wire settings
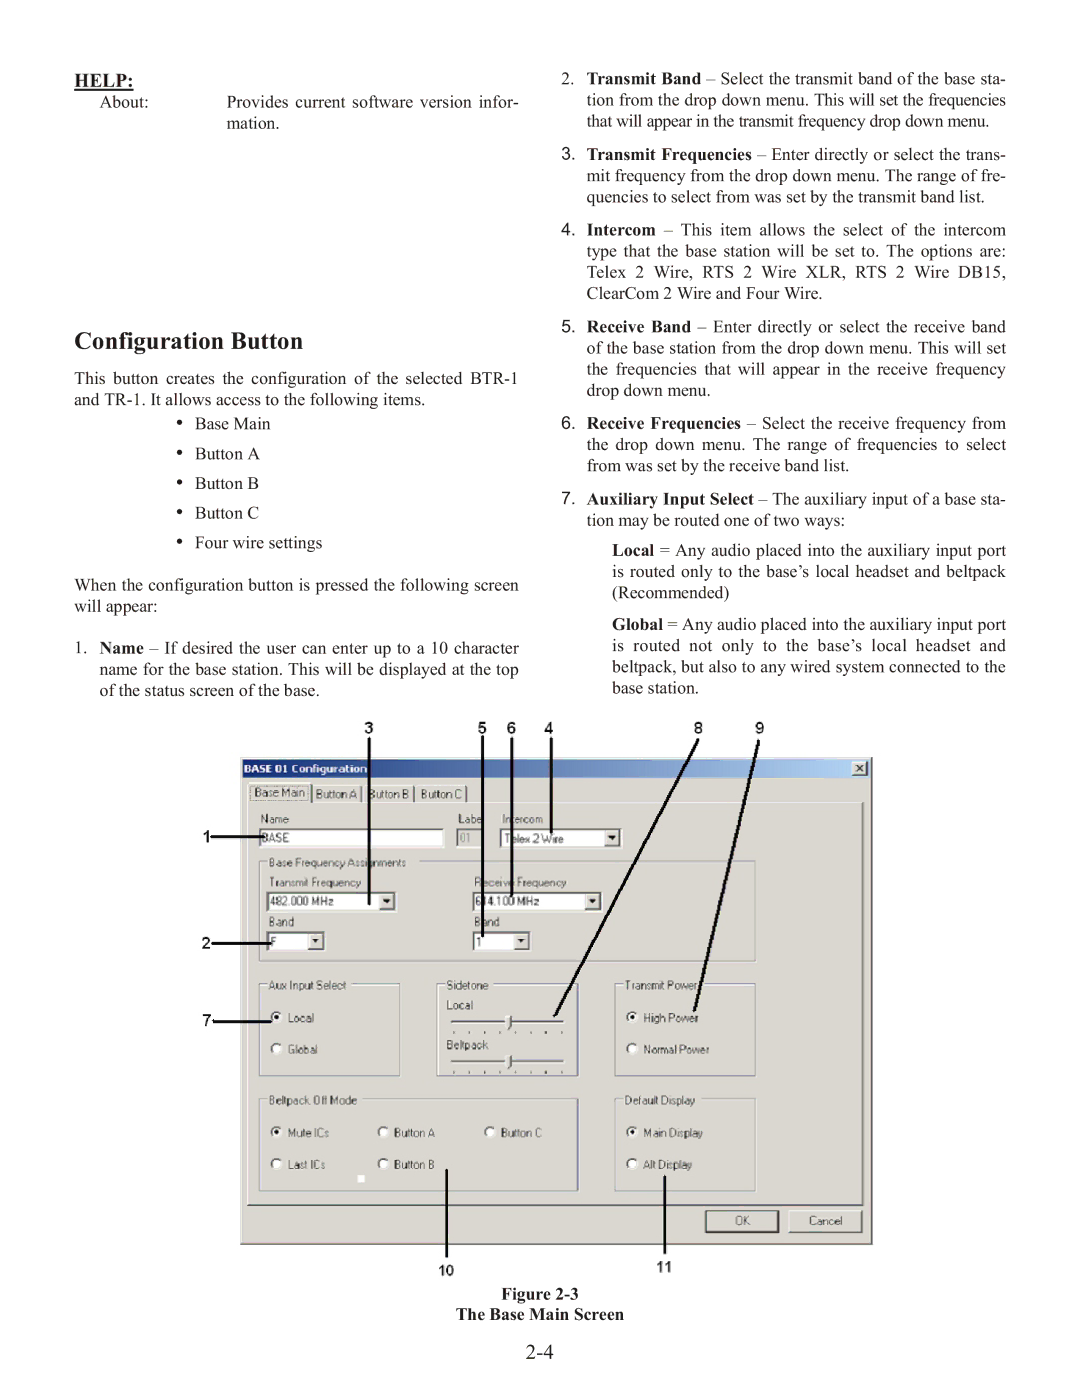
When the configuration button is pressed the following screen will appear:
1.Name – If desired the user can enter up to a 10 character name for the base station. This will be displayed at the top of the status screen of the base.
2.Transmit Band – Select the transmit band of the base sta- tion from the drop down menu. This will set the frequencies that will appear in the transmit frequency drop down menu.
3.Transmit Frequencies – Enter directly or select the trans- mit frequency from the drop down menu. The range of fre- quencies to select from was set by the transmit band list.
4.Intercom – This item allows the select of the intercom type that the base station will be set to. The options are: Telex 2 Wire, RTS 2 Wire XLR, RTS 2 Wire DB15, ClearCom 2 Wire and Four Wire.
5.Receive Band – Enter directly or select the receive band of the base station from the drop down menu. This will set the frequencies that will appear in the receive frequency drop down menu.
6.Receive Frequencies – Select the receive frequency from the drop down menu. The range of frequencies to select from was set by the receive band list.
7.Auxiliary Input Select – The auxiliary input of a base sta- tion may be routed one of two ways:
Local = Any audio placed into the auxiliary input port is routed only to the base’s local headset and beltpack (Recommended)
Global = Any audio placed into the auxiliary input port is routed not only to the base’s local headset and beltpack, but also to any wired system connected to the base station.
Figure
