RAM-SAN
8 Gigabytes |
|
|
|
System | 3 Gigabyte drive | 3 Gigabyte drive | 2 Gigabyte |
Memory |
|
| drive |
| 1 | 2 | 3 & 4 |
Fibre Channel |
|
|
|
ports | FC21 |
| FC21 |
|
|
HBA 1
HBA 2
HBA 3
HBA 4
4.3.2 Resizing LUNs
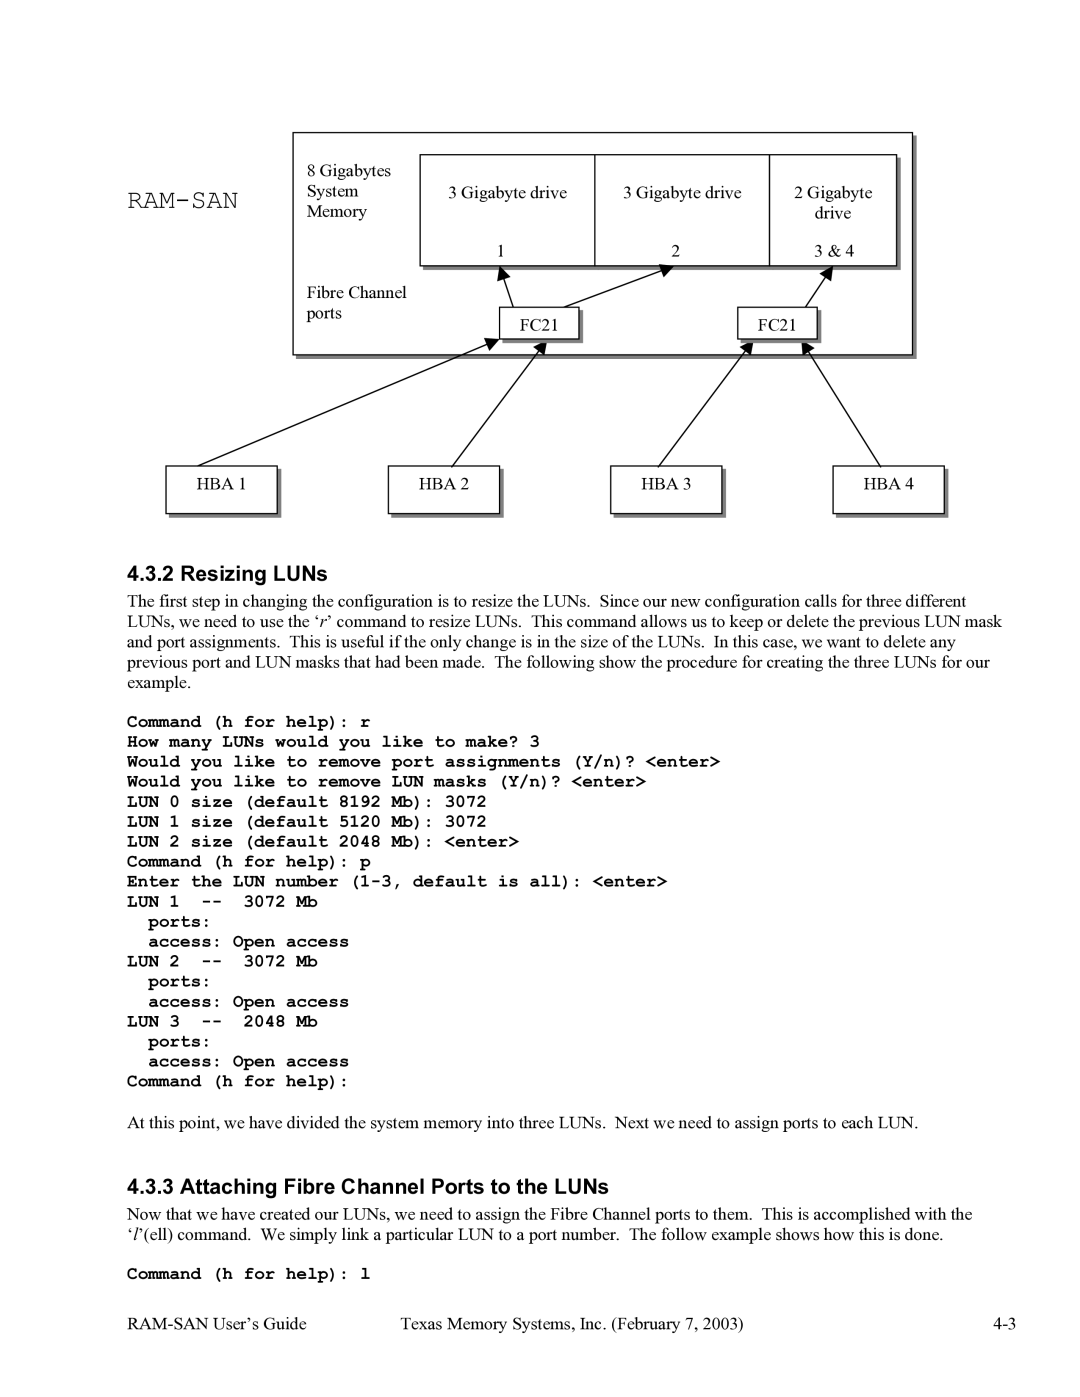
The first step in changing the configuration is to resize the LUNs. Since our new configuration calls for three different LUNs, we need to use the ‘r’ command to resize LUNs. This command allows us to keep or delete the previous LUN mask and port assignments. This is useful if the only change is in the size of the LUNs. In this case, we want to delete any previous port and LUN masks that had been made. The following show the procedure for creating the three LUNs for our example.
Command (h for help): r
How many LUNs would you like to make? 3
Would you like to remove port assignments (Y/n)? <enter> Would you like to remove LUN masks (Y/n)? <enter>
LUN 0 size (default 8192 Mb): 3072
LUN 1 size (default 5120 Mb): 3072
LUN 2 size (default 2048 Mb): <enter>
Command (h for help): p
Enter the LUN number
ports:
access: Open access LUN 2
ports:
access: Open access LUN 3
ports:
access: Open access Command (h for help):
At this point, we have divided the system memory into three LUNs. Next we need to assign ports to each LUN.
4.3.3 Attaching Fibre Channel Ports to the LUNs
Now that we have created our LUNs, we need to assign the Fibre Channel ports to them. This is accomplished with the ‘l’(ell) command. We simply link a particular LUN to a port number. The follow example shows how this is done.
Command (h for help): l
| Texas Memory Systems, Inc. (February 7, 2003) |