Expanding a RAID
To expand a RAID 1, RAID 5, RAID 6, or RAID 10 volume, follow the steps below:
1.Replace one of the hard drives in the RAID volume and allow it to automatically rebuild.
2.Once rebuilt, you can continue to replace any remaining disks in the RAID array.
3.When you are done replacing hard drives, log on to Web Management. Navigate to Storage > RAID to open the RAID List screen.
4.On the RAID List screen, select the RAID volume by clicking on its radio button, and click RAID Config to open the RAID Configuration screen.
5.On the RAID Configuration screen, click Expand.
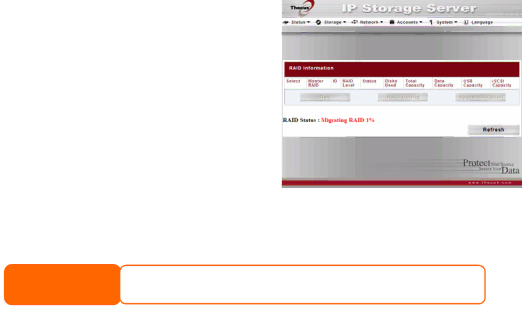
Migrating a RAID
Once a RAID volume has been created, you may want to move it to other physical drives or change the RAID array all together. To migrate a RAID 0, RAID 1, or RAID 5 volume, follow the steps below:
1.From the RAID Configuration screen, click Migrate RAID.
2.A list of possible RAID migration configurations will be listed. Select the desired migration scheme and click OK.
3.The system will begin migrating the RAID volume.
NOTE
Migrating a RAID volume could take several hours to complete
Below is a table listing of possible RAID migration schemes:
To | RAID 0 | RAID 5 | |
From | |||
|
| ||
| [RAID 0] HDDx2 to [RAID 0] HDDx3 | [RAID 0] HDDx2 to [RAID 5] HDDx3 | |
| [RAID 0] HDDx2 to [RAID 0] HDDx4 | [RAID 0] HDDx2 to [RAID 5] HDDx4 | |
RAID 0 | [RAID 0] HDDx2 to [RAID 0] HDDx5 | [RAID 0] HDDx2 to [RAID 5] HDDx5 | |
[RAID 0] HDDx3 to [RAID 0] HDDx4 | [RAID 0] HDDx3 to [RAID 5] HDDx4 | ||
| |||
| [RAID 0] HDDx3 to [RAID 0] HDDx5 | [RAID 0] HDDx3 to [RAID 5] HDDx5 | |
| [RAID 0] HDDx4 to [RAID 0] HDDx5 | [RAID 0] HDDx4 to [RAID 5] HDDx5 | |
| [RAID 1] HDDx2 to [RAID 0] HDDx2 | [RAID 1] HDDx2 to [RAID 5] HDDx3 | |
| [RAID 1] HDDx2 to [RAID 0] HDDx3 | ||
RAID 1 | [RAID 1] HDDx2 to [RAID 5] HDDx4 | ||
[RAID 1] HDDx2 to [RAID 0] HDDx4 | |||
| [RAID 1] HDDx2 to [RAID 5] HDDx5 | ||
| [RAID 1] HDDx2 to [RAID 0] HDDx5 | ||
|
| ||
| 32 |
|
