All installations and services must be performed by qualified service personnel.
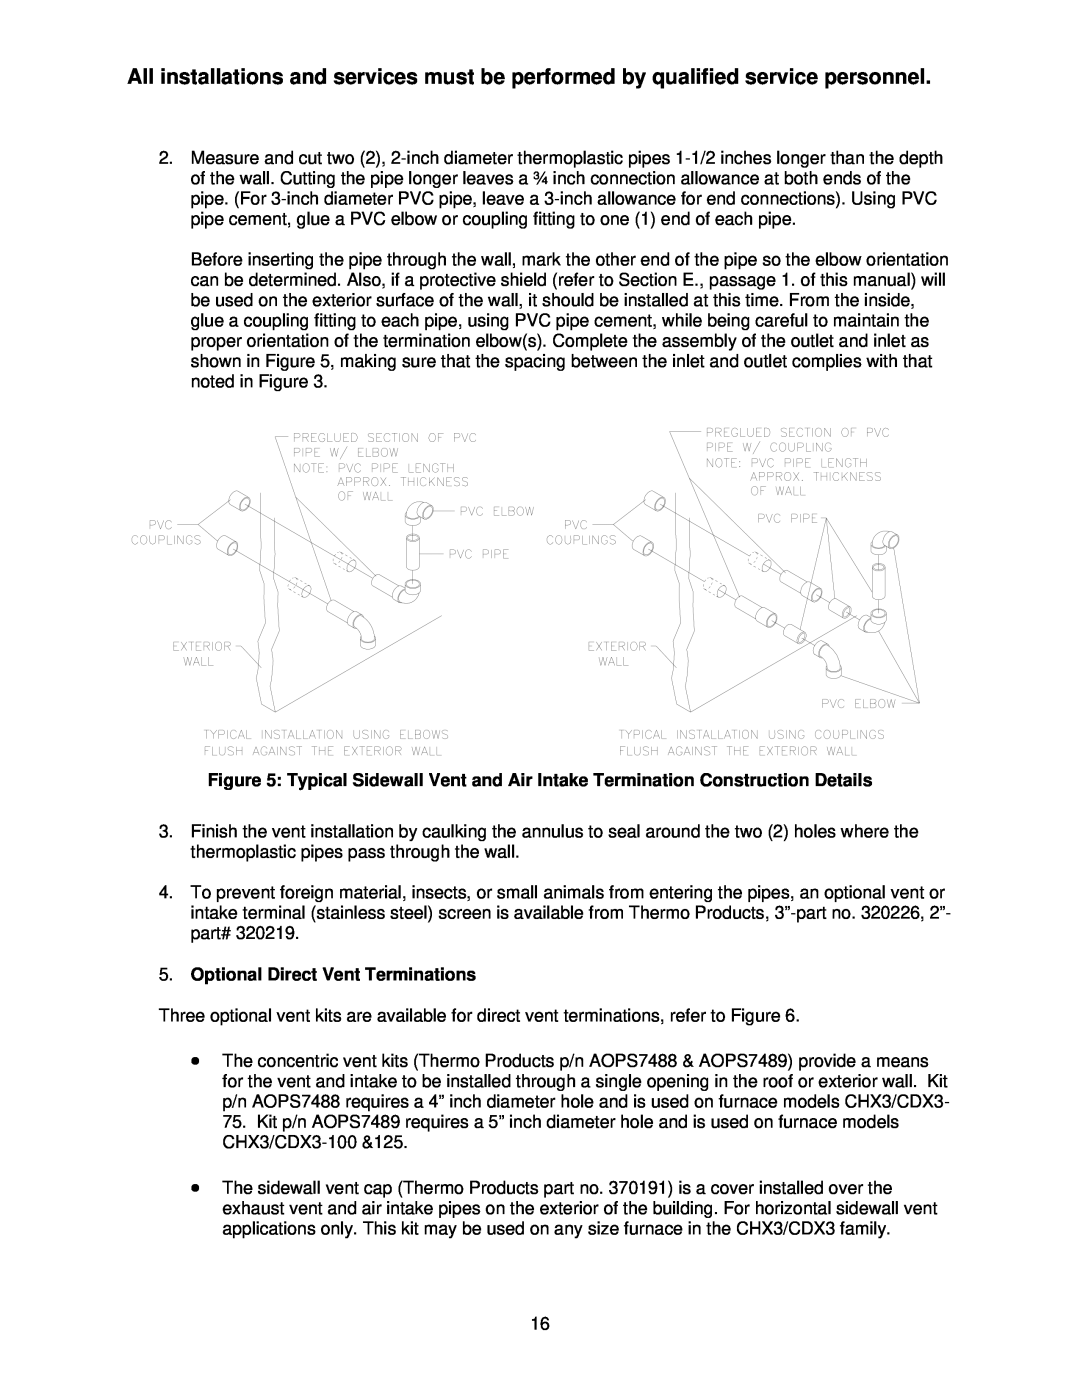
2.Measure and cut two (2),
Before inserting the pipe through the wall, mark the other end of the pipe so the elbow orientation can be determined. Also, if a protective shield (refer to Section E., passage 1. of this manual) will be used on the exterior surface of the wall, it should be installed at this time. From the inside, glue a coupling fitting to each pipe, using PVC pipe cement, while being careful to maintain the proper orientation of the termination elbow(s). Complete the assembly of the outlet and inlet as shown in Figure 5, making sure that the spacing between the inlet and outlet complies with that noted in Figure 3.
Figure 5: Typical Sidewall Vent and Air Intake Termination Construction Details
3.Finish the vent installation by caulking the annulus to seal around the two (2) holes where the thermoplastic pipes pass through the wall.
4.To prevent foreign material, insects, or small animals from entering the pipes, an optional vent or intake terminal (stainless steel) screen is available from Thermo Products,
5.Optional Direct Vent Terminations
Three optional vent kits are available for direct vent terminations, refer to Figure 6.
•The concentric vent kits (Thermo Products p/n AOPS7488 & AOPS7489) provide a means for the vent and intake to be installed through a single opening in the roof or exterior wall. Kit p/n AOPS7488 requires a 4” inch diameter hole and is used on furnace models CHX3/CDX3- 75. Kit p/n AOPS7489 requires a 5” inch diameter hole and is used on furnace models
•The sidewall vent cap (Thermo Products part no. 370191) is a cover installed over the exhaust vent and air intake pipes on the exterior of the building. For horizontal sidewall vent applications only. This kit may be used on any size furnace in the CHX3/CDX3 family.
16
