Floor-mounted projector placement (continued)
CONTENTS | 18 |
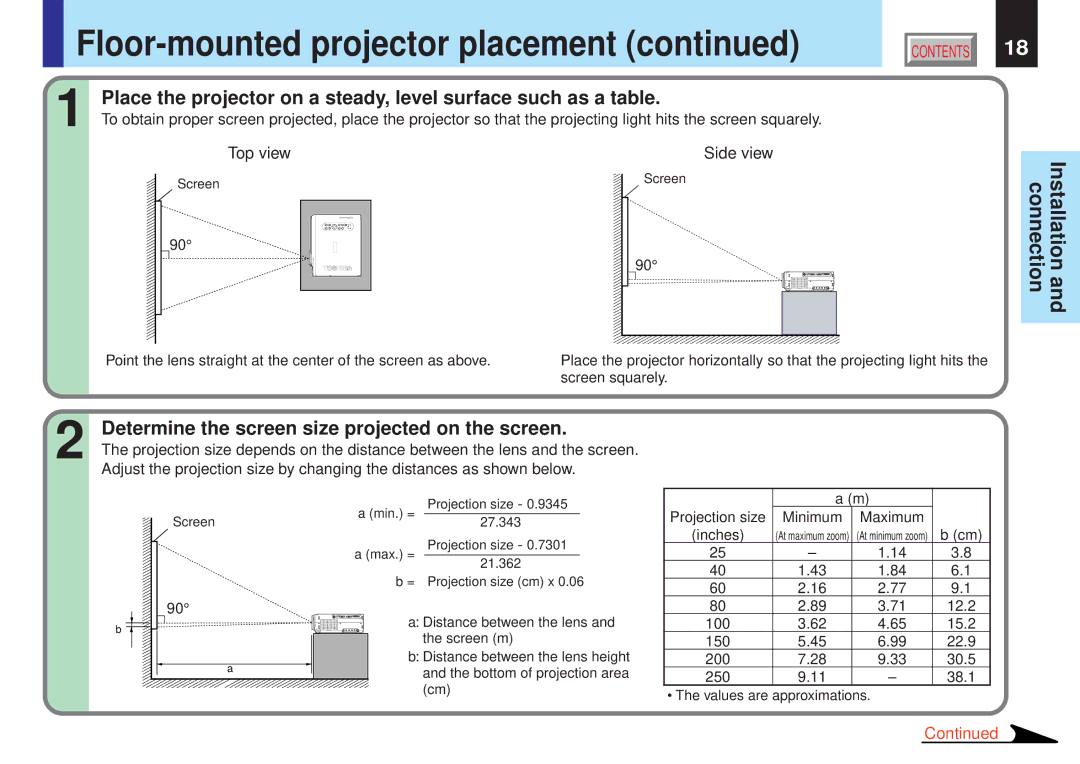
1 | Place the projector on a steady, level surface such as a table. |
| |
| To obtain proper screen projected, place the projector so that the projecting light hits the screen squarely. |
Top view
Screen
90°
Point the lens straight at the center of the screen as above.
Side view
Screen |
90° |
Place the projector horizontally so that the projecting light hits the screen squarely.
Installation and connection
2 | Determine the screen size projected on the screen. |
| |
| The projection size depends on the distance between the lens and the screen. |
| Adjust the projection size by changing the distances as shown below. |
b
Screen
90°
a
a (min.) = | Projection size - 0.9345 | |
27.343 |
| |
|
| |
a (max.) = | Projection size - 0.7301 | |
21.362 |
| |
|
| |
b = | Projection size (cm) x 0.06 | |
a: Distance between the lens and the screen (m)
b:Distance between the lens height and the bottom of projection area (cm)
| a (m) |
| |
Projection size | Minimum | Maximum |
|
(inches) | (At maximum zoom) | (At minimum zoom) | b (cm) |
25 | – | 1.14 | 3.8 |
40 | 1.43 | 1.84 | 6.1 |
60 | 2.16 | 2.77 | 9.1 |
80 | 2.89 | 3.71 | 12.2 |
100 | 3.62 | 4.65 | 15.2 |
150 | 5.45 | 6.99 | 22.9 |
200 | 7.28 | 9.33 | 30.5 |
250 | 9.11 | – | 38.1 |
• The values are approximations.
Continued