QUICK MENU adjustments and settings (continued)
CONTENTS | 50 |
Control panel
Remote control | (Main unit side) | |||
|
|
| ||
|
|
| AUTO | AUTO |
INPUT |
| ON/STANDBY | KEYSTONE | SET |
| LASER |
|
|
|
KEYSTONE | AUTO | SET | VOL/ADJ. | |
| ||||
VOLUME/ADJUST | ENTER | EXIT | ||
|
|
| ||
|
|
| MENU | INPUT |
MENU | ENTER EXIT |
|
| ON/STANDBY |
PIP | FREEZE |
|
|
|
CALL | RESIZE |
|
|
|
MUTE |
| TEMP LAMP ON | ||
|
|
| BUSY | FAN |
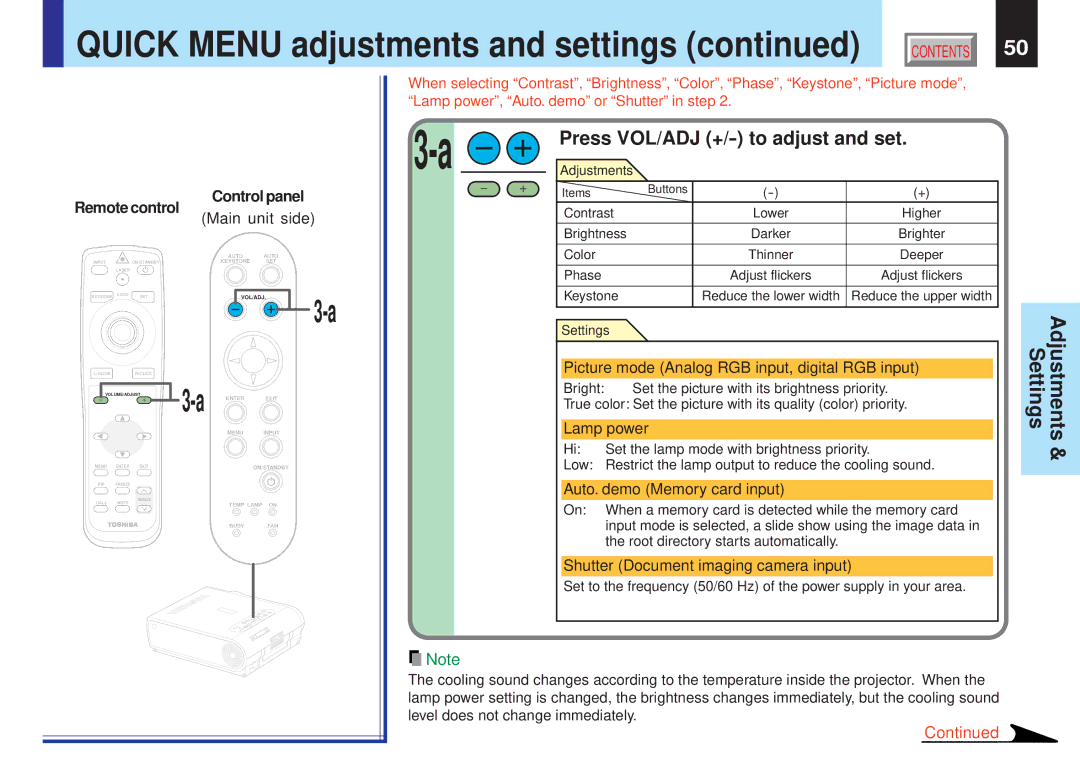
When selecting “Contrast”, “Brightness”, “Color”, “Phase”, “Keystone”, “Picture mode”, “Lamp power”, “Auto. demo” or “Shutter” in step 2.
|
|
|
|
|
|
|
|
|
| Press VOL/ADJ | ||||
|
|
|
|
|
|
|
|
|
| Adjustments |
|
|
| |
|
|
|
|
|
|
|
|
|
|
|
|
| ||
|
|
|
|
|
|
|
|
|
|
| Items | Buttons | (+) | |
|
|
|
|
|
|
|
|
|
|
| Contrast |
| Lower | Higher |
|
|
|
|
|
|
|
|
|
|
|
|
|
|
|
|
|
|
|
|
|
|
|
|
|
| Brightness |
| Darker | Brighter |
|
|
|
|
|
|
|
|
|
|
|
|
|
|
|
|
|
|
|
|
|
|
|
|
|
| Color |
| Thinner | Deeper |
|
|
|
|
|
|
|
|
|
|
|
|
|
|
|
|
|
|
|
|
|
|
|
|
|
| Phase |
| Adjust flickers | Adjust flickers |
|
|
|
|
|
|
|
|
|
|
|
|
|
|
|
|
|
|
|
|
|
|
|
|
|
| Keystone |
| Reduce the lower width | Reduce the upper width |
|
|
|
|
|
|
|
|
|
|
|
|
|
|
|
Settings
Picture mode (Analog RGB input, digital RGB input)
Bright: Set the picture with its brightness priority.
True color: Set the picture with its quality (color) priority.
Lamp power
Hi: | Set the lamp mode with brightness priority. |
Low: | Restrict the lamp output to reduce the cooling sound. |
Auto. demo (Memory card input)
On: When a memory card is detected while the memory card input mode is selected, a slide show using the image data in the root directory starts automatically.
Shutter (Document imaging camera input)
Set to the frequency (50/60 Hz) of the power supply in your area.
![]() Note
Note
The cooling sound changes according to the temperature inside the projector. When the lamp power setting is changed, the brightness changes immediately, but the cooling sound level does not change immediately.
Continued
Settings | Adjustments |
| & |
|
|