Projection on the screen | CONTENTS | 28 |
CAUTION – Do not look into the projection lens while operating the projector.
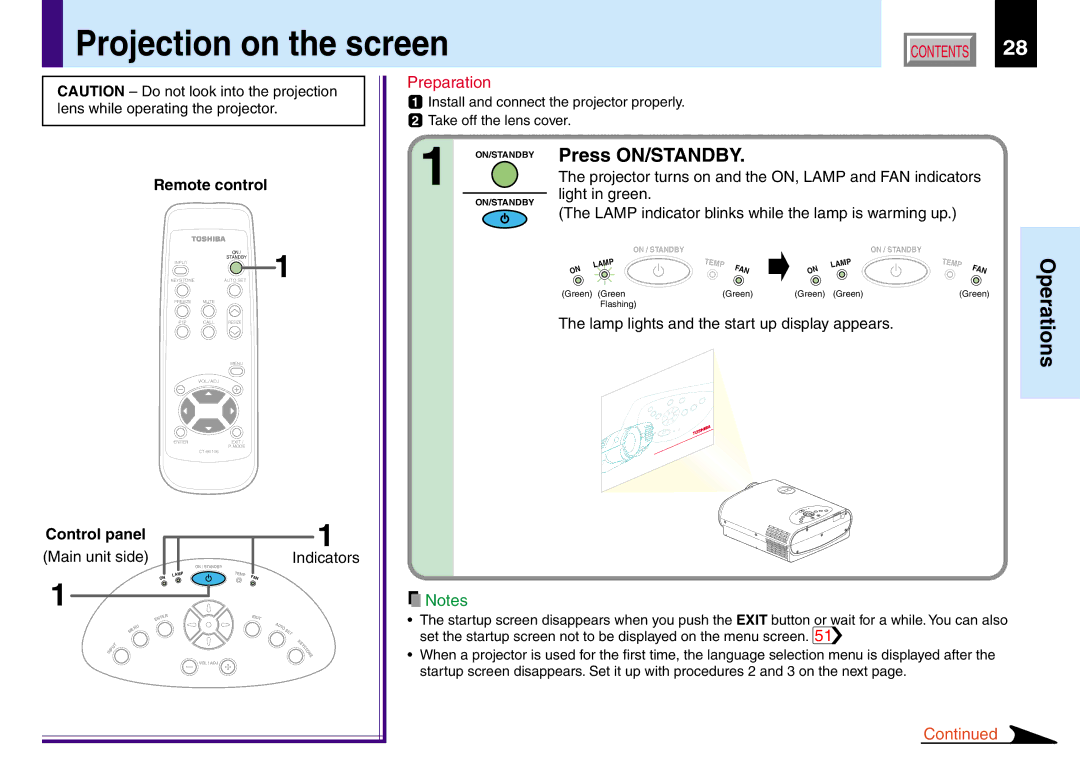
Remote control
Preparation
1Install and connect the projector properly.
2Take off the lens cover.
1 | ON/STANDBY | Press ON/STANDBY. |
| ||
|
| |
|
| The projector turns on and the ON, LAMP and FAN indicators |
|
| light in green. |
| ON/STANDBY | |
| (The LAMP indicator blinks while the lamp is warming up.) | |
|
|
ON /
STANDBY1
INPUT
KEYSTONE |
| AUTO SET |
FREEZE | MUTE |
|
PIP | CALL | RESIZE |
|
| MENU |
| VOL / ADJ |
|
ENTER |
| EXIT / |
|
| P.MODE |
|
|
Control panel | 1 |
(Main unit side) | Indicators |
| ON / STANDBY |
| ON / STANDBY |
|
|
|
| ON / STANDBY |
N | MP | TE | MP | FA | N | MP |
LA |
| LA | ||||
O |
|
|
| N | O |
|
(Green) | (Green |
| (Green) | (Green) | (Green) | |
| Flashing) |
|
|
|
|
|
The lamp lights and the start up display appears.
TEMP | FA |
| |
| N |
(Green)
Operations
1 |
|
| ON | |
|
|
|
| |
|
|
|
| R |
|
|
| TE | |
|
|
| EN |
|
|
|
| U |
|
|
|
| N |
|
|
|
| E |
|
|
|
| M |
|
| P | U | T |
|
IN |
|
| ||
|
|
| ||
|
|
|
| |
LAMP
T |
|
EMP | FAN |
|
EXIT
A |
|
UT |
|
O | S |
| ET |
K
E
Y
S
T
O
N
E
![]() Notes
Notes
• | The startup screen disappears when you push the EXIT button or wait for a while. You can also |
| set the startup screen not to be displayed on the menu screen. 51 |
• | When a projector is used for the first time, the language selection menu is displayed after the |
VOL / ADJ
startup screen disappears. Set it up with procedures 2 and 3 on the next page. |
Continued