Add a camera for monitoring
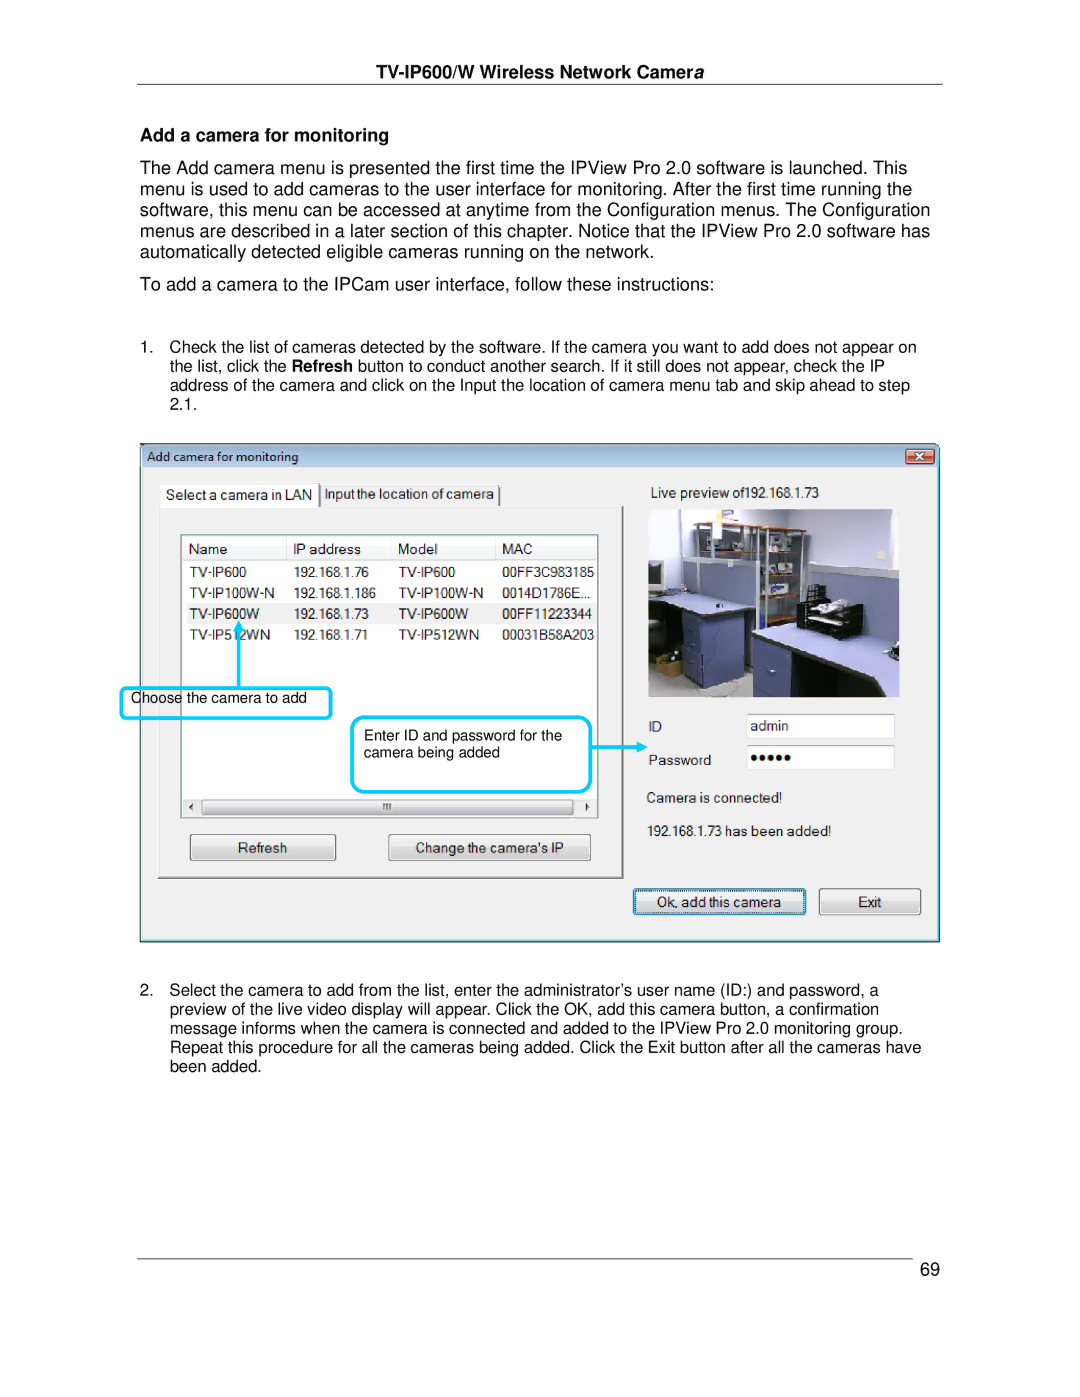
The Add camera menu is presented the first time the IPView Pro 2.0 software is launched. This menu is used to add cameras to the user interface for monitoring. After the first time running the software, this menu can be accessed at anytime from the Configuration menus. The Configuration menus are described in a later section of this chapter. Notice that the IPView Pro 2.0 software has automatically detected eligible cameras running on the network.
To add a camera to the IPCam user interface, follow these instructions:
1.Check the list of cameras detected by the software. If the camera you want to add does not appear on the list, click the Refresh button to conduct another search. If it still does not appear, check the IP address of the camera and click on the Input the location of camera menu tab and skip ahead to step 2.1.
Choose the camera to add
Enter ID and password for the camera being added
2.Select the camera to add from the list, enter the administrator’s user name (ID:) and password, a preview of the live video display will appear. Click the OK, add this camera button, a confirmation message informs when the camera is connected and added to the IPView Pro 2.0 monitoring group. Repeat this procedure for all the cameras being added. Click the Exit button after all the cameras have been added.
69
