until the chain slack is eliminated and the flywheel can rotate freely without pulling the pedals around with it.
Replacing the Handlebars
1.NOTE: Your
2.As you will probably intend to use the existing
3.Remove the
4.Carefully prise inside the rubber handlebar grips with a small flat head screwdriver and spray some
5.Using a 6mm hex key, loosen the 4 bolts from the handlebar clamp on the top of the X- Bars™ Handlebar System to release the grip on the handlebar.
6.Twist the handlebar to expose the bolt holding the
7.Remove the 4 bolts from the handlebar clamp on the top of the
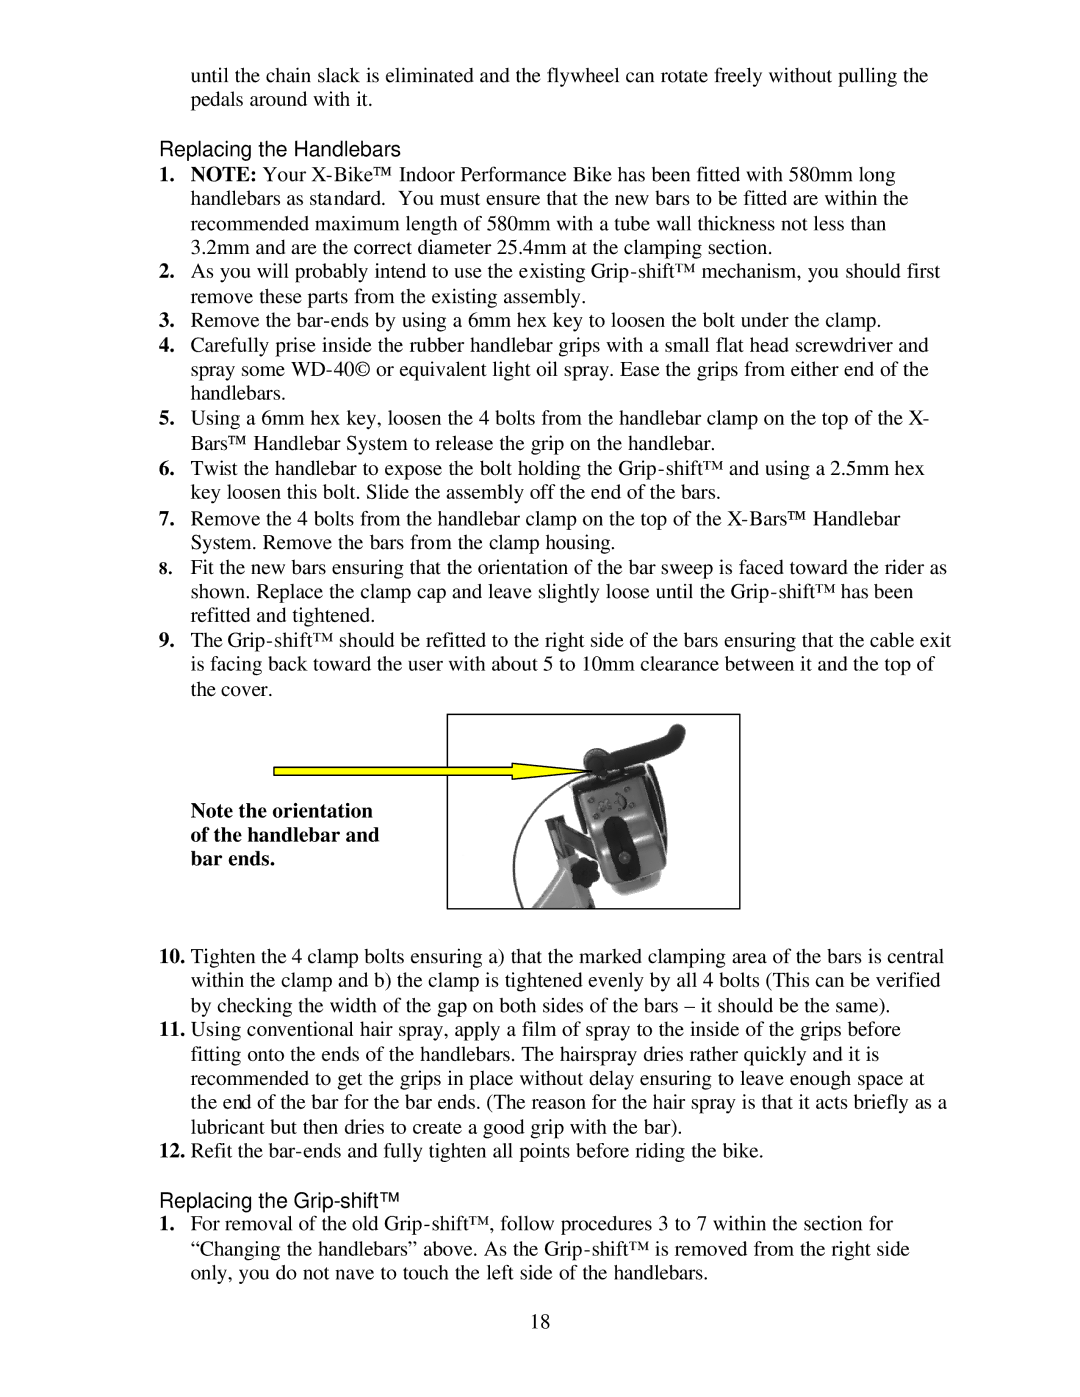
8.Fit the new bars ensuring that the orientation of the bar sweep is faced toward the rider as shown. Replace the clamp cap and leave slightly loose until the
9.The
Note the orientation of the handlebar and bar ends.
10.Tighten the 4 clamp bolts ensuring a) that the marked clamping area of the bars is central within the clamp and b) the clamp is tightened evenly by all 4 bolts (This can be verified by checking the width of the gap on both sides of the bars – it should be the same).
11.Using conventional hair spray, apply a film of spray to the inside of the grips before fitting onto the ends of the handlebars. The hairspray dries rather quickly and it is recommended to get the grips in place without delay ensuring to leave enough space at the end of the bar for the bar ends. (The reason for the hair spray is that it acts briefly as a lubricant but then dries to create a good grip with the bar).
12.Refit the
Replacing the Grip-shift™
1.For removal of the old
18