Replacing the “Return to Zero” Springs
1.Remove the top cover as directed in the covers removal section.
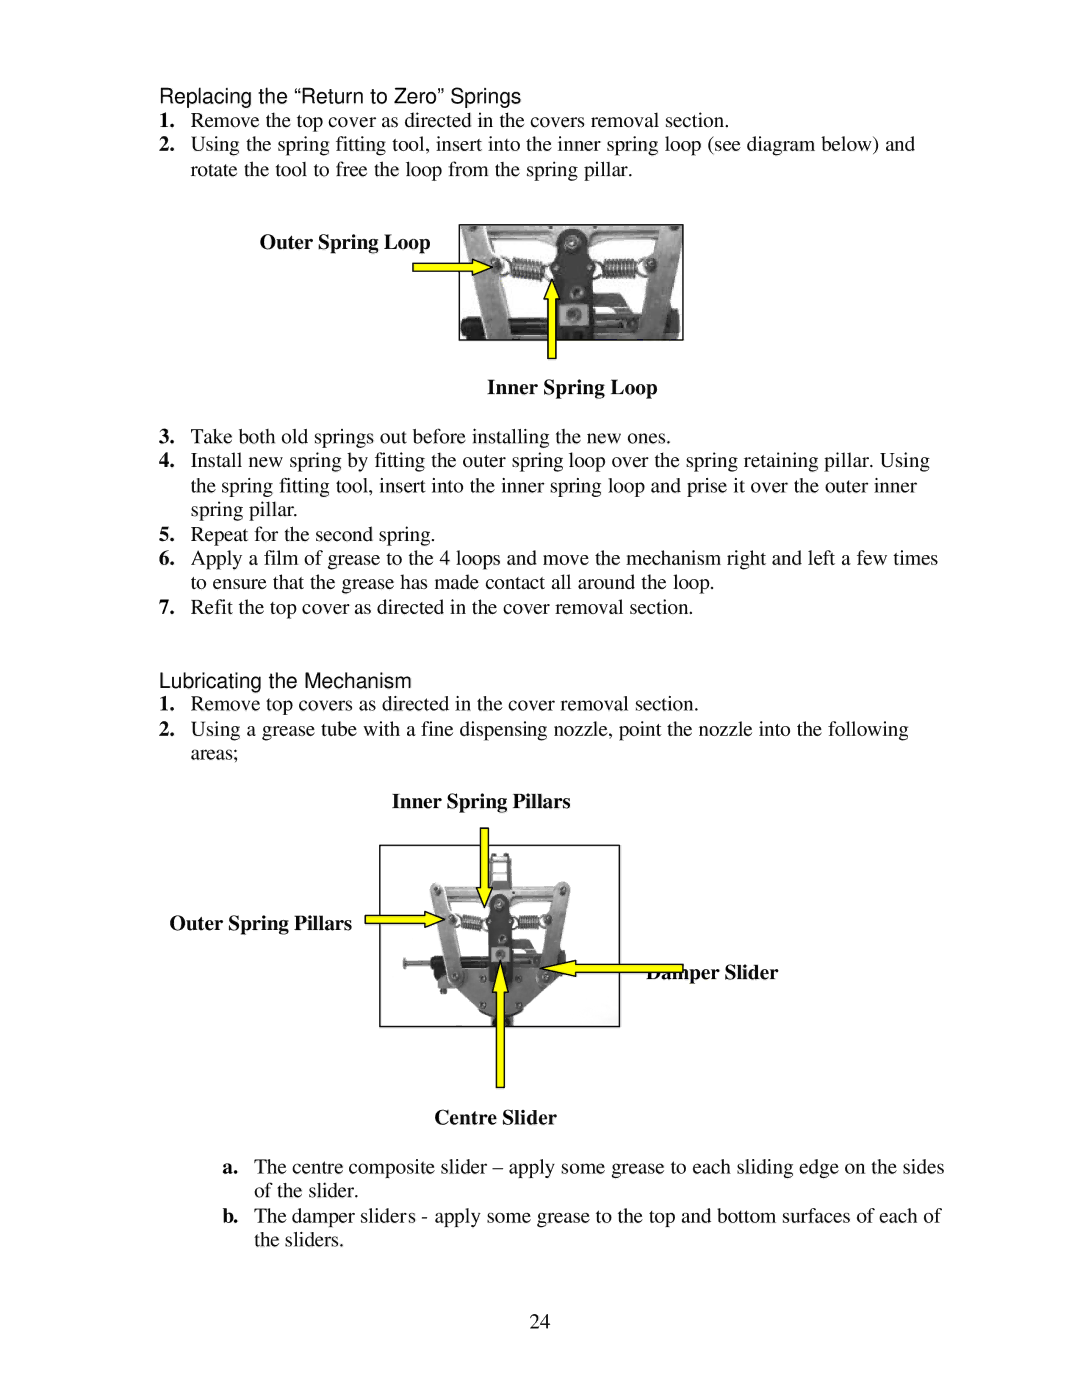
2.Using the spring fitting tool, insert into the inner spring loop (see diagram below) and rotate the tool to free the loop from the spring pillar.
Outer Spring Loop
Inner Spring Loop
3.Take both old springs out before installing the new ones.
4.Install new spring by fitting the outer spring loop over the spring retaining pillar. Using the spring fitting tool, insert into the inner spring loop and prise it over the outer inner spring pillar.
5.Repeat for the second spring.
6.Apply a film of grease to the 4 loops and move the mechanism right and left a few times to ensure that the grease has made contact all around the loop.
7.Refit the top cover as directed in the cover removal section.
Lubricating the Mechanism
1.Remove top covers as directed in the cover removal section.
2.Using a grease tube with a fine dispensing nozzle, point the nozzle into the following areas;
Inner Spring Pillars
Outer Spring Pillars
Centre Slider
Damper Slider
a.The centre composite slider – apply some grease to each sliding edge on the sides of the slider.
b.The damper sliders - apply some grease to the top and bottom surfaces of each of the sliders.
24