PARTS – REMOVAL AND REPLACEMENT
WARNING:
It is vitally important to keep the
NOTE: When carrying out any service or maintenance procedures, it is vital to ensure that ALL hardware has been fully tightened and the assembly is returned to its original assembly state prior to allowing the
Replacing the Resistance Pads
1.If the pad thickness is reduced to less than 4mm, they need to be replaced.
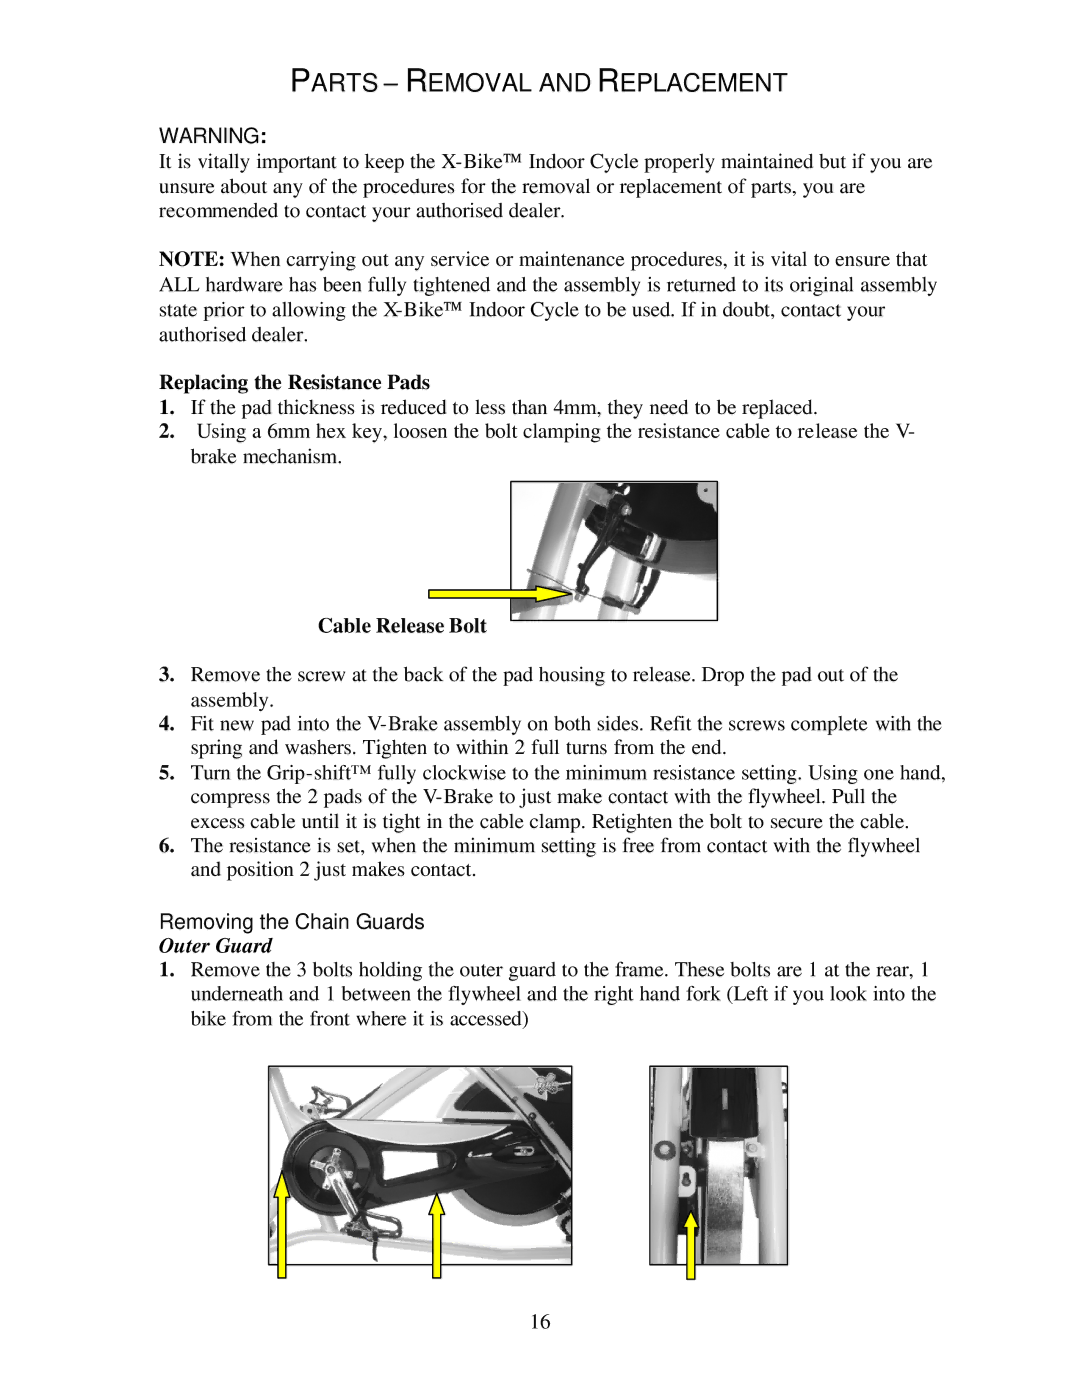
2.Using a 6mm hex key, loosen the bolt clamping the resistance cable to release the V- brake mechanism.
Cable Release Bolt
3.Remove the screw at the back of the pad housing to release. Drop the pad out of the assembly.
4.Fit new pad into the
5.Turn the
6.The resistance is set, when the minimum setting is free from contact with the flywheel and position 2 just makes contact.
Removing the Chain Guards
Outer Guard
1.Remove the 3 bolts holding the outer guard to the frame. These bolts are 1 at the rear, 1 underneath and 1 between the flywheel and the right hand fork (Left if you look into the bike from the front where it is accessed)
16