25 |
|
|
|
|
|
|
|
|
| 26 |
ChannelFavoriteSetup |
|
|
|
|
|
|
| MacroPowerTM Setup |
| MacroPowerSetup |
|
|
|
|
|
|
| button. In addition to the Power ON or OFF buttons, any of | |||
|
|
|
|
|
|
|
| MacroPowerTM is a unique feature that enables you to turn |
| |
|
|
|
|
|
|
|
| all of your Components ON or OFF, at the same time, simply |
| |
|
|
|
|
|
|
|
| with the press of one button. We call that a “Macro”. |
| |
|
|
|
|
|
|
|
| What would normally take multiple remotes and button |
| |
|
|
|
|
|
|
|
| pushes, the RF30 can accomplish with the press of one |
| |
|
|
|
|
|
|
|
| the Display buttons (on any Component or Page) can be set |
| |
|
|
|
|
|
|
|
| to be Macro buttons as well. Feel the power! |
| |
|
|
|
|
|
|
|
| To setup a Power ON macro button that will turn ON several |
| |
|
|
|
|
|
|
|
| components at the same time (for example, TV, VCR and |
| |
|
|
|
|
|
|
|
| CABLE), follow these easy steps: |
| |
|
|
|
|
|
|
|
| |||
|
| STEP 7: | STEP 8: | STEP 1: | STEP 4: |
| ||||
|
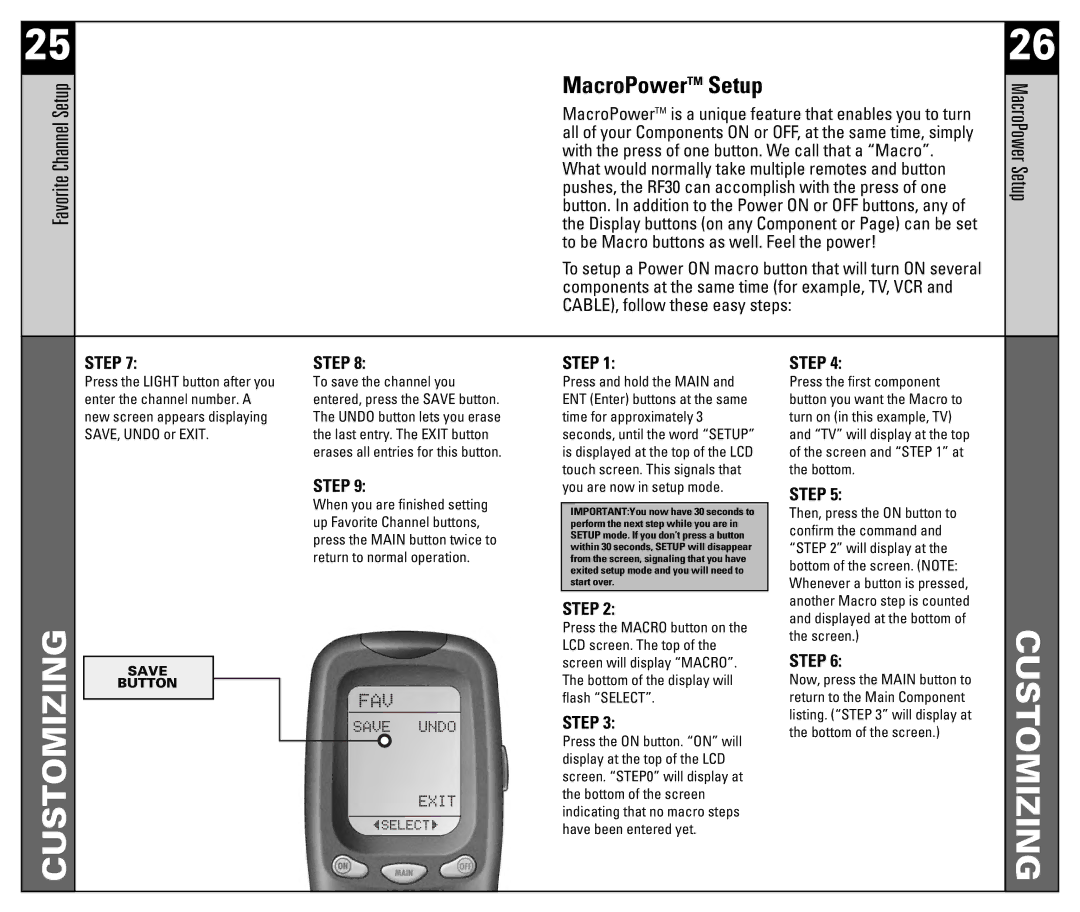
| Press the LIGHT button after you | To save the channel you | Press and hold the MAIN and | Press the first component |
| ||||
|
| enter the channel number. A | entered, press the SAVE button. | ENT (Enter) buttons at the same | button you want the Macro to |
| ||||
|
| new screen appears displaying | The UNDO button lets you erase | time for approximately 3 | turn on (in this example, TV) |
| ||||
|
| SAVE, UNDO or EXIT. | the last entry. The EXIT button | seconds, until the word “SETUP” | and “TV” will display at the top |
| ||||
|
|
|
| erases all entries for this button. | is displayed at the top of the LCD | of the screen and “STEP 1” at |
| |||
|
|
|
| STEP 9: | touch screen. This signals that | the bottom. |
| |||
|
|
|
| you are now in setup mode. | STEP 5: |
| ||||
|
|
|
| When you are finished setting |
|
| ||||
|
|
|
| IMPORTANT:You now have 30 seconds to | Then, press the ON button to |
| ||||
|
|
|
| up Favorite Channel buttons, |
| |||||
|
|
|
| perform the next step while you are in | confirm the command and |
| ||||
|
|
|
| press the MAIN button twice to | SETUP mode. If you don’t press a button |
| ||||
|
|
|
| within 30 seconds, SETUP will disappear | “STEP 2” will display at the |
| ||||
|
|
|
| return to normal operation. |
| |||||
|
|
|
| from the screen, signaling that you have | bottom of the screen. (NOTE: |
| ||||
|
|
|
|
|
|
|
| exited setup mode and you will need to |
| |
|
|
|
|
|
|
|
| start over. | Whenever a button is pressed, |
|
|
|
|
|
|
|
|
| STEP 2: | another Macro step is counted |
|
|
|
|
|
|
|
|
| and displayed at the bottom of |
| |
CUSTOMIZING |
|
|
|
|
|
|
| Press the MACRO button on the | CUSTOMIZING | |
|
|
|
|
|
|
| the screen.) | |||
|
|
|
|
|
|
| LCD screen. The top of the | |||
|
|
|
|
|
|
|
|
| ||
|
|
|
|
|
|
|
| STEP 6: |
| |
|
| SAVE |
|
|
|
|
| screen will display “MACRO”. |
| |
|
|
|
|
|
|
| The bottom of the display will | Now, press the MAIN button to |
| |
|
| BUTTON |
|
|
|
|
|
| ||
|
|
|
|
|
|
|
| flash “SELECT”. | return to the Main Component |
|
|
|
|
|
|
|
|
|
| ||
|
|
|
|
|
|
|
| STEP 3: | listing. (“STEP 3” will display at |
|
|
|
|
|
|
|
|
|
| ||
|
|
|
|
|
|
|
| the bottom of the screen.) |
| |
|
|
|
|
|
|
|
| Press the ON button. “ON” will |
| |
|
|
|
|
|
|
|
|
|
| |
|
|
|
|
|
|
|
| display at the top of the LCD |
|
|
|
|
|
|
|
|
|
| screen. “STEP0” will display at |
|
|
|
|
|
|
|
|
|
| the bottom of the screen |
|
|
|
|
|
|
|
|
|
| indicating that no macro steps |
|
|
|
|
|
|
|
|
|
| have been entered yet. |
|
|
|
|
|
|
|
|
|
|
|
|
|