Stardance Natural Vent Gas Heater
Insert the
Attach the first section of venting to the
for details on joining the decorative pipe at the ceiling.
ST373
Fig. 15 Attach the B-vent adapter to the flue.
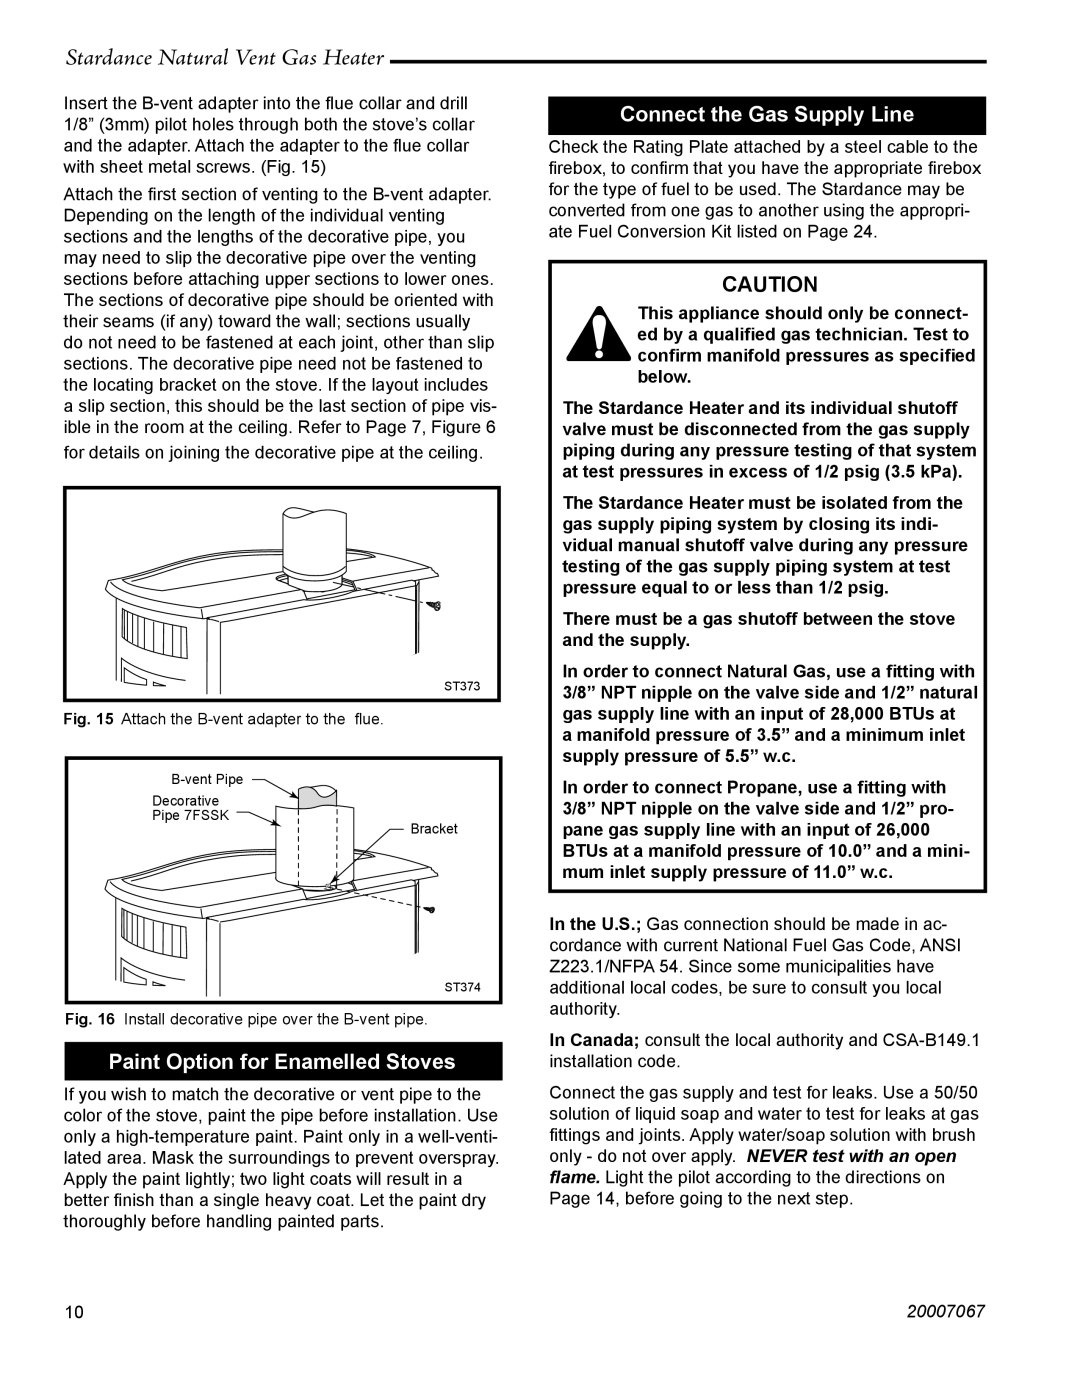
Decorative
Pipe 7FSSK
Bracket
ST374
Fig. 16 Install decorative pipe over the B-vent pipe.
Paint Option for Enamelled Stoves
If you wish to match the decorative or vent pipe to the color of the stove, paint the pipe before installation. Use only a
Connect the Gas Supply Line
Check the Rating Plate attached by a steel cable to the firebox, to confirm that you have the appropriate firebox for the type of fuel to be used. The Stardance may be converted from one gas to another using the appropri- ate Fuel Conversion Kit listed on Page 24.
CAUTION
This appliance should only be connect- ed by a qualified gas technician. Test to confirm manifold pressures as specified
below.
The Stardance Heater and its individual shutoff valve must be disconnected from the gas supply piping during any pressure testing of that system at test pressures in excess of 1/2 psig (3.5 kPa).
The Stardance Heater must be isolated from the gas supply piping system by closing its indi- vidual manual shutoff valve during any pressure testing of the gas supply piping system at test pressure equal to or less than 1/2 psig.
There must be a gas shutoff between the stove and the supply.
In order to connect Natural Gas, use a fitting with 3/8” NPT nipple on the valve side and 1/2” natural gas supply line with an input of 28,000 BTUs at a manifold pressure of 3.5” and a minimum inlet supply pressure of 5.5” w.c.
In order to connect Propane, use a fitting with 3/8” NPT nipple on the valve side and 1/2” pro- pane gas supply line with an input of 26,000 BTUs at a manifold pressure of 10.0” and a mini- mum inlet supply pressure of 11.0” w.c.
In the U.S.; Gas connection should be made in ac- cordance with current National Fuel Gas Code, ANSI Z223.1/NFPA 54. Since some municipalities have additional local codes, be sure to consult you local authority.
In Canada; consult the local authority and
Connect the gas supply and test for leaks. Use a 50/50 solution of liquid soap and water to test for leaks at gas fittings and joints. Apply water/soap solution with brush only - do not over apply. NEVER test with an open flame. Light the pilot according to the directions on Page 14, before going to the next step.
1010 | 20007067 |