Maintenance and Troubleshooting
5.6
Lamp Replacement
1.Turn off the projector and wait for the cooling fan to stop.
2.Unplug the power cord. Allow the projector to cool down for approximately one hour prior to removing the lamp assembly for replacement.
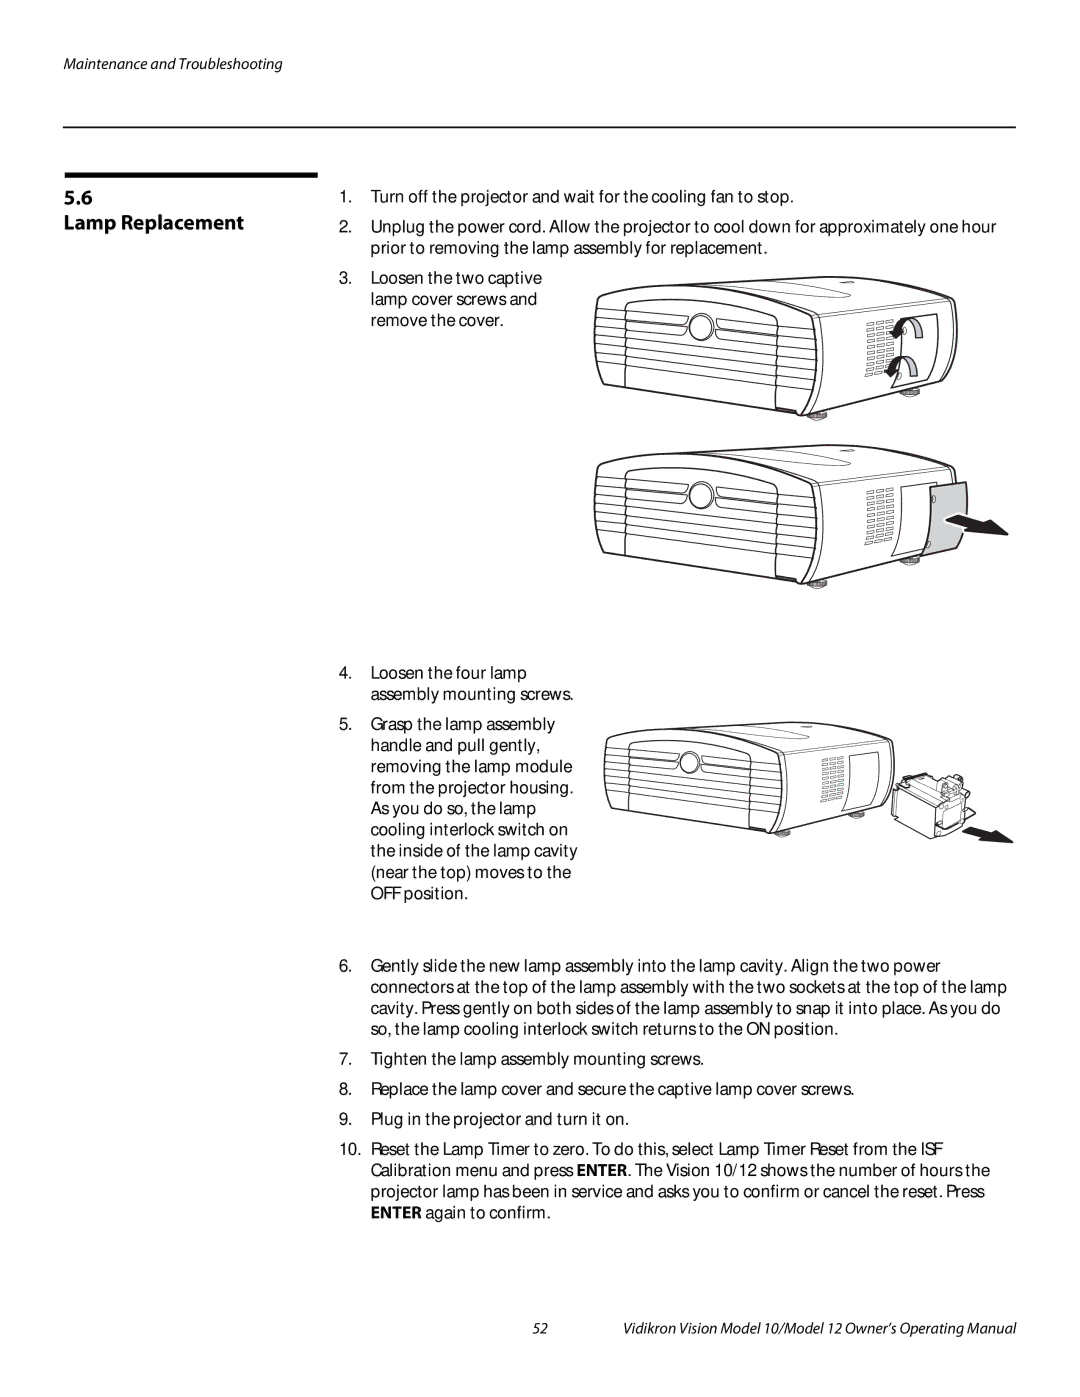
3.Loosen the two captive
lamp cover screws and remove the cover.
4.Loosen the four lamp assembly mounting screws.
5.Grasp the lamp assembly
handle and pull gently, removing the lamp module from the projector housing. As you do so, the lamp cooling interlock switch on the inside of the lamp cavity (near the top) moves to the OFF position.
6.Gently slide the new lamp assembly into the lamp cavity. Align the two power connectors at the top of the lamp assembly with the two sockets at the top of the lamp cavity. Press gently on both sides of the lamp assembly to snap it into place. As you do so, the lamp cooling interlock switch returns to the ON position.
7.Tighten the lamp assembly mounting screws.
8.Replace the lamp cover and secure the captive lamp cover screws.
9.Plug in the projector and turn it on.
10.Reset the Lamp Timer to zero. To do this, select Lamp Timer Reset from the ISF Calibration menu and press ENTER. The Vision 10/12 shows the number of hours the projector lamp has been in service and asks you to confirm or cancel the reset. Press ENTER again to confirm.
52 | Vidikron Vision Model 10/Model 12 Owner’s Operating Manual |