Installation
Connecting to AC Power ➤ The Vision 85 system includes two (2) AC power cords (one each for the VHD Controller and projector).
VHD Controller: Plug the female end of one power cord into the AC receptacle on the rear of the VHD Controller. Connect the other end to your AC power source (100 to 240 VAC).
Projector: Similarly connect the Vision 85 to a nearby 100 to 240 VAC power source.
AutoScope Lens Motor: With
Caution | The input voltage to the AutoScope lens motor must be between 100 and |
120 VAC. Do not connect the AutoScope lens motor to a | |
| power source! |
3.7
Turning on the Power
1.Turn on your source components.
2.Turn on the main power switch at the rear of the VHD Controller.
3.If this is an
4.Press the ON button on the remote control – or the POWER (![]() ) button on the VHD Controller front panel – to turn on the system. The vacuum fluorescent display on the VHD Controller front panel briefly displays “Starting Display.”
) button on the VHD Controller front panel – to turn on the system. The vacuum fluorescent display on the VHD Controller front panel briefly displays “Starting Display.”
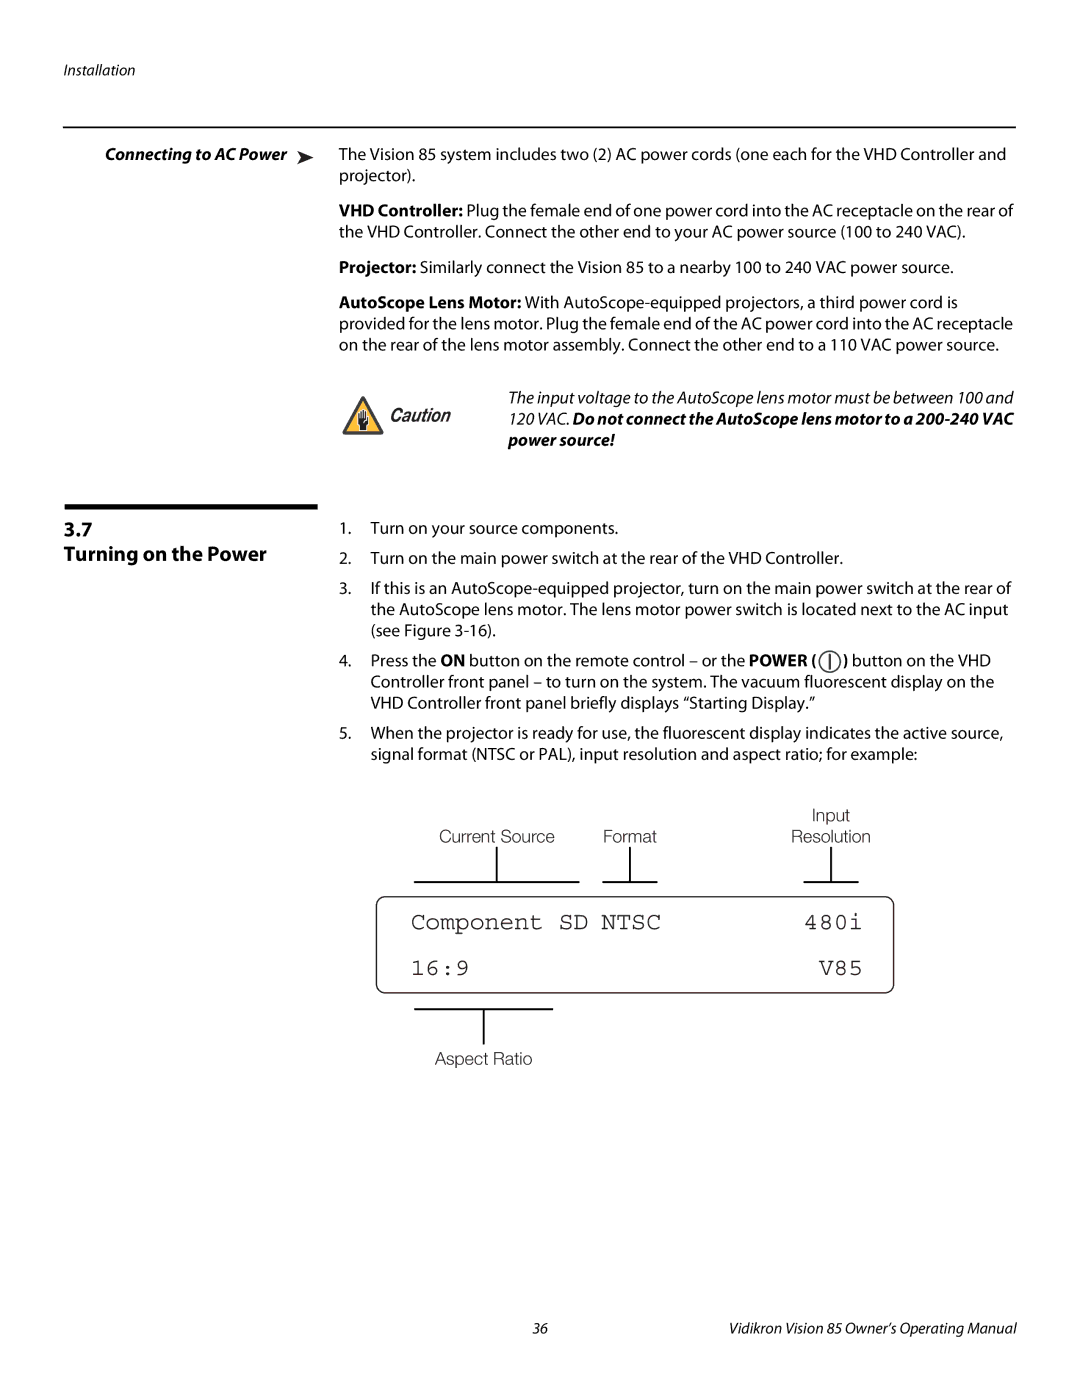
5.When the projector is ready for use, the fluorescent display indicates the active source, signal format (NTSC or PAL), input resolution and aspect ratio; for example:
|
| Input |
Current Source | Format | Resolution |
Component SD NTSC | 480i | |||
16:9 |
|
| V85 | |
|
|
|
|
|
|
|
|
|
|
Aspect Ratio
36 | Vidikron Vision 85 Owner’s Operating Manual |