Operation
Table
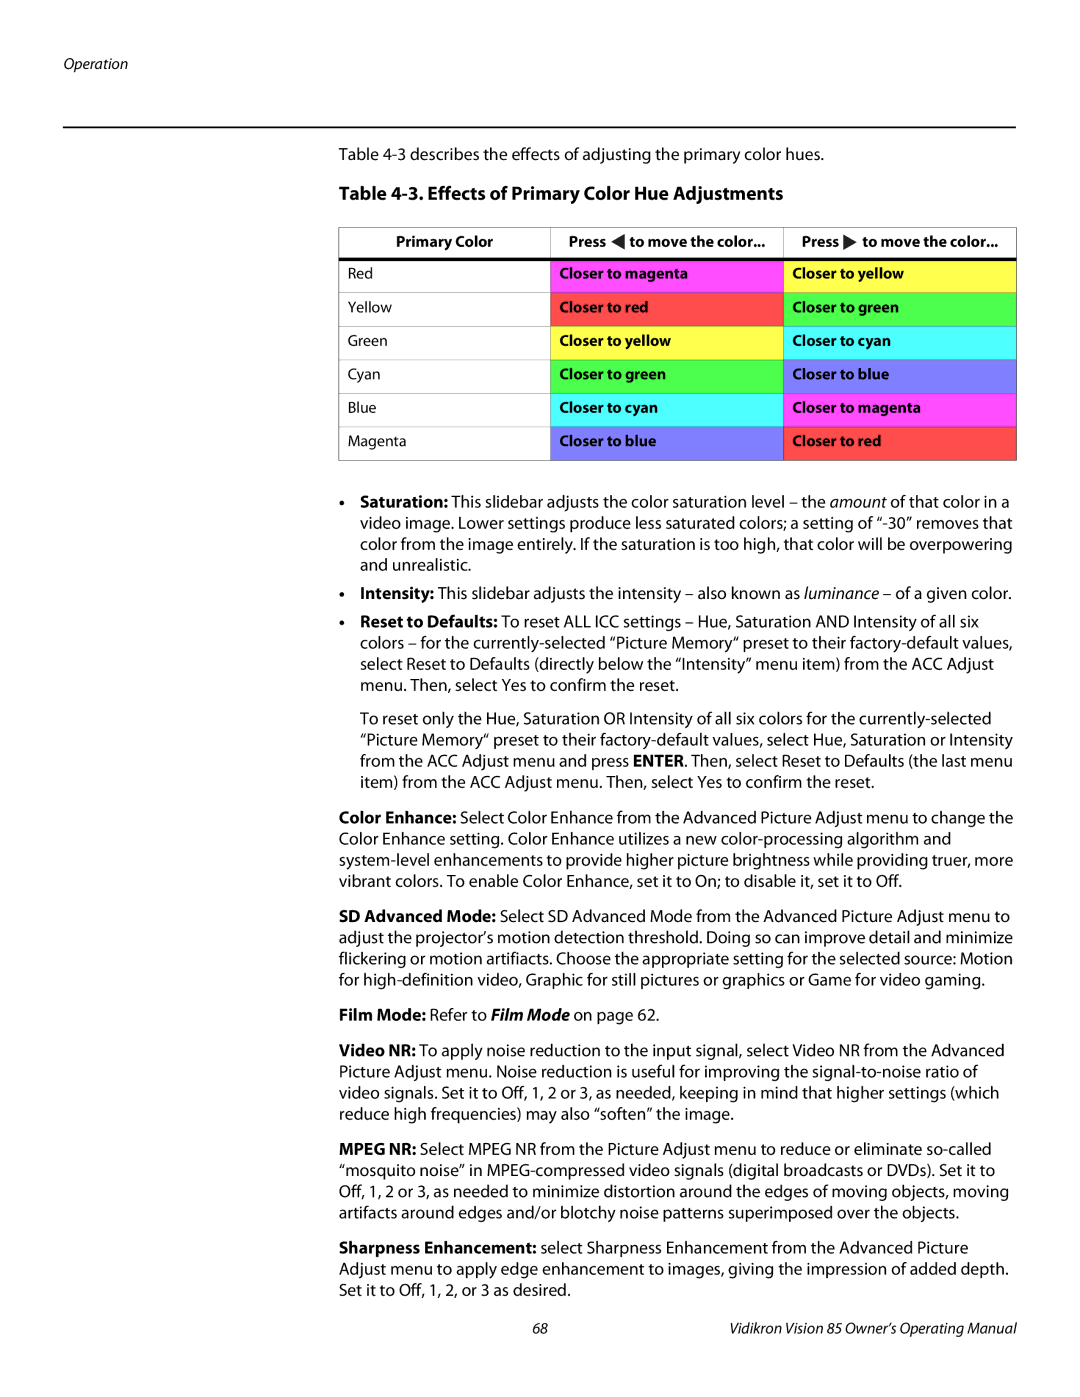
Table 4-3. Effects of Primary Color Hue Adjustments
Primary Color | Press to move the color... | Press to move the color... |
|
|
|
Red | Closer to magenta | Closer to yellow |
|
|
|
Yellow | Closer to red | Closer to green |
|
|
|
Green | Closer to yellow | Closer to cyan |
|
|
|
Cyan | Closer to green | Closer to blue |
|
|
|
Blue | Closer to cyan | Closer to magenta |
|
|
|
Magenta | Closer to blue | Closer to red |
|
|
|
•Saturation: This slidebar adjusts the color saturation level – the amount of that color in a video image. Lower settings produce less saturated colors; a setting of
•Intensity: This slidebar adjusts the intensity – also known as luminance – of a given color.
•Reset to Defaults: To reset ALL ICC settings – Hue, Saturation AND Intensity of all six colors – for the
To reset only the Hue, Saturation OR Intensity of all six colors for the
Color Enhance: Select Color Enhance from the Advanced Picture Adjust menu to change the Color Enhance setting. Color Enhance utilizes a new
SD Advanced Mode: Select SD Advanced Mode from the Advanced Picture Adjust menu to adjust the projector’s motion detection threshold. Doing so can improve detail and minimize flickering or motion artifiacts. Choose the appropriate setting for the selected source: Motion for
Film Mode: Refer to Film Mode on page 62.
Video NR: To apply noise reduction to the input signal, select Video NR from the Advanced Picture Adjust menu. Noise reduction is useful for improving the
MPEG NR: Select MPEG NR from the Picture Adjust menu to reduce or eliminate
Sharpness Enhancement: select Sharpness Enhancement from the Advanced Picture
Adjust menu to apply edge enhancement to images, giving the impression of added depth.
Set it to Off, 1, 2, or 3 as desired.
68 | Vidikron Vision 85 Owner’s Operating Manual |