IMAGE Menu

IMAGE Menu

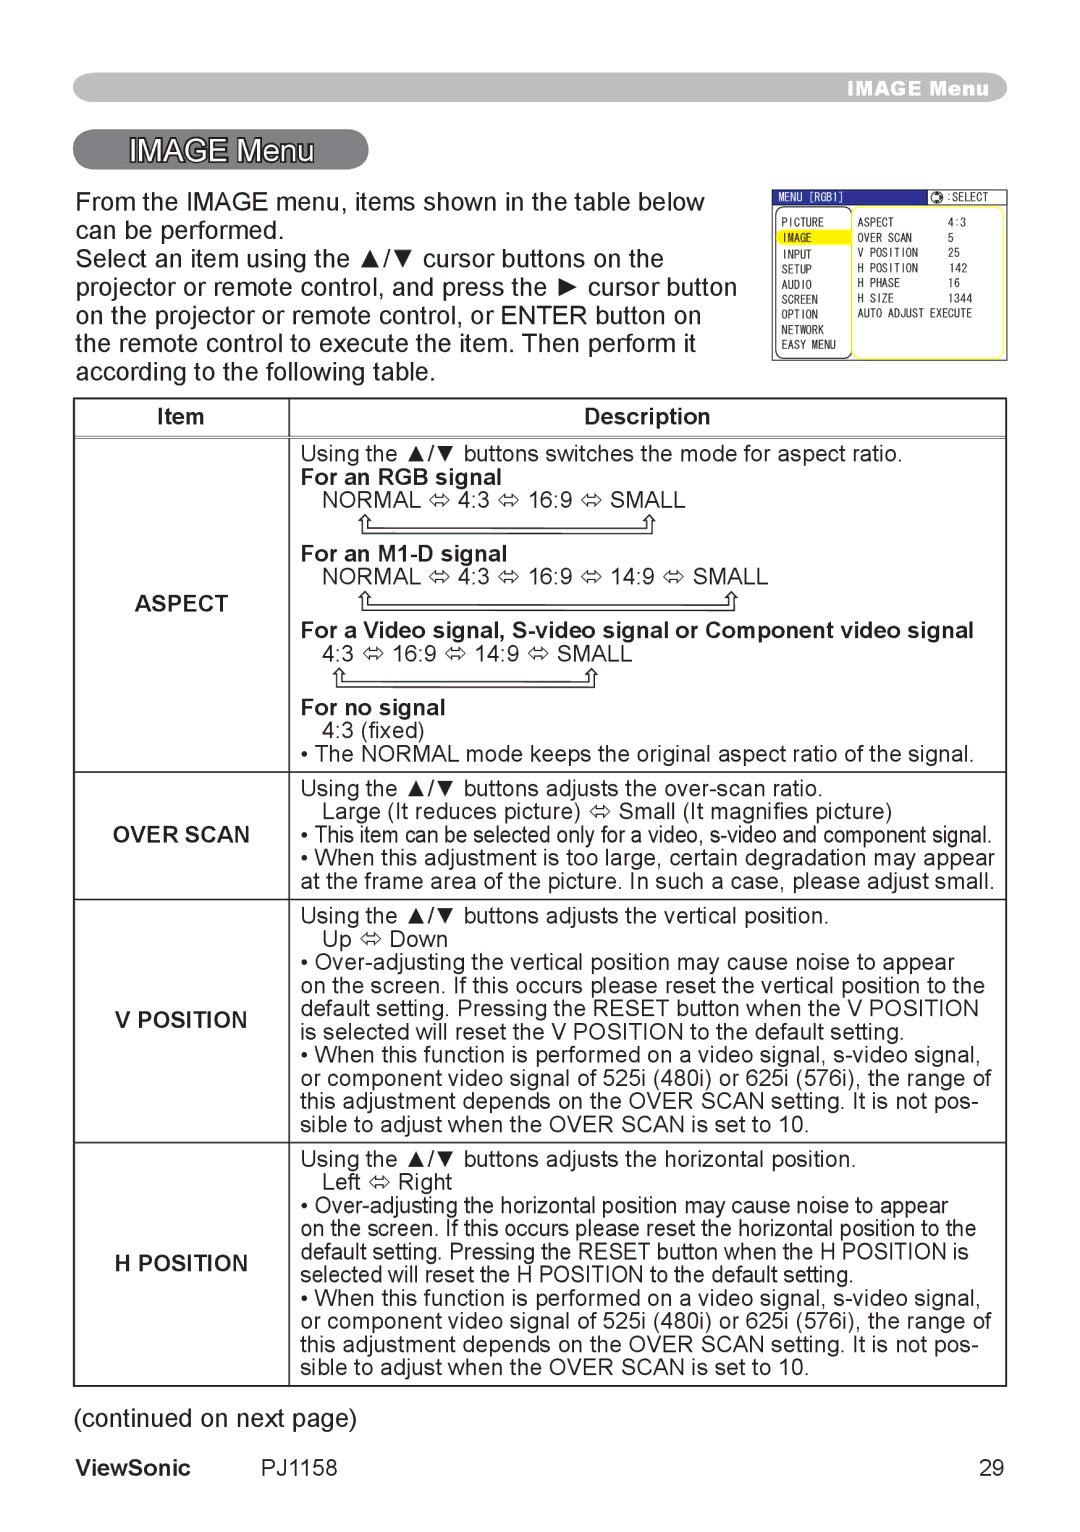
From the IMAGE menu, items shown in the table below can be performed.

Select an item using the ▲/▼ cursor buttons on the projector or remote control, and press the ► cursor button on the projector or remote control, or ENTER button on the remote control to execute the item. Then perform it according to the following table.


/#)


%#0


+

02


6

18'45+<'


2

*


#7&

+1


*#5'


215+6+10 


5%4''012

#76

#&,756 ':'%76'


0''#5;6914/'07-


Item


Description


Using the ▲/▼ buttons switches the mode for aspect ratio.


For an RGB signal


NORMAL ó 4:3

ó 16:9 ó SMALL


For an M1-D signal

ASPECT

NORMAL ó 4:3

ó 16:9 ó 14:9 ó SMALL

For a Video signal, S-video signal or Component video signal


4:3 ó 16:9 ó 14:9 ó SMALL


For no signal


4:3 (fixed)


• The NORMAL mode keeps the original aspect ratio of the signal.


Using the ▲/▼ buttons adjusts the over-scan ratio.

OVER SCAN

Large (It reduces picture) ó Small (It magnifies picture)

• This item can be selected only for a video, s-video and component signal.


• When this adjustment is too large, certain degradation may appear


at the frame area of the picture. In such a case, please adjust small.


Using the ▲/▼ buttons adjusts the vertical position.


Up ó Down


Over-adjusting the vertical position may cause noise to appear


on the screen. If this occurs please reset the vertical position to the

V POSITION

default setting. Pressing the RESET button when the V POSITION

is selected will reset the V POSITION to the default setting.


• When this function is performed on a video signal, s-video signal,


or component video signal of 525i (480i) or 625i (576i), the range of


this adjustment depends on the OVER SCAN setting. It is not pos-


sible to adjust when the OVER SCAN is set to 10.


Using the ▲/▼ buttons adjusts the horizontal position.


Left ó Right


Over-adjusting the horizontal position may cause noise to appear


on the screen. If this occurs please reset the horizontal position to the

H POSITION

default setting. Pressing the RESET button when the H POSITION is

selected will reset the H POSITION to the default setting.


• When this function is performed on a video signal, s-video signal,


or component video signal of 525i (480i) or 625i (576i), the range of


this adjustment depends on the OVER SCAN setting. It is not pos-


sible to adjust when the OVER SCAN is set to 10.

(continued on next page)

ViewSonic

PJ1158

29

Page 34
Image 34
ViewSonic PJ1158 manual Image Menu, Over Scan, Position

PJ1158 specifications

The ViewSonic PJ1158 is a versatile and powerful projector designed to meet the demands of both business and educational environments. Known for its impressive performance and user-friendly features, the PJ1158 stands out as a reliable tool for presentations, lectures, and multimedia presentations.

One of the main features of the PJ1158 is its high brightness capability. With a brightness level of up to 4,000 ANSI lumens, this projector ensures clear and vibrant images even in well-lit rooms. This is crucial for environments where ambient light cannot be completely controlled, making the PJ1158 an excellent choice for conference rooms, classrooms, and auditoriums.

The resolution of the ViewSonic PJ1158 is another highlight, as it supports native XGA (1024x768) resolution. This level of clarity allows for detailed images and text, ensuring that audiences can easily read and comprehend the information presented. Additionally, the PJ1158 supports various resolutions, including up to 1080p, making it compatible with a wide range of video sources and formats.

In terms of connectivity, the PJ1158 offers a comprehensive selection of ports to accommodate various devices. It includes HDMI, VGA, and composite inputs, making it versatile for connecting laptops, DVD players, and other multimedia devices. The inclusion of USB ports also allows for easy plug-and-play functionality, enabling users to present directly from USB drives with minimal setup time.

The PJ1158 utilizes advanced DLP technology, which enhances image quality by providing sharpness, saturation, and contrast. The DLP chip ensures that images are smooth and free from the pixelation that can occur with other projector types. Furthermore, the PJ1158 is equipped with a long-lasting lamp life of up to 15,000 hours, significantly reducing maintenance costs and downtime.

For ease of use, the PJ1158 features a remote control and an intuitive interface, allowing users to navigate menus quickly and adjust settings effortlessly. The integrated 10-watt speaker provides adequate sound output for smaller venues, eliminating the need for external audio systems in many cases.

Overall, the ViewSonic PJ1158 excels in providing a combination of high brightness, resolution, versatile connectivity, and robust build quality. These features make it a solid choice for professionals and educators looking for an efficient and dependable projector for their presentations.