VIVOTEK - A Leading Provider of Multimedia Communication Solutions
Event Settings
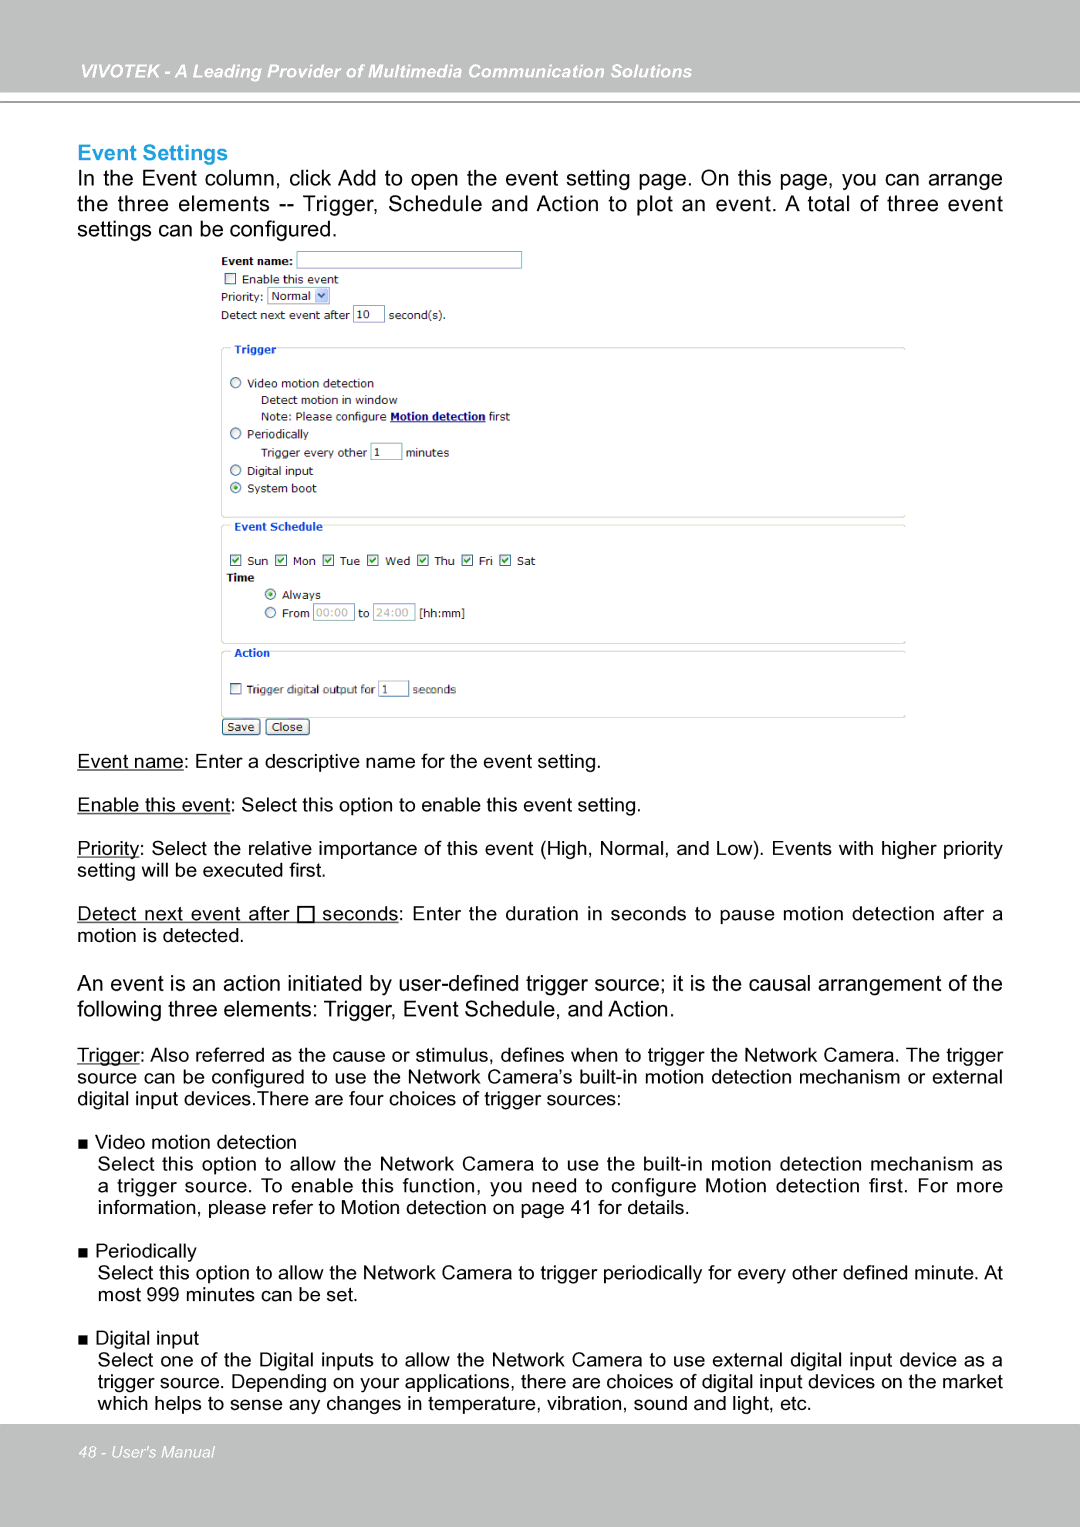
In the Event column, click Add to open the event setting page. On this page, you can arrange the three elements
Event name: Enter a descriptive name for the event setting.
Enable this event: Select this option to enable this event setting.
Priority: Select the relative importance of this event (High, Normal, and Low). Events with higher priority setting will be executed first.
Detect next event after ![]()
![]() seconds: Enter the duration in seconds to pause motion detection after a motion is detected.
seconds: Enter the duration in seconds to pause motion detection after a motion is detected.
An event is an action initiated by
Trigger: Also referred as the cause or stimulus, defines when to trigger the Network Camera. The trigger source can be configured to use the Network Camera’s
■ Video motion detection
Select this option to allow the Network Camera to use the
■ Periodically
Select this option to allow the Network Camera to trigger periodically for every other defined minute. At most 999 minutes can be set.
■ Digital input
Select one of the Digital inputs to allow the Network Camera to use external digital input device as a trigger source. Depending on your applications, there are choices of digital input devices on the market which helps to sense any changes in temperature, vibration, sound and light, etc.
48 - User's Manual