VIVOTEK
■ Keep current value
Follow the steps below to manually set the white balance to compensate for the ambient lighting conditions.
1.Set the White balance to Auto and click Save.
2.Place a sheet of white paper in front of the lens, then allow the Network Camera to adjust the color temperature automatically.
3.Select Keep Current Value to confirm the setting while the white balance is being measured.
4.Click Save to enable the new setting.
Image Adjustment
■Brightness: Adjust the image brightness level, which ranges from
■Saturation: Adjust the image saturation level, which ranges from
■Contrast: Adjust the image contrast level, which ranges from
■Sharpness: Adjust the image sharpness level, which ranges from
You can click Preview to
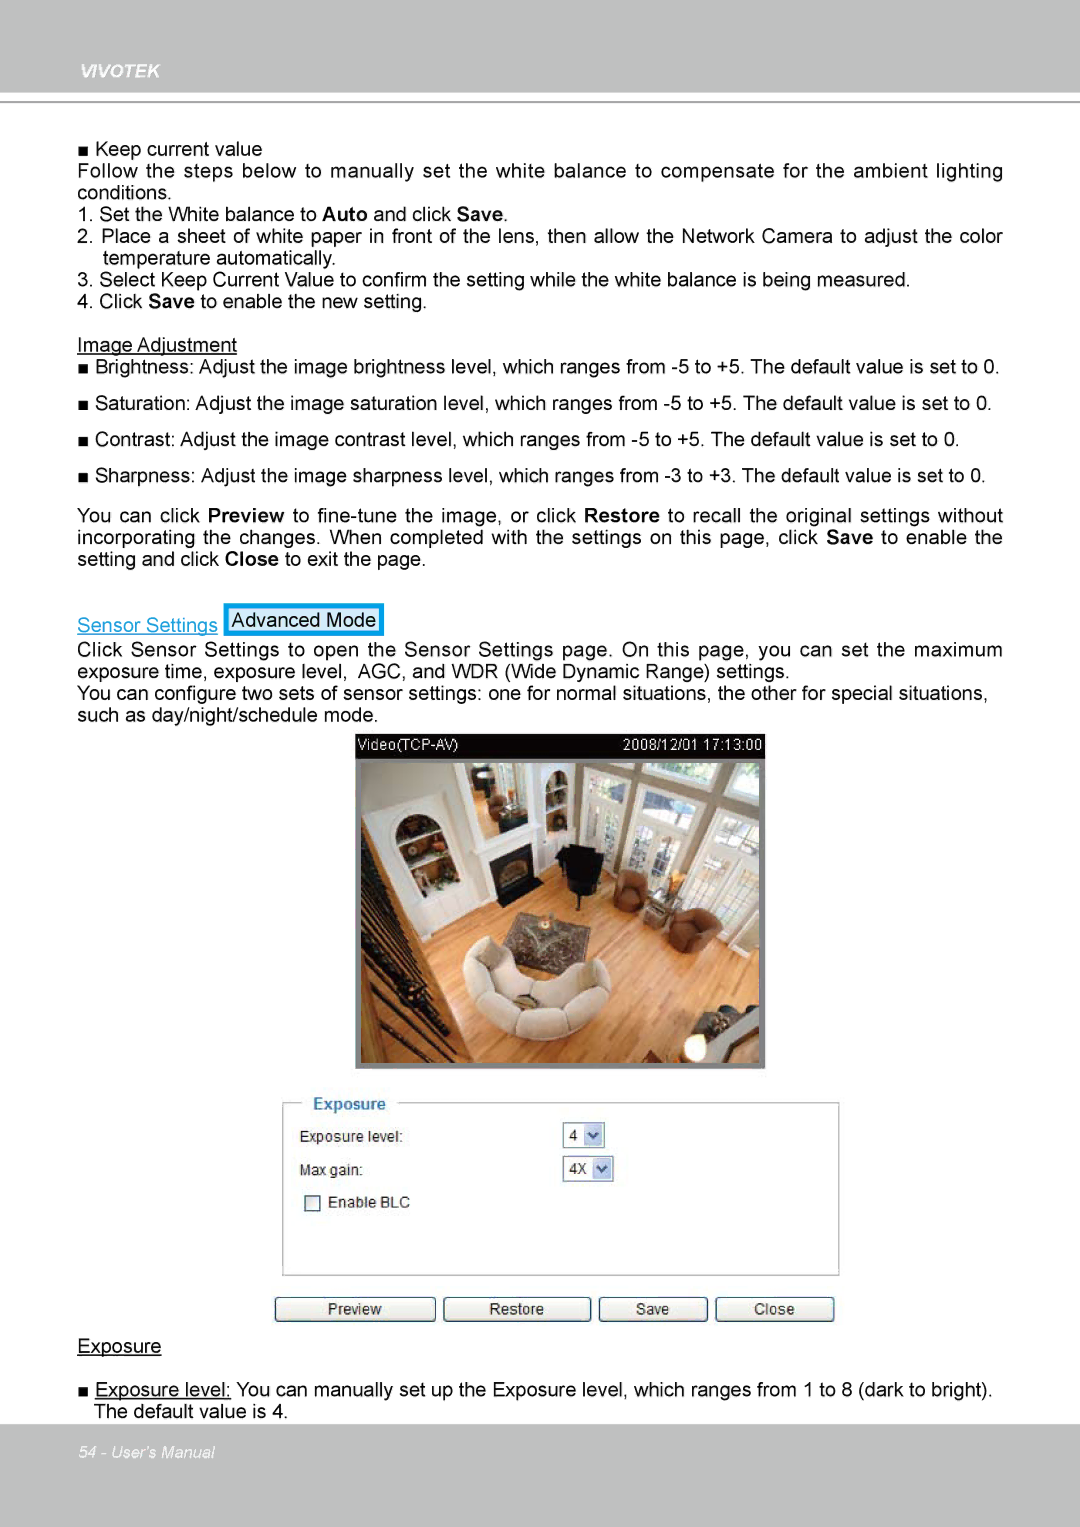
Sensor Settings
Advanced Mode
Click Sensor Settings to open the Sensor Settings page. On this page, you can set the maximum exposure time, exposure level, AGC, and WDR (Wide Dynamic Range) settings.
You can configure two sets of sensor settings: one for normal situations, the other for special situations, such as day/night/schedule mode.
Exposure
■Exposure level: You can manually set up the Exposure level, which ranges from 1 to 8 (dark to bright). The default value is 4.
54 - User's Manual