BUMPER BAR INSTALLATION (RANGES ON CASTERS ONLY)
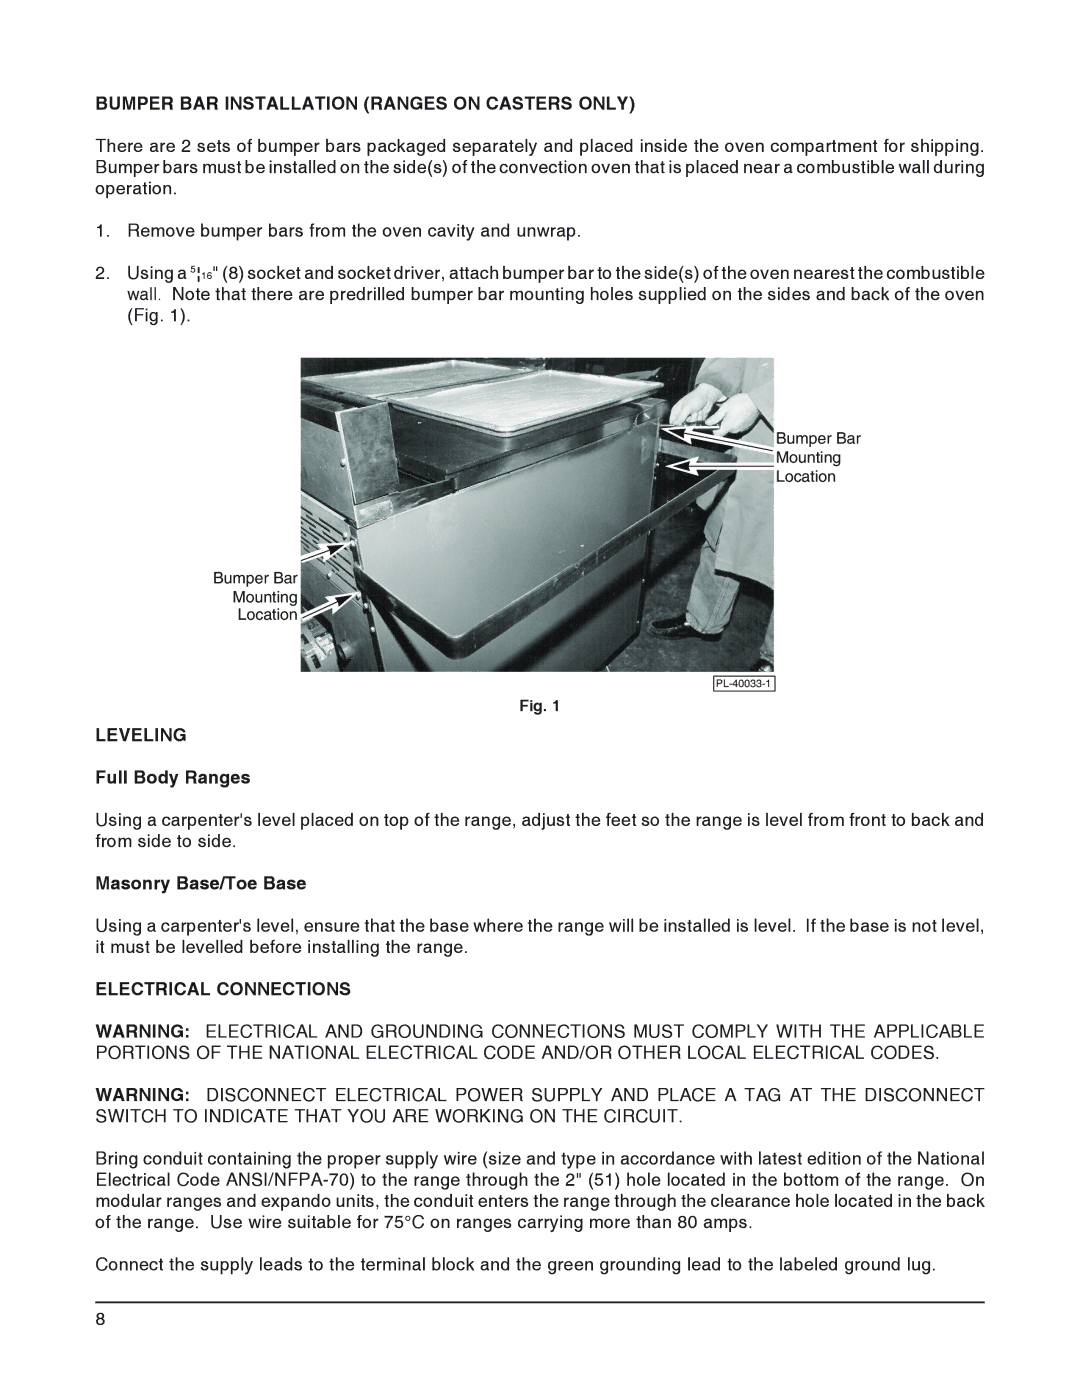
There are 2 sets of bumper bars packaged separately and placed inside the oven compartment for shipping. Bumper bars must be installed on the side(s) of the convection oven that is placed near a combustible wall during operation.
1.Remove bumper bars from the oven cavity and unwrap.
2.Using a 5¦16" (8) socket and socket driver, attach bumper bar to the side(s) of the oven nearest the combustible wall. Note that there are predrilled bumper bar mounting holes supplied on the sides and back of the oven (Fig. 1).
![]() Bumper Bar
Bumper Bar
Mounting
Location
Bumper Bar
Mounting
Location ![]()
Fig. 1
LEVELING
Full Body Ranges
Using a carpenter's level placed on top of the range, adjust the feet so the range is level from front to back and from side to side.
Masonry Base/Toe Base
Using a carpenter's level, ensure that the base where the range will be installed is level. If the base is not level, it must be levelled before installing the range.
ELECTRICAL CONNECTIONS
WARNING: ELECTRICAL AND GROUNDING CONNECTIONS MUST COMPLY WITH THE APPLICABLE PORTIONS OF THE NATIONAL ELECTRICAL CODE AND/OR OTHER LOCAL ELECTRICAL CODES.
WARNING: DISCONNECT ELECTRICAL POWER SUPPLY AND PLACE A TAG AT THE DISCONNECT SWITCH TO INDICATE THAT YOU ARE WORKING ON THE CIRCUIT.
Bring conduit containing the proper supply wire (size and type in accordance with latest edition of the National Electrical Code
Connect the supply leads to the terminal block and the green grounding lead to the labeled ground lug.
8
