INSTALLATION
the new screws (E) supplied with the kit. Tighten screws securely.
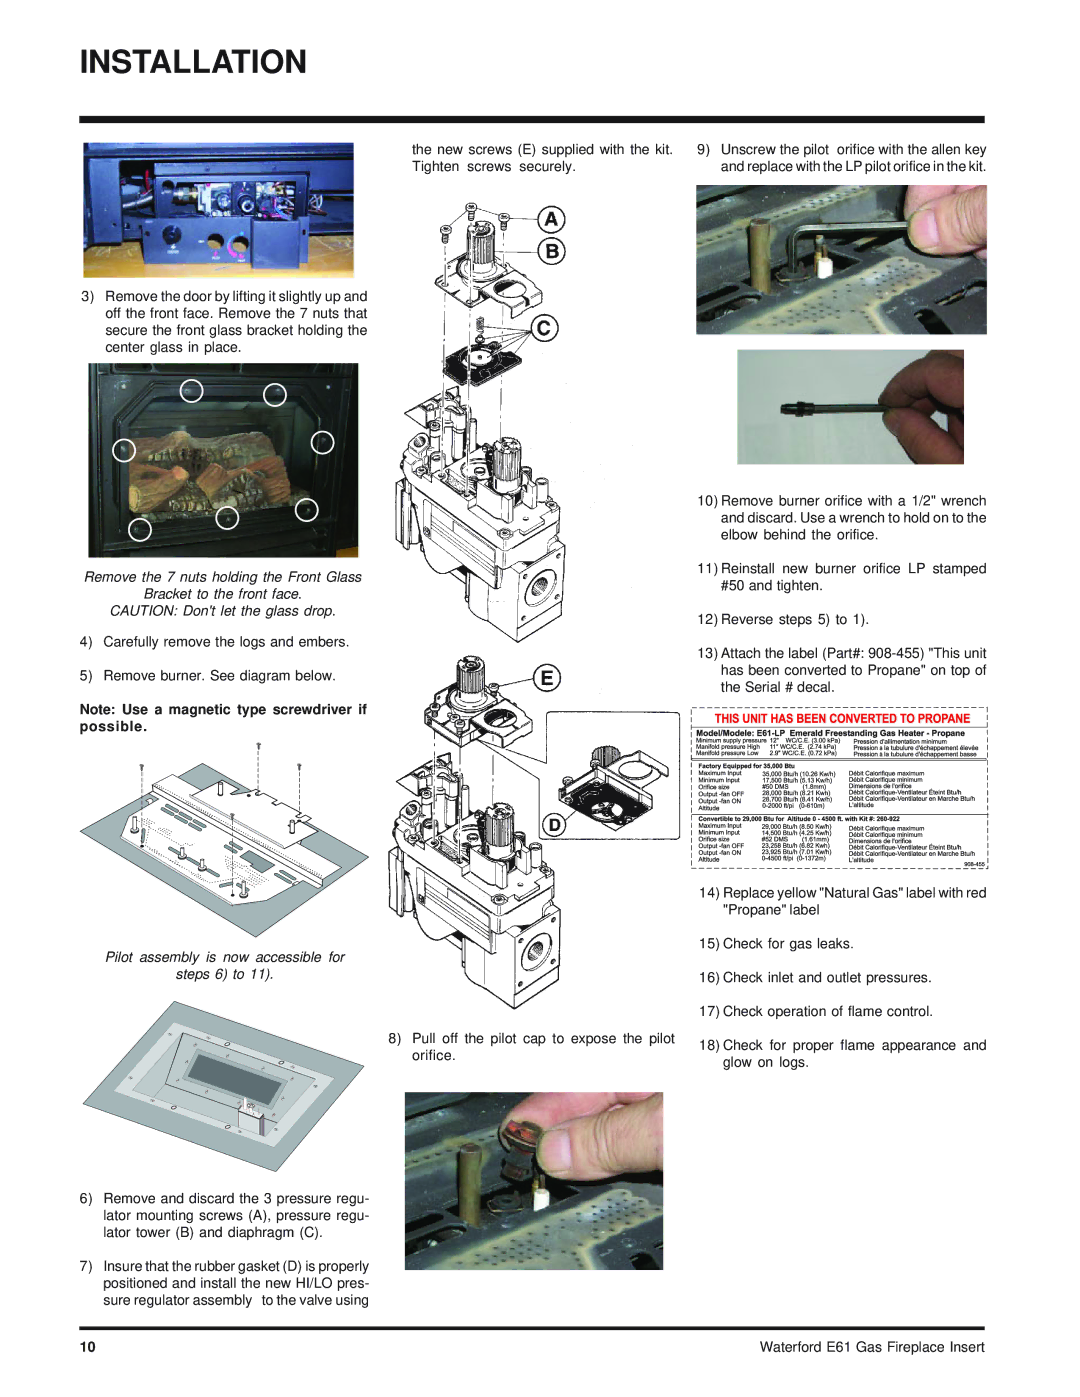
9)Unscrew the pilot orifice with the allen key and replace with the LP pilot orifice in the kit.
3)Remove the door by lifting it slightly up and off the front face. Remove the 7 nuts that secure the front glass bracket holding the center glass in place.
Remove the 7 nuts holding the Front Glass
Bracket to the front face.
CAUTION: Don't let the glass drop.
4)Carefully remove the logs and embers.
5)Remove burner. See diagram below.
Note: Use a magnetic type screwdriver if possible.
Pilot assembly is now accessible for
steps 6) to 11).
8) Pull off the pilot cap to expose the pilot orifice.
6)Remove and discard the 3 pressure regu- lator mounting screws (A), pressure regu- lator tower (B) and diaphragm (C).
7)Insure that the rubber gasket (D) is properly positioned and install the new HI/LO pres- sure regulator assembly to the valve using
10)Remove burner orifice with a 1/2" wrench and discard. Use a wrench to hold on to the elbow behind the orifice.
11)Reinstall new burner orifice LP stamped #50 and tighten.
12)Reverse steps 5) to 1).
13)Attach the label (Part#:
14)Replace yellow "Natural Gas" label with red "Propane" label
15)Check for gas leaks.
16)Check inlet and outlet pressures.
17)Check operation of flame control.
18)Check for proper flame appearance and glow on logs.
10 | Waterford E61 Gas Fireplace Insert |