GROUNDING INSTRUCTIONS
For a grounded, cord-connected washer:
This washer must be grounded. In the event of a malfunction or breakdown, grounding will reduce the risk of electrical shock by providing a path of least resistance for electric current. This washer is equipped with a cord having an
WARNING: Improper connection of the equipment- grounding conductor can result in a risk of electric shock. Check with a qualified electrician or serviceman if you are in doubt as to whether the appliance is properly grounded.
Do not modify the plug provided with the appliance – if it will not fit the outlet, have a proper outlet installed by a qualified electrician.
For a permanently connected washer:
This washer must be connected to a grounded metal, permanent wiring system, or an equipment grounding conductor must be run with the circuit conductors and connected to the
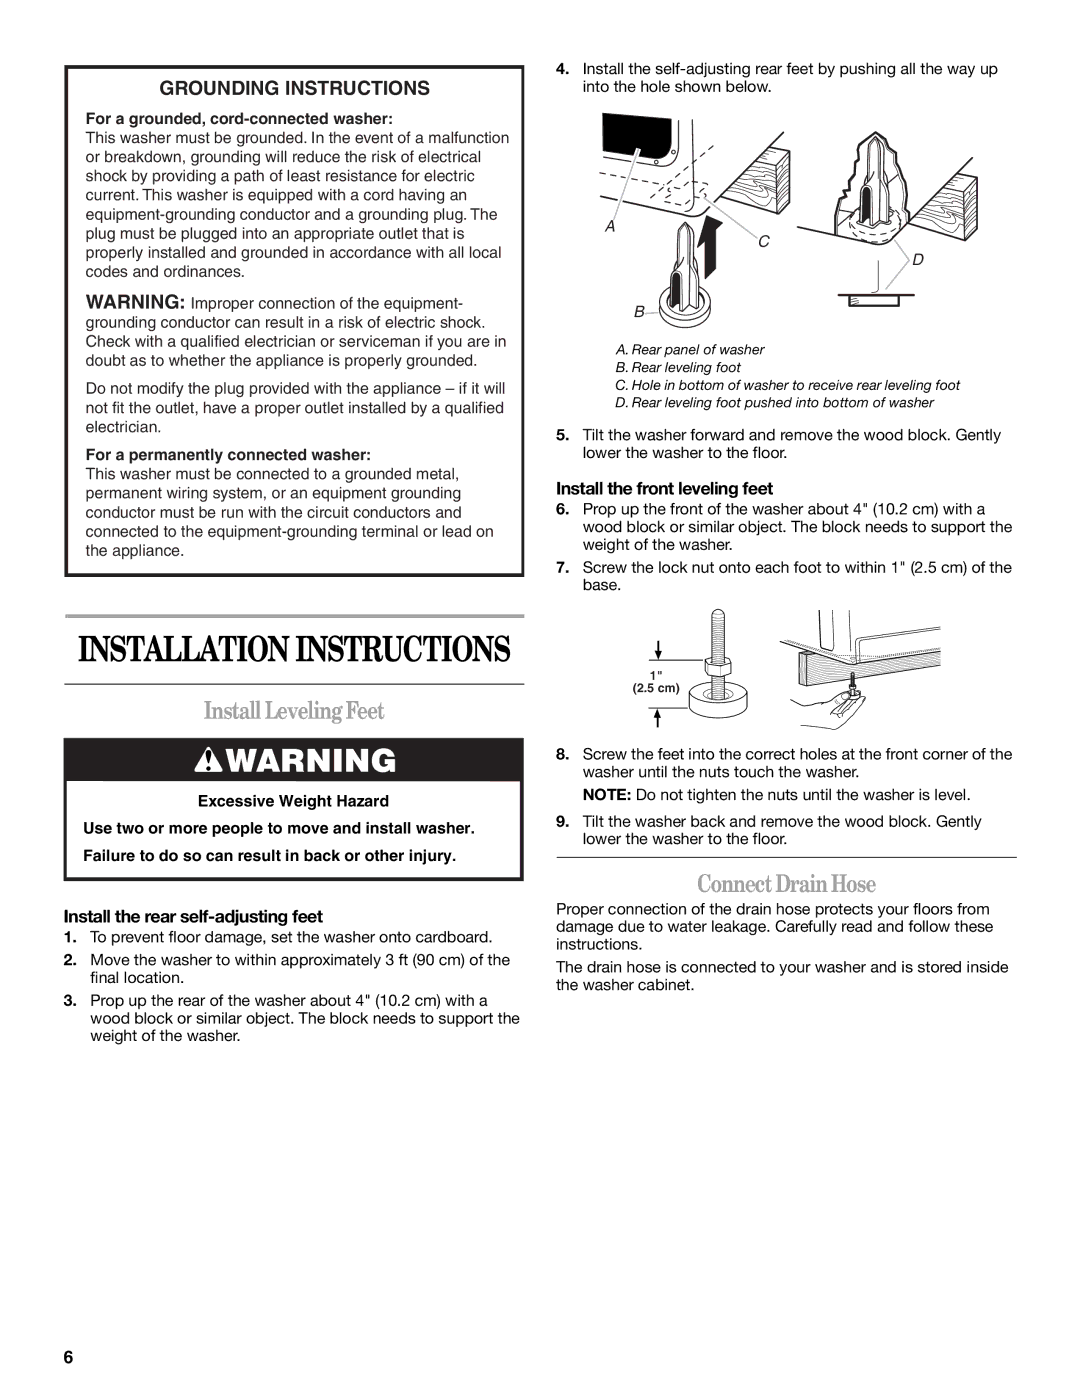
4.Install the
A
C
D
B
A. Rear panel of washer B. Rear leveling foot
C. Hole in bottom of washer to receive rear leveling foot D. Rear leveling foot pushed into bottom of washer
5.Tilt the washer forward and remove the wood block. Gently lower the washer to the floor.
Install the front leveling feet
6.Prop up the front of the washer about 4" (10.2 cm) with a wood block or similar object. The block needs to support the weight of the washer.
7.Screw the lock nut onto each foot to within 1" (2.5 cm) of the base.
INSTALLATION INSTRUCTIONS
Install LevelingFeet
![]() WARNING
WARNING
Excessive Weight Hazard
Use two or more people to move and install washer. Failure to do so can result in back or other injury.
Install the rear self-adjusting feet
1.To prevent floor damage, set the washer onto cardboard.
2.Move the washer to within approximately 3 ft (90 cm) of the final location.
3.Prop up the rear of the washer about 4" (10.2 cm) with a wood block or similar object. The block needs to support the weight of the washer.
1"
(2.5 cm)
8.Screw the feet into the correct holes at the front corner of the washer until the nuts touch the washer.
NOTE: Do not tighten the nuts until the washer is level.
9.Tilt the washer back and remove the wood block. Gently lower the washer to the floor.
ConnectDrainHose
Proper connection of the drain hose protects your floors from damage due to water leakage. Carefully read and follow these instructions.
The drain hose is connected to your washer and is stored inside the washer cabinet.
6