GRIDDLE MODULE
Clean the griddle shortly after removing food and the burner has been turned off.
■Use a metal spatula to scrape reside into the drip tray. To avoid damaging the surface, always rub in the direction of the polish lines. If necessary, scrub the griddle surface with a nonabrasive pad and a little cooking oil or use a griddle screen cleaner (not supplied with this unit).
■Hot, soapy water and/or soft plastic scrub pad.
■After cleaning, dry surface with a soft cloth or sponge. To protect the finish and prevent rust, wipe the entire surface with a light film of cooking oil.
Drip Tray and Area Under Tray
Allow cooktop to cool completely before cleaning.
■Soap and water or nonabrasive cleanser.
■Damp cloth or nonabrasive pad.
TILE BEZEL FEATURE
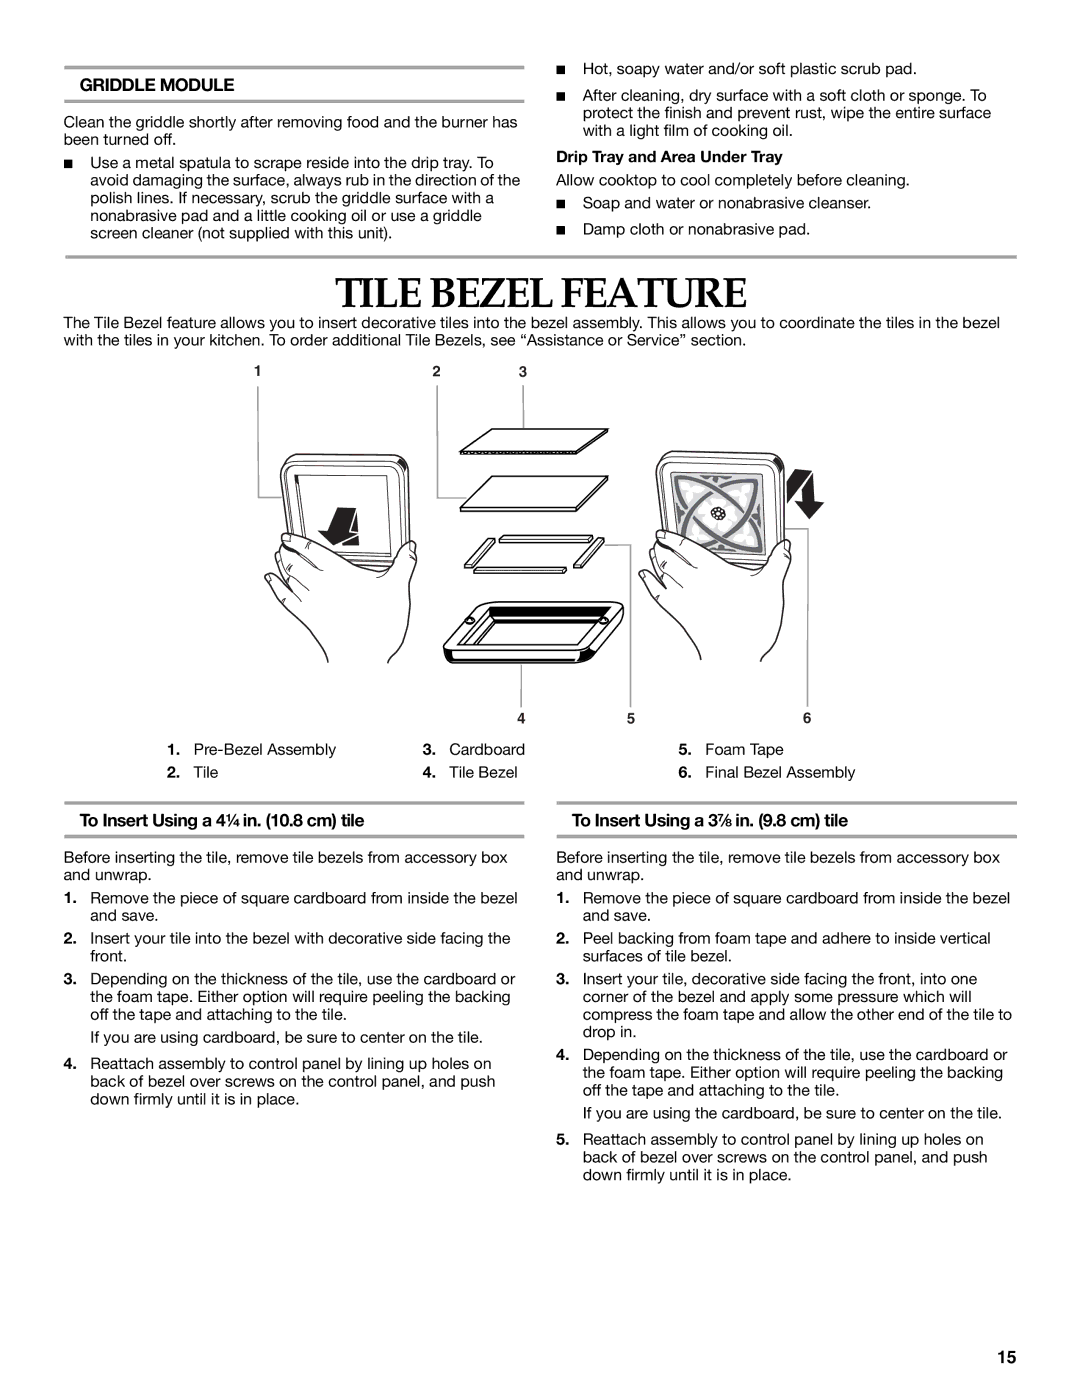
The Tile Bezel feature allows you to insert decorative tiles into the bezel assembly. This allows you to coordinate the tiles in the bezel with the tiles in your kitchen. To order additional Tile Bezels, see “Assistance or Service” section.
1 | 2 | 3 |
|
|
| 4 | 5 |
| 6 |
1. | 3. | Cardboard |
| 5. | Foam Tape | |
2. | Tile | 4. | Tile Bezel |
| 6. | Final Bezel Assembly |
To Insert Using a 4¹⁄₄ in. (10.8 cm) tile
Before inserting the tile, remove tile bezels from accessory box and unwrap.
1.Remove the piece of square cardboard from inside the bezel and save.
2.Insert your tile into the bezel with decorative side facing the front.
3.Depending on the thickness of the tile, use the cardboard or the foam tape. Either option will require peeling the backing off the tape and attaching to the tile.
If you are using cardboard, be sure to center on the tile.
4.Reattach assembly to control panel by lining up holes on back of bezel over screws on the control panel, and push down firmly until it is in place.
To Insert Using a 3⁷⁄₈ in. (9.8 cm) tile
Before inserting the tile, remove tile bezels from accessory box and unwrap.
1.Remove the piece of square cardboard from inside the bezel and save.
2.Peel backing from foam tape and adhere to inside vertical surfaces of tile bezel.
3.Insert your tile, decorative side facing the front, into one corner of the bezel and apply some pressure which will compress the foam tape and allow the other end of the tile to drop in.
4.Depending on the thickness of the tile, use the cardboard or the foam tape. Either option will require peeling the backing off the tape and attaching to the tile.
If you are using the cardboard, be sure to center on the tile.
5.Reattach assembly to control panel by lining up holes on back of bezel over screws on the control panel, and push down firmly until it is in place.
15