
 FIG. 13
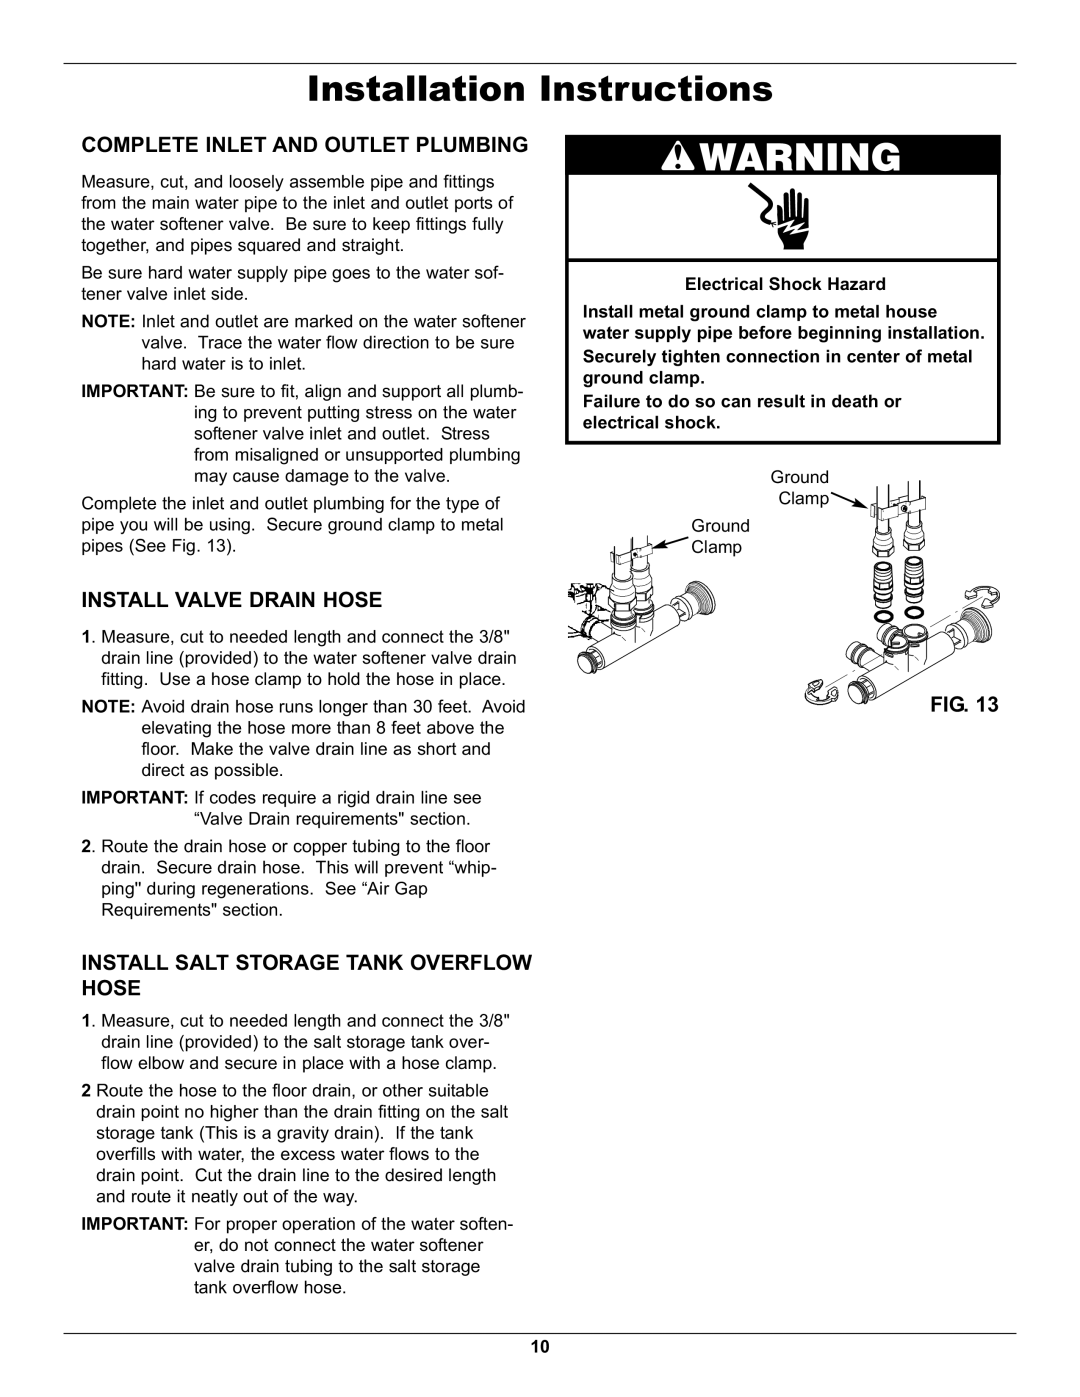
WHES48 specifications
The Whirlpool WHES48 is an advanced water softener designed to provide exceptional water quality for both residential and commercial applications. This model stands out in the market due to its effective water treatment capabilities and user-friendly features.One of the primary characteristics of the WHES48 is its high capacity, which can handle up to 48,000 grains, making it ideal for large families or homes with significant water usage. This capacity allows for efficient removal of hardness minerals such as calcium and magnesium, which can cause scale buildup in plumbing and appliances. By softening the water, the WHES48 helps to extend the lifespan of faucets, water heaters, and other fixtures, providing significant savings over time.
The WHES48 features a modern demand-initiated regeneration system that optimizes salt and water usage. This technology ensures that regeneration only occurs when necessary, reducing waste and conserving resources. The system monitors water consumption patterns, meaning it regenerates during off-peak hours, further enhancing efficiency.
Another significant advantage of the Whirlpool WHES48 is its user-friendly digital control panel. This intuitive interface allows users to easily program the system for their specific needs and provides a clear display of water usage data, remaining salt levels, and system status. Additionally, the softener is equipped with a bypass valve, allowing homeowners to direct hard water to their taps if ever needed.
Installation is a straightforward process, thanks to the compact design and included installation kit. The WHES48 can fit comfortably in most spaces, making it a versatile option for various home layouts.
The Whirlpool WHES48 also emphasizes low maintenance, with a self-cleaning feature that reduces the need for frequent servicing. It uses food-grade salt, making it safe for households with children and pets.
In summary, the Whirlpool WHES48 is a robust and efficient water softener offering advanced features like high capacity, demand-initiated regeneration, and user-friendly monitoring. Combined with its low maintenance requirements, this model serves as an excellent investment for anyone seeking to improve their home’s water quality and protect their plumbing systems.