I N S TA L L AT I O N I N S T R U C T I O N S
DUCT COVER I N S TA L L AT I O N | I N S TA L L FILTERS / GREASE CUPS |
Installing a duct cover assembly will impact all aspects of the hood installa- tion including hood location, ducting, electrical placement and the mounting surface.
IMPORTANT NOTE: If a duct cover is to be used, follow these instructions before installing the wall hood.
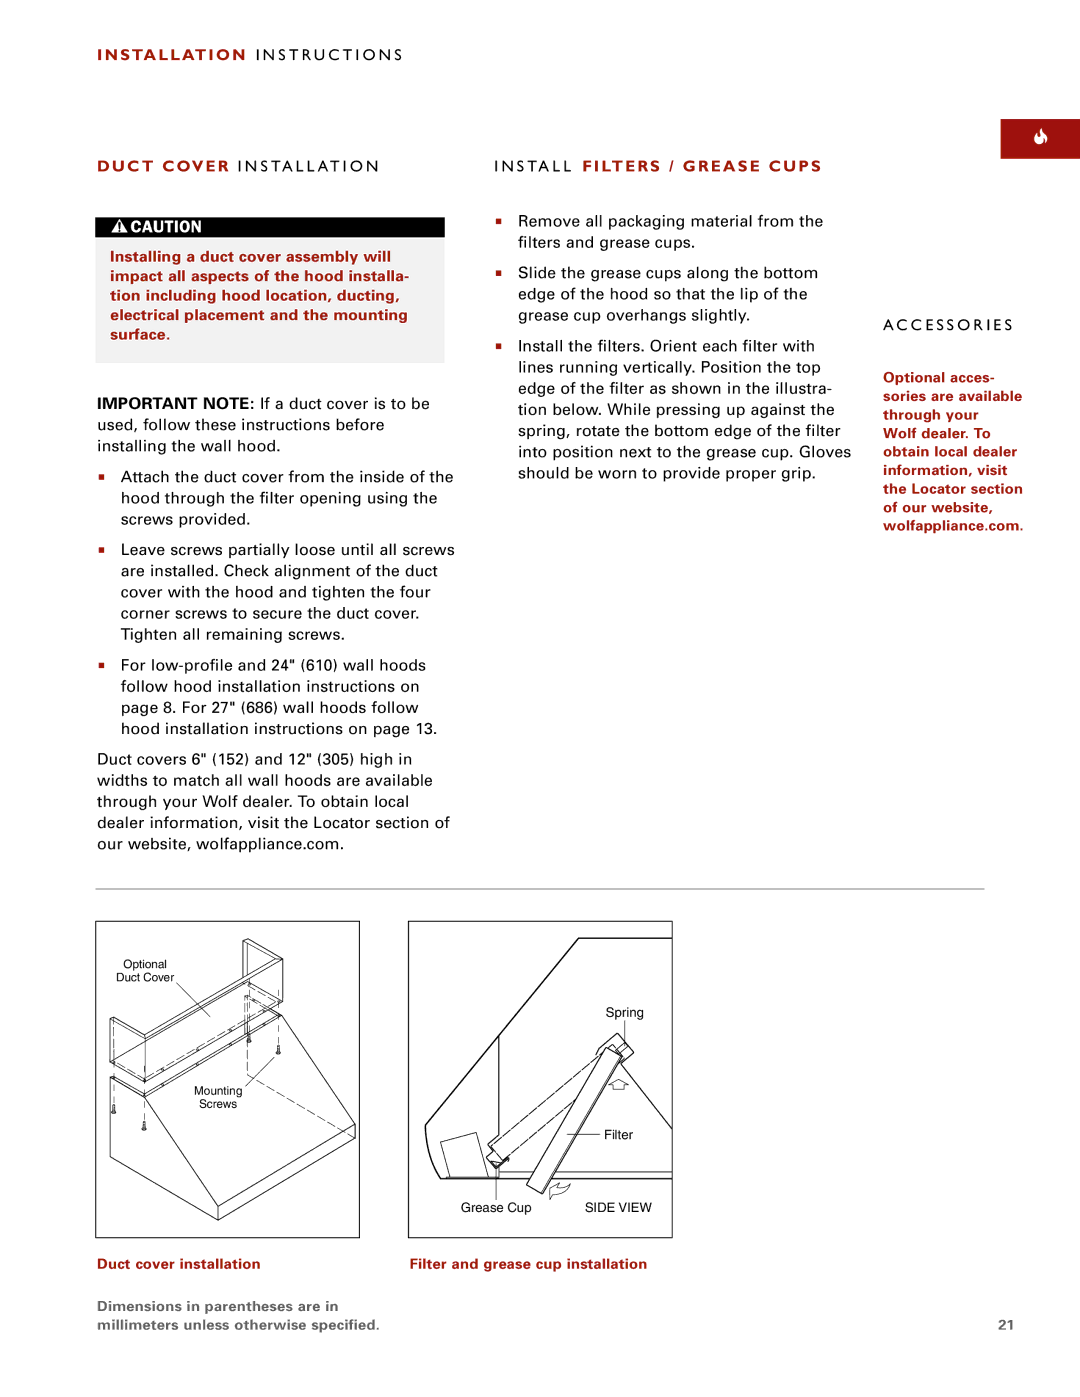
Attach the duct cover from the inside of the hood through the filter opening using the screws provided.
Leave screws partially loose until all screws are installed. Check alignment of the duct cover with the hood and tighten the four corner screws to secure the duct cover. Tighten all remaining screws.
For
Duct covers 6" (152) and 12" (305) high in widths to match all wall hoods are available through your Wolf dealer. To obtain local dealer information, visit the Locator section of our website, wolfappliance.com.
Remove all packaging material from the filters and grease cups.
Slide the grease cups along the bottom edge of the hood so that the lip of the grease cup overhangs slightly.
Install the filters. Orient each filter with lines running vertically. Position the top edge of the filter as shown in the illustra- tion below. While pressing up against the spring, rotate the bottom edge of the filter into position next to the grease cup. Gloves should be worn to provide proper grip.
A C C E S S O R I E S
Optional acces- sories are available through your Wolf dealer. To obtain local dealer information, visit the Locator section of our website, wolfappliance.com.
Optional |
Duct Cover |
Mounting |
Screws |
Duct cover installation
| Spring |
| Filter |
Grease Cup | SIDE VIEW |
Filter and grease cup installation
Dimensions in parentheses are in |
|
millimeters unless otherwise specified. | 21 |