W O L F PRO WALL VENTILATION H O O D S
LOW- PROFILE A N D 24" (610) H O O D S
S T E P 5 : I N S TA L L T H E H O O D
IMPORTANT NOTE: If a backsplash is to be used, it should be installed before the wall hood is mounted.
Align the hood assembly with the marked location.
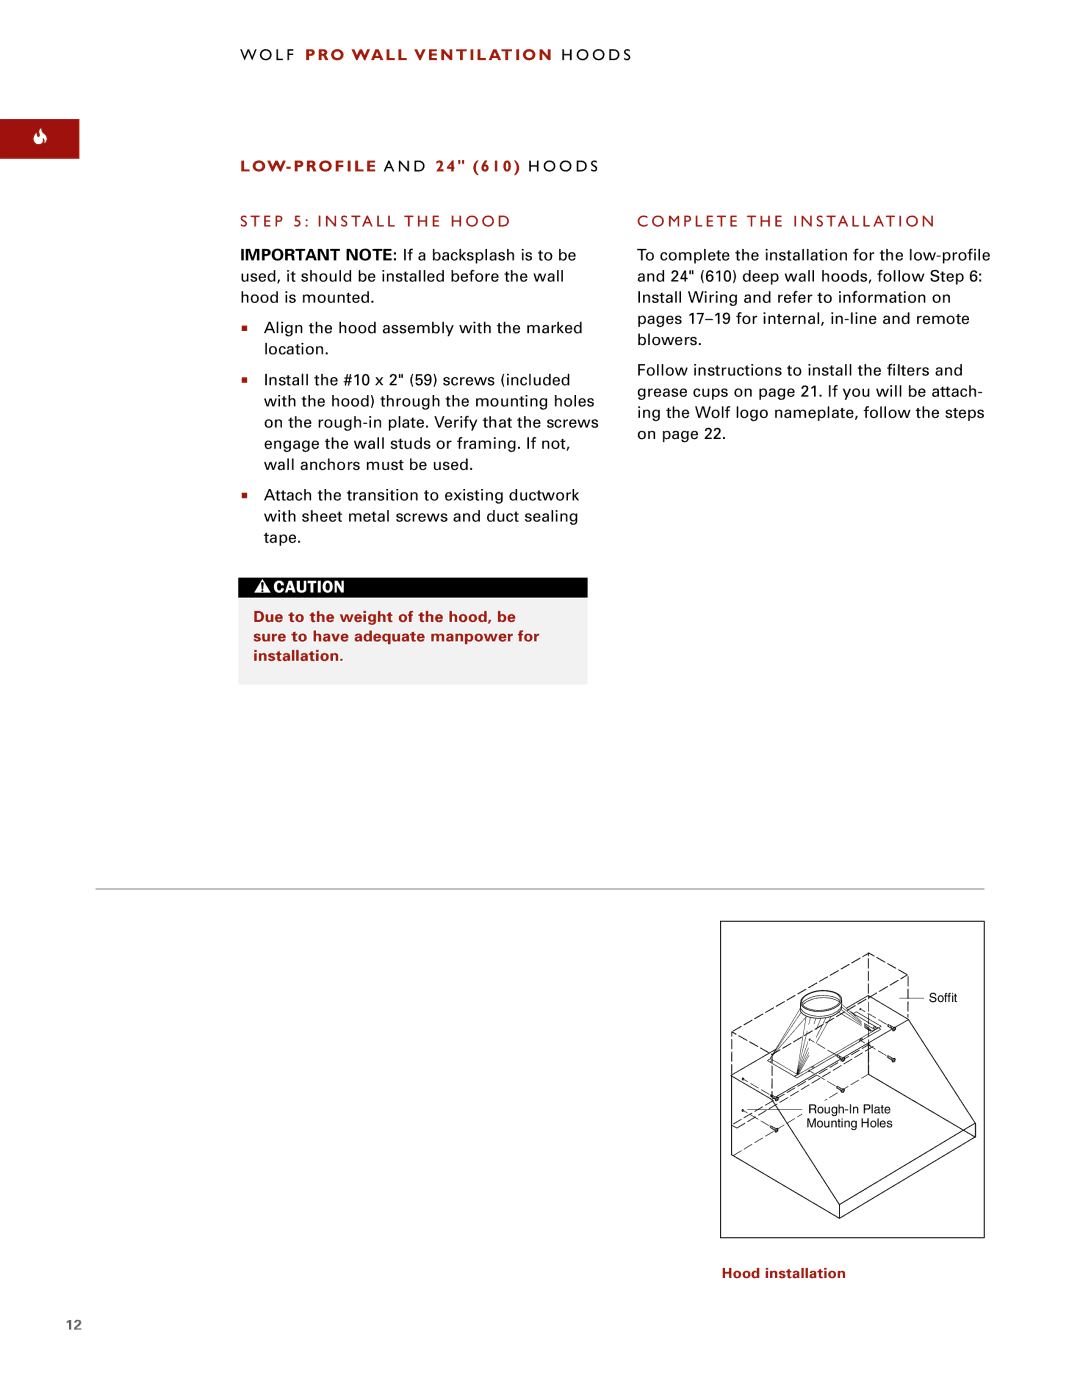
Install the #10 x 2" (59) screws (included with the hood) through the mounting holes on the
Attach the transition to existing ductwork with sheet metal screws and duct sealing tape.
C O M P L E T E T H E I N S TA L L AT I O N
To complete the installation for the
Follow instructions to install the filters and grease cups on page 21. If you will be attach- ing the Wolf logo nameplate, follow the steps on page 22.
Due to the weight of the hood, be sure to have adequate manpower for installation.
Soffit |
Mounting Holes |
Hood installation
12