OWNERS SERVICE
![]() WARNING
WARNING
On
Before performing any service or maintenance, lower equipment to ground or block securely, turn off engine, remove key, and disconnect driveline from tractor PTO.
Keep all persons away from operator control area while performing adjustments, service, or maintenance.
![]() CAUTION
CAUTION
Always wear relatively tight and belted clothing to avoid getting caught in moving parts. Wear sturdy,
The information in this section is written for operators who possess basic mechanical skills. Should you need help, your dealer has trained service technicians avail- able. For your protection, read and follow all safety information in this manual.
LUBRICATION INFORMATION
The accompanying chart gives the frequency of lubri- cation in operating hours, based on normal conditions. Severe or unusual conditions may require more fre- quent lubrication. See Figure 8.
Do not let excess grease collect on or around parts, particularly when operating in sandy areas.
Use an SAE 90W gear lube in gearbox.
Use a lithium grease of No. 2 consistency with a MOLY (molybdenum disulfide) additive for all locations. Be sure to clean fittings thoroughly before attaching grease gun. When applied according to the lubrication chart, one good pump of most guns is sufficient. Do not overgrease.
Daily lubrication of the PTO slip joint is necessary. Fail- ure to maintain proper lubrication can result in damage
to
BLADE SERVICING
![]() WARNING
WARNING
On
Blocking the cutter before working underneath provides additional safety. If a mechanical or hydraulic failure occurs, the blocks will support the cutter and prevent anyone under it from being crushed.
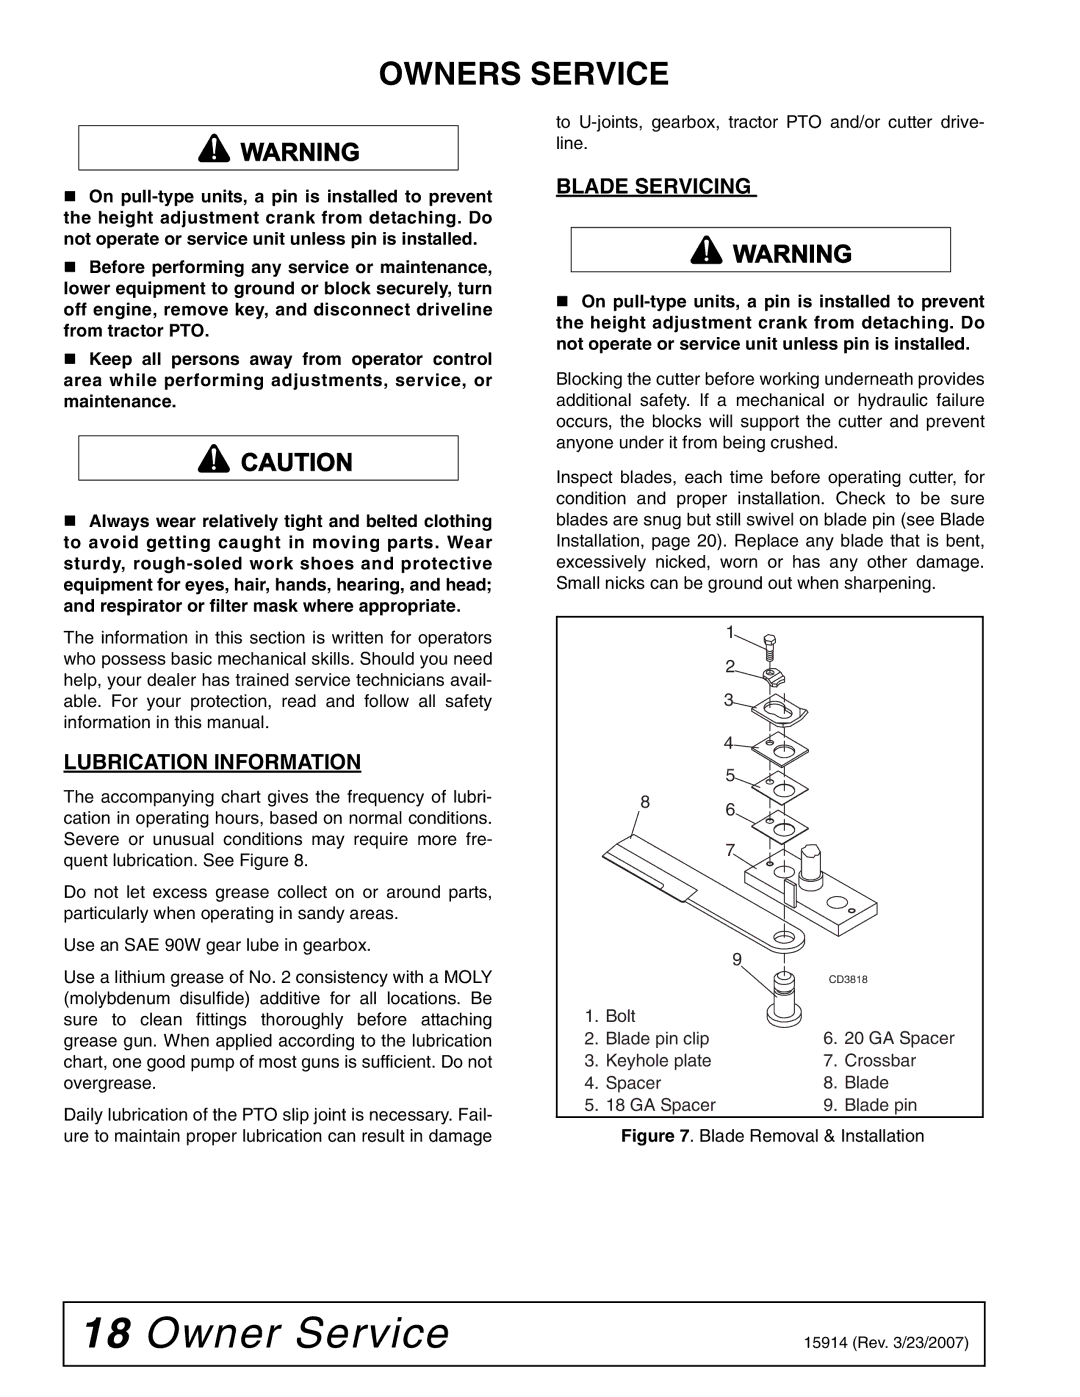
Inspect blades, each time before operating cutter, for condition and proper installation. Check to be sure blades are snug but still swivel on blade pin (see Blade Installation, page 20). Replace any blade that is bent, excessively nicked, worn or has any other damage. Small nicks can be ground out when sharpening.
1
2
3
4
5
| 8 | 6 |
|
|
|
| |
|
| 7 |
|
|
| 9 |
|
|
| CD3818 | |
1. | Bolt |
|
|
2. | Blade pin clip | 6. | 20 GA Spacer |
3. | Keyhole plate | 7. | Crossbar |
4. | Spacer | 8. Blade | |
5. | 18 GA Spacer | 9. | Blade pin |
Figure 7. Blade Removal & Installation
18 Owner Service | 15914 (Rev. 3/23/2007) |
|
|
