BELT SERVICE
![]() CAUTION
CAUTION
Use care when installing or removing belt from
Belt Adjustment (Figure 10)
A
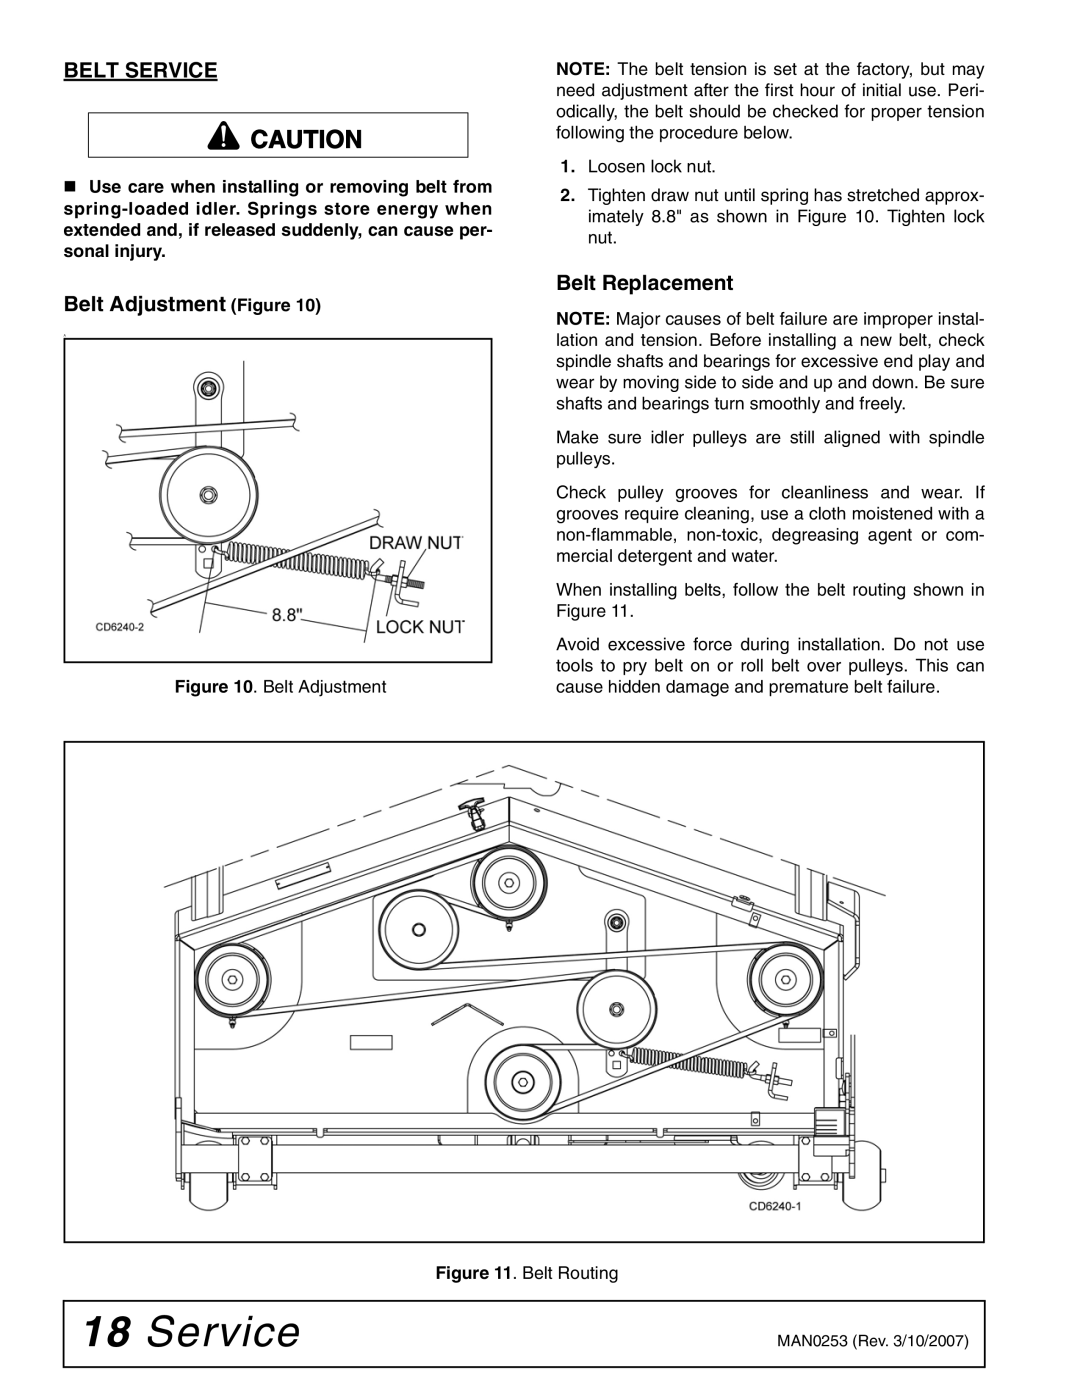
Figure 10. Belt Adjustment
NOTE: The belt tension is set at the factory, but may need adjustment after the first hour of initial use. Peri- odically, the belt should be checked for proper tension following the procedure below.
1.Loosen lock nut.
2.Tighten draw nut until spring has stretched approx- imately 8.8" as shown in Figure 10. Tighten lock nut.
Belt Replacement
NOTE: Major causes of belt failure are improper instal- lation and tension. Before installing a new belt, check spindle shafts and bearings for excessive end play and wear by moving side to side and up and down. Be sure shafts and bearings turn smoothly and freely.
Make sure idler pulleys are still aligned with spindle pulleys.
Check pulley grooves for cleanliness and wear. If grooves require cleaning, use a cloth moistened with a
When installing belts, follow the belt routing shown in Figure 11.
Avoid excessive force during installation. Do not use tools to pry belt on or roll belt over pulleys. This can cause hidden damage and premature belt failure.
Figure 11. Belt Routing
18 Service | MAN0253 (Rev. 3/10/2007) |
|
|
