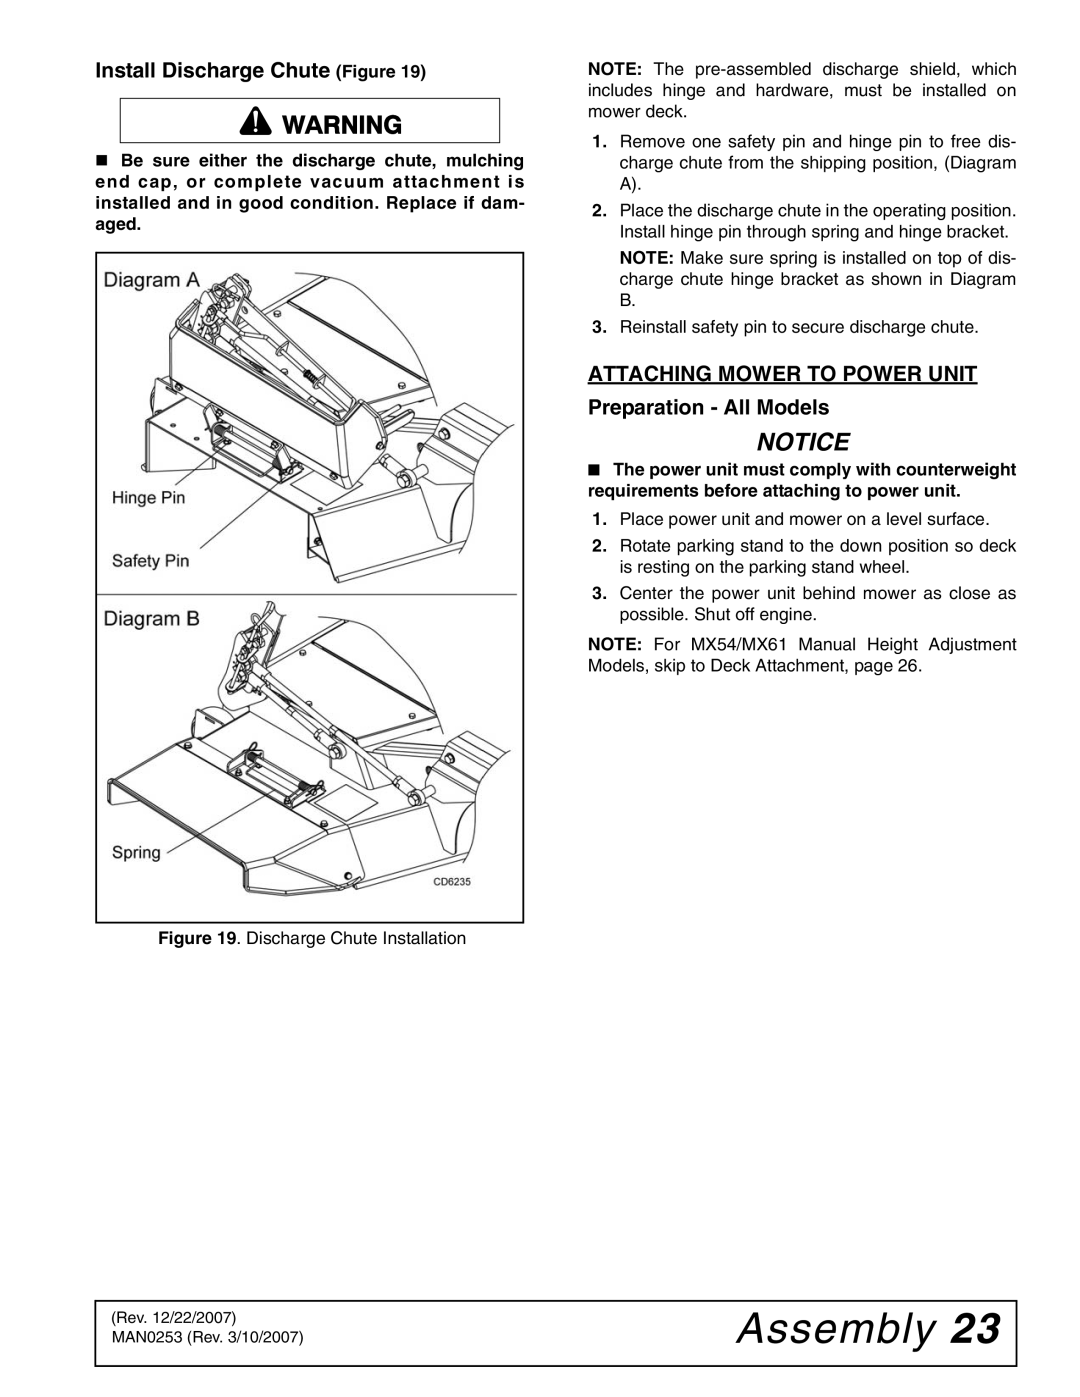
Install Discharge Chute (Figure 19)
Be sure either the discharge chute, mulching end cap, or complete vacuum attachment is installed and in good condition. Replace if dam- aged.
Figure 19. Discharge Chute Installation
NOTE: The
1.Remove one safety pin and hinge pin to free dis- charge chute from the shipping position, (Diagram A).
2.Place the discharge chute in the operating position. Install hinge pin through spring and hinge bracket.
NOTE: Make sure spring is installed on top of dis- charge chute hinge bracket as shown in Diagram B.
3.Reinstall safety pin to secure discharge chute.
ATTACHING MOWER TO POWER UNIT
Preparation - All Models
NOTICE
■The power unit must comply with counterweight requirements before attaching to power unit.
1.Place power unit and mower on a level surface.
2.Rotate parking stand to the down position so deck is resting on the parking stand wheel.
3.Center the power unit behind mower as close as possible. Shut off engine.
NOTE: For MX54/MX61 Manual Height Adjustment Models, skip to Deck Attachment, page 26.
(Rev. 12/22/2007) MAN0253 (Rev. 3/10/2007)