OPERATION
Make sure the driveline
Do not operate power unit with attachment removed. Attachment is required for power unit stability.
![]() CAUTION
CAUTION
Always wear relatively tight and belted clothing to avoid getting caught in moving parts. Wear sturdy,
ATTACHING MOWER TO POWER UNIT
NOTICE
■The power unit must comply with counterweight requirements before attaching to power unit.
1.Place power unit and mower on a level surface.
2.Rotate parking stand to the down position so deck is resting on the parking stand wheel.
3.Center the power unit behind mower as close as possible. Shut off engine.
4.Open dump valves on both hydraulic pumps to allow power unit to be moved by hand. See Mow’n Machine power unit manual for location of dump valves.
NOTE: If you have a PowerTilt™ model, the wiring har- ness must be connected before raising or lowering the deck to align the arm with the mounting bracket. See Connect Wiring Harness - PowerTilt™ Units MXT Deck SN 1100885 and below, page 24 for instructions.
5.Use the height adjustment handle (or height adjust- ment switch on PowerTilt models) to raise or lower rear pivot lift arm and align arm with mounting brackets.
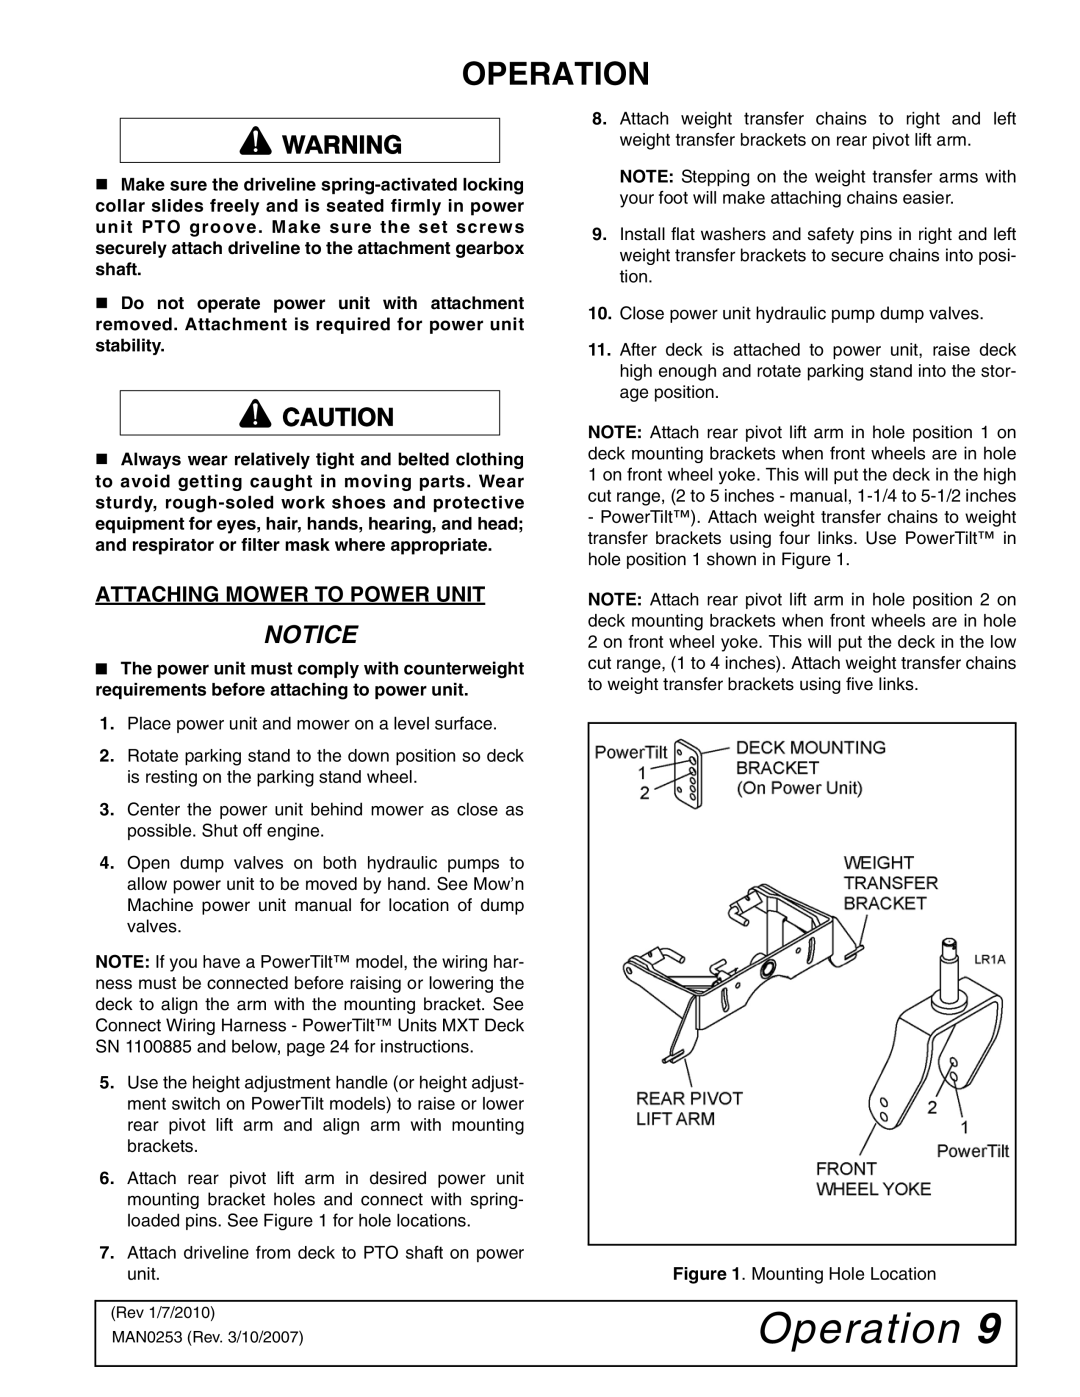
6.Attach rear pivot lift arm in desired power unit mounting bracket holes and connect with spring- loaded pins. See Figure 1 for hole locations.
7.Attach driveline from deck to PTO shaft on power unit.
8.Attach weight transfer chains to right and left weight transfer brackets on rear pivot lift arm.
NOTE: Stepping on the weight transfer arms with your foot will make attaching chains easier.
9.Install flat washers and safety pins in right and left weight transfer brackets to secure chains into posi- tion.
10.Close power unit hydraulic pump dump valves.
11.After deck is attached to power unit, raise deck high enough and rotate parking stand into the stor- age position.
NOTE: Attach rear pivot lift arm in hole position 1 on deck mounting brackets when front wheels are in hole 1 on front wheel yoke. This will put the deck in the high cut range, (2 to 5 inches - manual,
-PowerTilt™). Attach weight transfer chains to weight transfer brackets using four links. Use PowerTilt™ in hole position 1 shown in Figure 1.
NOTE: Attach rear pivot lift arm in hole position 2 on deck mounting brackets when front wheels are in hole 2 on front wheel yoke. This will put the deck in the low cut range, (1 to 4 inches). Attach weight transfer chains to weight transfer brackets using five links.
Figure 1. Mounting Hole Location
(Rev 1/7/2010)
MAN0253 (Rev. 3/10/2007)