W1701 1HP Shaper
Table Spacer Kit
The provided table spacer kit allows you to modify your shaper for use as a router table by raising the table. A higher table will allow you to make shallow cuts and uti- lize the upper blade area of most router bits with stan-
To install the table spacer kit, do these steps:
1.DISCONNECT SHAPER FROM POWER SOURCE!
2.Remove the spindle lock nut and any cutters or rub collars installed on the spindle.
3.Remove table from the shaper by undoing the seven bolts that secure it in place.
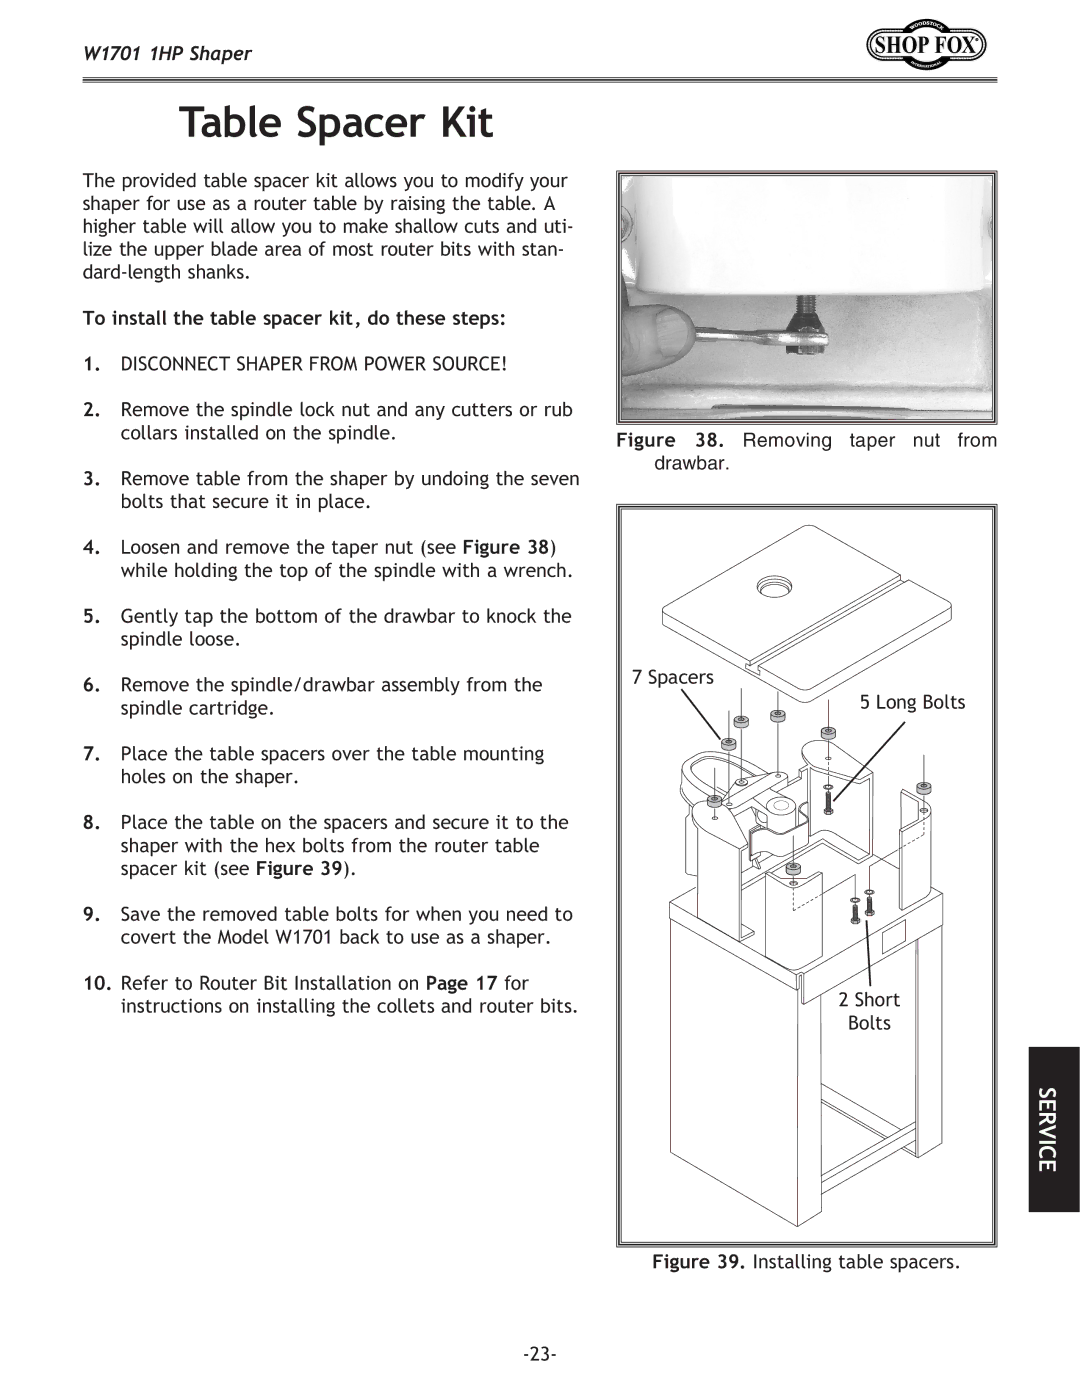
4.Loosen and remove the taper nut (see Figure 38) while holding the top of the spindle with a wrench.
5.Gently tap the bottom of the drawbar to knock the spindle loose.
6.Remove the spindle/drawbar assembly from the spindle cartridge.
7.Place the table spacers over the table mounting holes on the shaper.
8.Place the table on the spacers and secure it to the shaper with the hex bolts from the router table spacer kit (see Figure 39).
9.Save the removed table bolts for when you need to covert the Model W1701 back to use as a shaper.
10.Refer to Router Bit Installation on Page 17 for instructions on installing the collets and router bits.
Figure 38. Removing taper nut from drawbar.
���������
������������
�������
�����
SERVICE
