Air Hose Installation
Push your air supply hose on to the air pressure regulator inlet fitting, and clamp it in place with a hose clamp as shown in Figure 7. If you prefer, you can replace the included air nozzle with a 3⁄8" male quick connect air coupling.
When the air hose is installed, pull up and rotate the regulator air pressure knob until the gauge reads 57 PSI then push down. DO NOT attempt to regulate the air pressure with the ON/OFF air supply lever. This control only shuts off air pressure to the machine.
NOTICE
To achieve maximum life of the air system o- rings, gaskets, and components, keep the air pressure shut off when not using the sander, and DO NOT exceed75 PSI.
Sanding Belt Installation
Before installing belt, clean the protective grease from the upper metal sanding belt roller as per the “Cleaning Machine” instructions.
To install the sanding belt, do these steps:
1.
2.Turn and remove the lever and support spacer. See Figure 8.
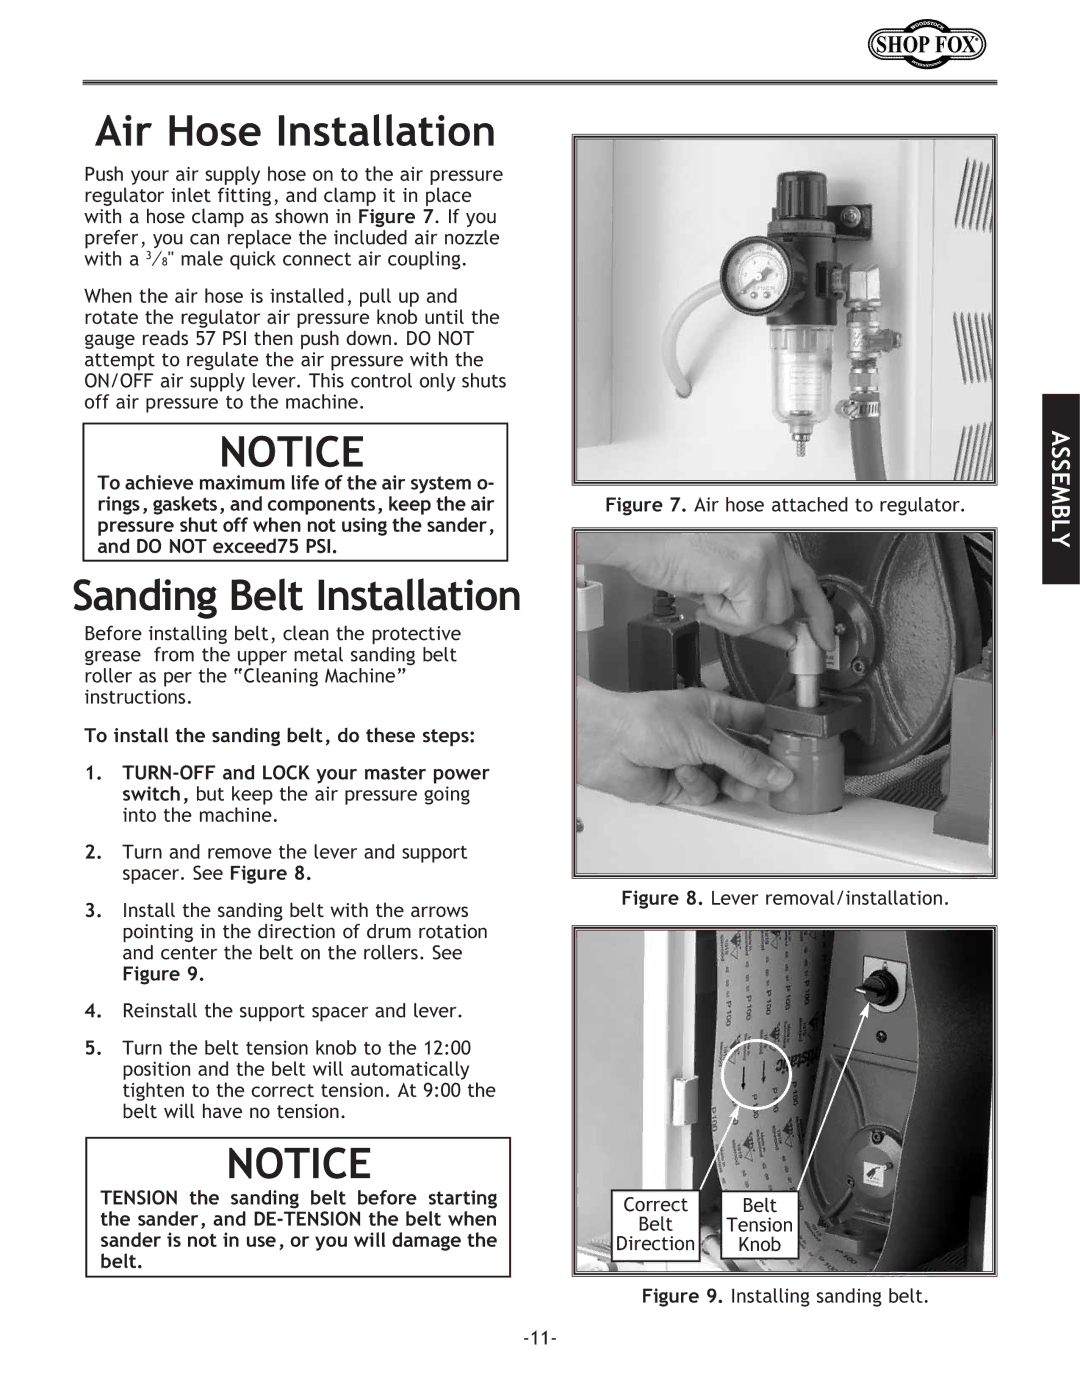
3.Install the sanding belt with the arrows pointing in the direction of drum rotation and center the belt on the rollers. See
Figure 9.
4.Reinstall the support spacer and lever.
5.Turn the belt tension knob to the 12:00 position and the belt will automatically tighten to the correct tension. At 9:00 the belt will have no tension.
NOTICE
TENSION the sanding belt before starting the sander, and
Figure 7. Air hose attached to regulator.
Figure 8. Lever removal/installation.
|
|
|
|
|
|
|
|
|
|
| Correct |
| Belt |
|
| Belt |
| Tension |
|
| Direction |
| Knob |
|
|
|
|
|
|
|
|
|
|
|
|
|
|
|
|
|
|
|
|
|
Figure 9. Installing sanding belt.
ASSEMBLY