| Names |
|
|
|
|
|
|
| Channel+ | Click | Access all channels in upper direction |
| BAND | Press | Skip channels’ bands |
|
|
|
|
| Channel- | Click | Access all channels in lower direction |
| SCAN | Press | Enter scan mode |
|
|
|
|
| Program- | Click | Skip to previous prefixed program |
| Volume- | Press | Decrease volume |
|
|
|
|
| Program+ | Click | Skip to next prefixed program |
| Volume+ | Press | Increase volume |
|
|
|
|
| Ok | Click | Display status |
|
| Press | Store or erase program |
|
|
|
|
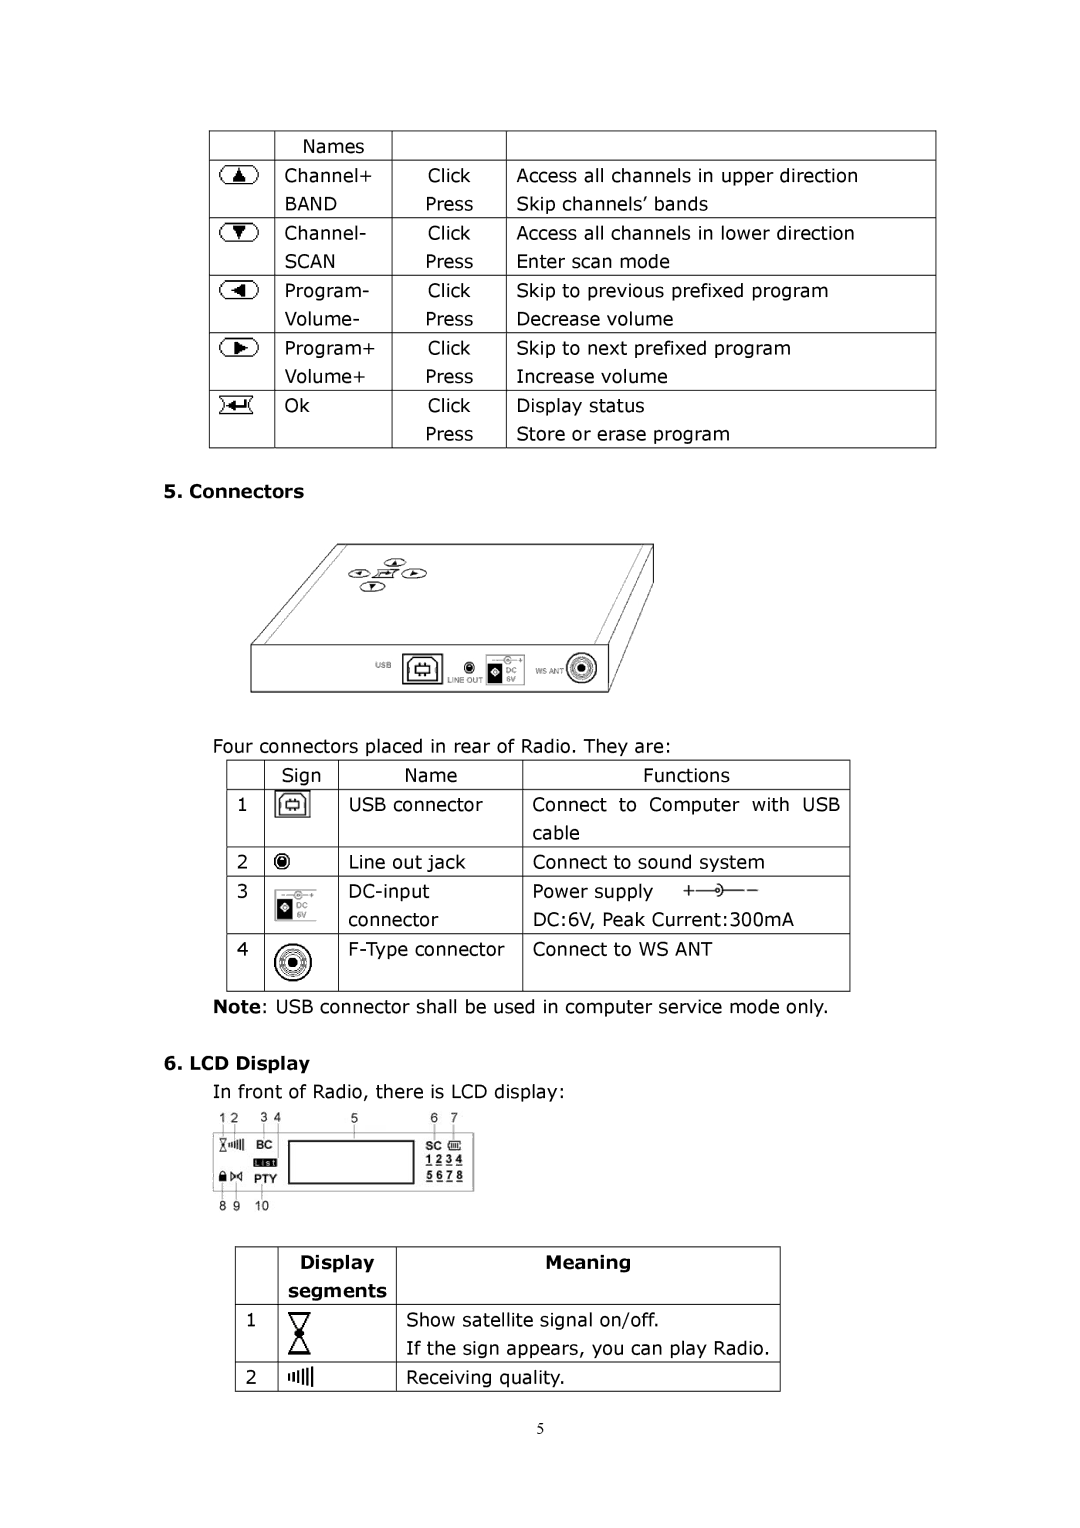
5. Connectors
Four connectors placed in rear of Radio. They are:
| Sign | Name | Functions |
|
|
|
|
1 |
| USB connector | Connect to Computer with USB |
|
|
| cable |
|
|
|
|
2 |
| Line out jack | Connect to sound system |
|
|
|
|
3 |
| Power supply | |
|
| connector | DC:6V, Peak Current:300mA |
|
|
|
|
4 |
| Connect to WS ANT | |
|
|
|
|
Note: USB connector shall be used in computer service mode only.
6. LCD Display
In front of Radio, there is LCD display:
| Display | Meaning |
| segments |
|
|
|
|
1 |
| Show satellite signal on/off. |
|
| If the sign appears, you can play Radio. |
|
|
|
2 |
| Receiving quality. |
|
|
|
5
