CONNECTIONS
■Composite video jack <A>
Connect VIDEO OUT (VIDEO) jack of this unit to the video input jack of your AV receiver, and then to that of your TV using the supplied video pin cable.
■S-video jack <B>
■Component video jacks <C>
Component video connections achieve higher fidelity color reproduction than
If your receiver does not have component output jacks, you can achieve a better video image by connecting the component output jacks of this unit directly to the component input jacks of your TV.
■SCART terminal <D>
(U.K., Europe, and Russia models only)
If your TV has only a terminal for video input, you can connect the TV directly to this unit.
Connect AV terminal of this unit to SCART input terminal of your TV using a commercially available SCART cable.
Notes
•Ensure that the “TV” indication on SCART cable is connected to the TV set and “DVD” indication on SCART cable is connected to this unit.
•
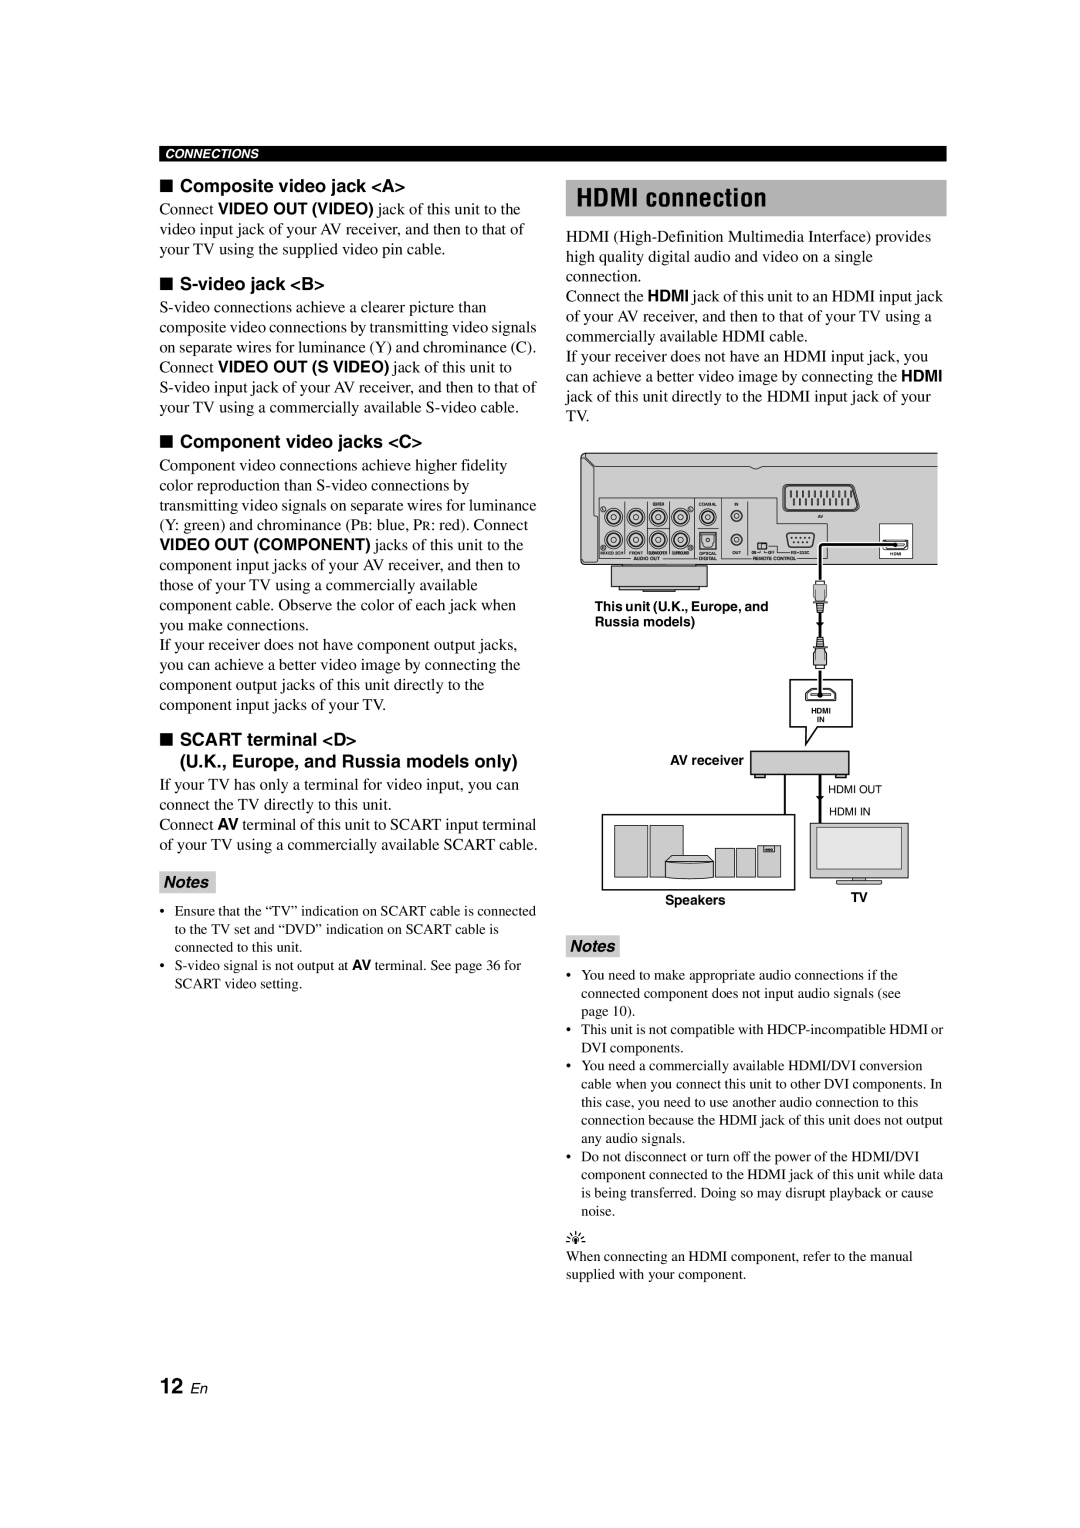
HDMI connection
HDMI
Connect the HDMI jack of this unit to an HDMI input jack of your AV receiver, and then to that of your TV using a commercially available HDMI cable.
If your receiver does not have an HDMI input jack, you can achieve a better video image by connecting the HDMI jack of this unit directly to the HDMI input jack of your TV.
|
| CENTER |
| COAXIAL | IN |
|
|
|
|
L |
|
|
| L |
|
|
|
|
|
|
|
|
|
|
|
|
|
| AV |
R |
|
|
| R |
|
|
|
|
|
MIXED 2CH | FRONT | SUBWOOFER | SURROUND | OPTICAL | OUT | ON | OFF | RS 232C | HDMI |
| AUDIO OUT |
| DIGITAL |
| REMOTE CONTROL |
| |||
This unit (U.K., Europe, and
Russia models)
HDMI
IN
AV receiver
HDMI OUT
HDMI IN
SpeakersTV
Notes
•You need to make appropriate audio connections if the connected component does not input audio signals (see page 10).
•This unit is not compatible with
•You need a commercially available HDMI/DVI conversion cable when you connect this unit to other DVI components. In this case, you need to use another audio connection to this connection because the HDMI jack of this unit does not output any audio signals.
•Do not disconnect or turn off the power of the HDMI/DVI component connected to the HDMI jack of this unit while data is being transferred. Doing so may disrupt playback or cause noise.
y
When connecting an HDMI component, refer to the manual supplied with your component.