SPEAKER SETUP |
|
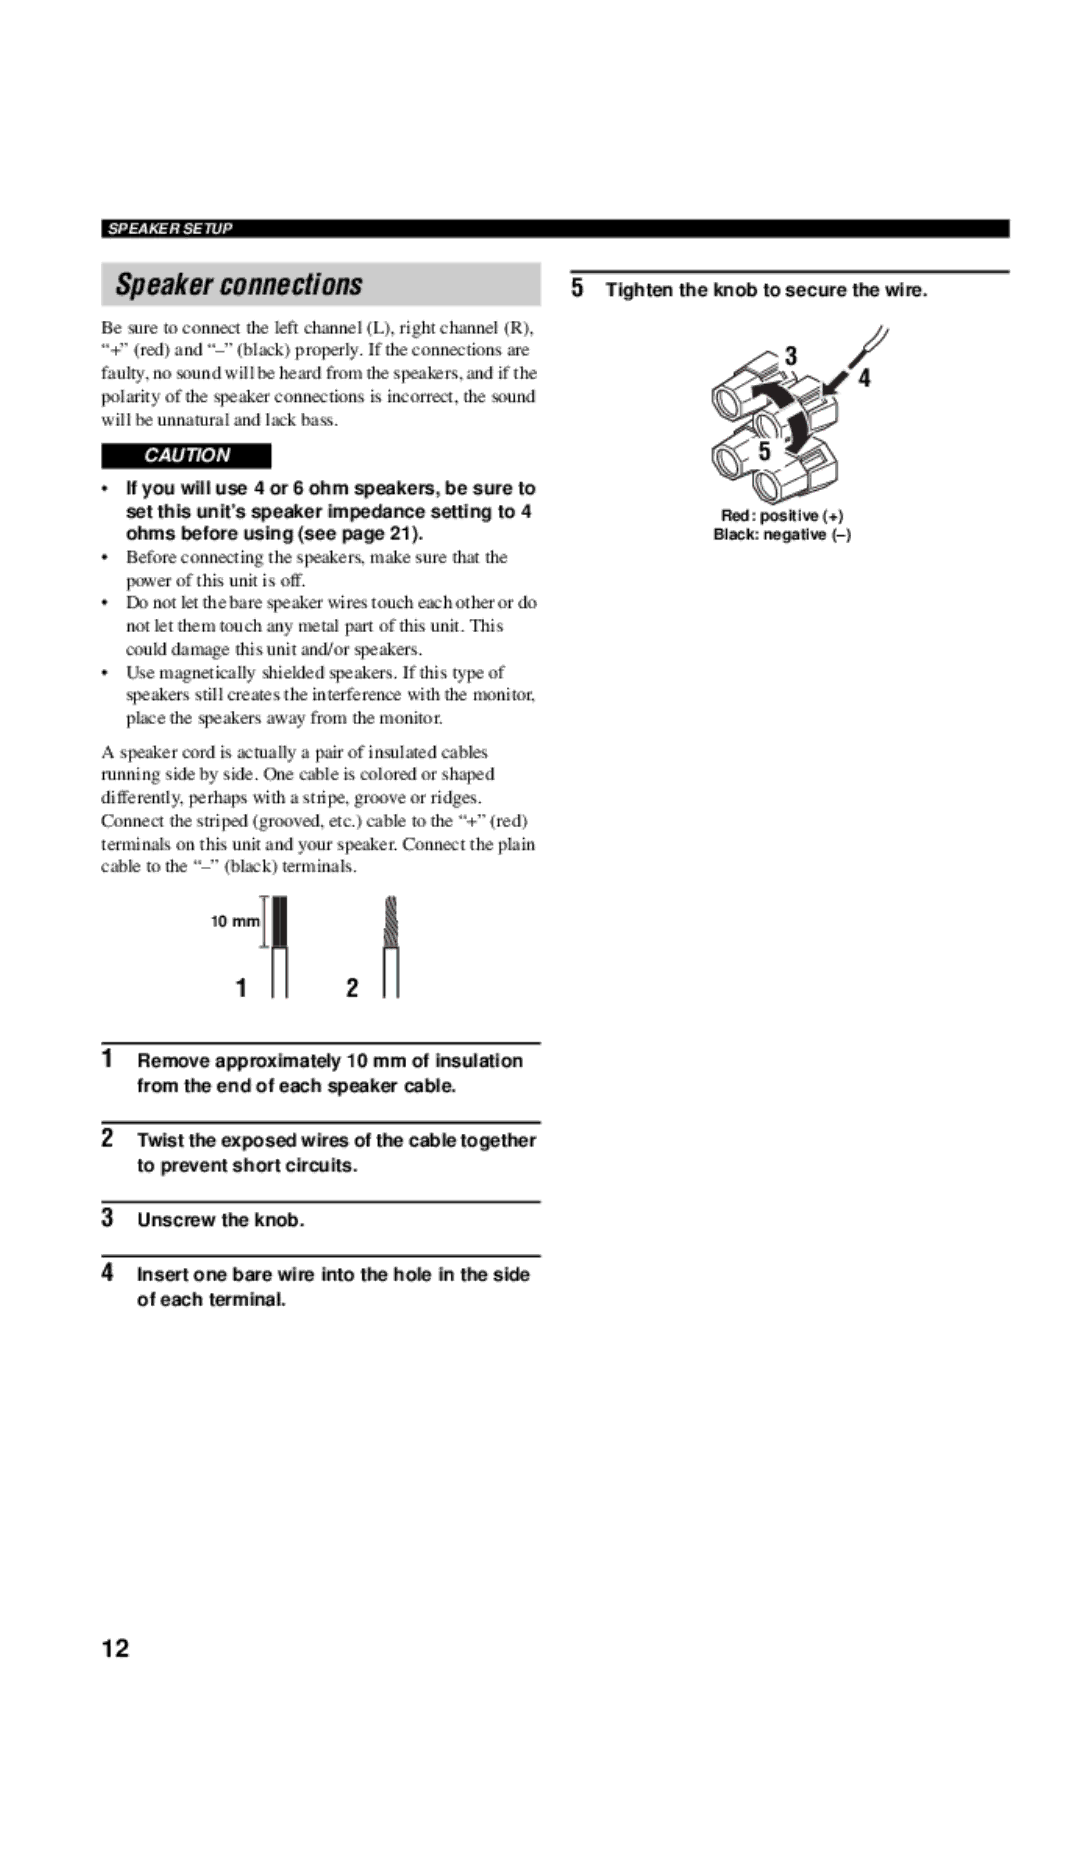
Speaker connections | 5 Tighten the knob to secure the wire. |
Be sure to connect the left channel (L), right channel (R), |
|
“+” (red) and | 3 |
faulty, no sound will be heard from the speakers, and if the | 4 |
polarity of the speaker connections is incorrect, the sound |
|
will be unnatural and lack bass. |
|
CAUTION | 5 |
• If you will use 4 or 6 ohm speakers, be sure to |
|
set this unit’s speaker impedance setting to 4 | Red: positive (+) |
ohms before using (see page 21). | Black: negative |
•Before connecting the speakers, make sure that the power of this unit is off.
•Do not let the bare speaker wires touch each other or do not let them touch any metal part of this unit. This could damage this unit and/or speakers.
•Use magnetically shielded speakers. If this type of speakers still creates the interference with the monitor, place the speakers away from the monitor.
A speaker cord is actually a pair of insulated cables running side by side. One cable is colored or shaped differently, perhaps with a stripe, groove or ridges.
Connect the striped (grooved, etc.) cable to the “+” (red) terminals on this unit and your speaker. Connect the plain cable to the
10 mm
1
2
1Remove approximately 10 mm of insulation from the end of each speaker cable.
2Twist the exposed wires of the cable together to prevent short circuits.
3Unscrew the knob.
4Insert one bare wire into the hole in the side of each terminal.
12