

 OVEN
OVEN &
& ACCESSORIES


1
|
|
|
|
| 2 |
|
|
|
|
| 3 |
|
|
|
|
| 4 |
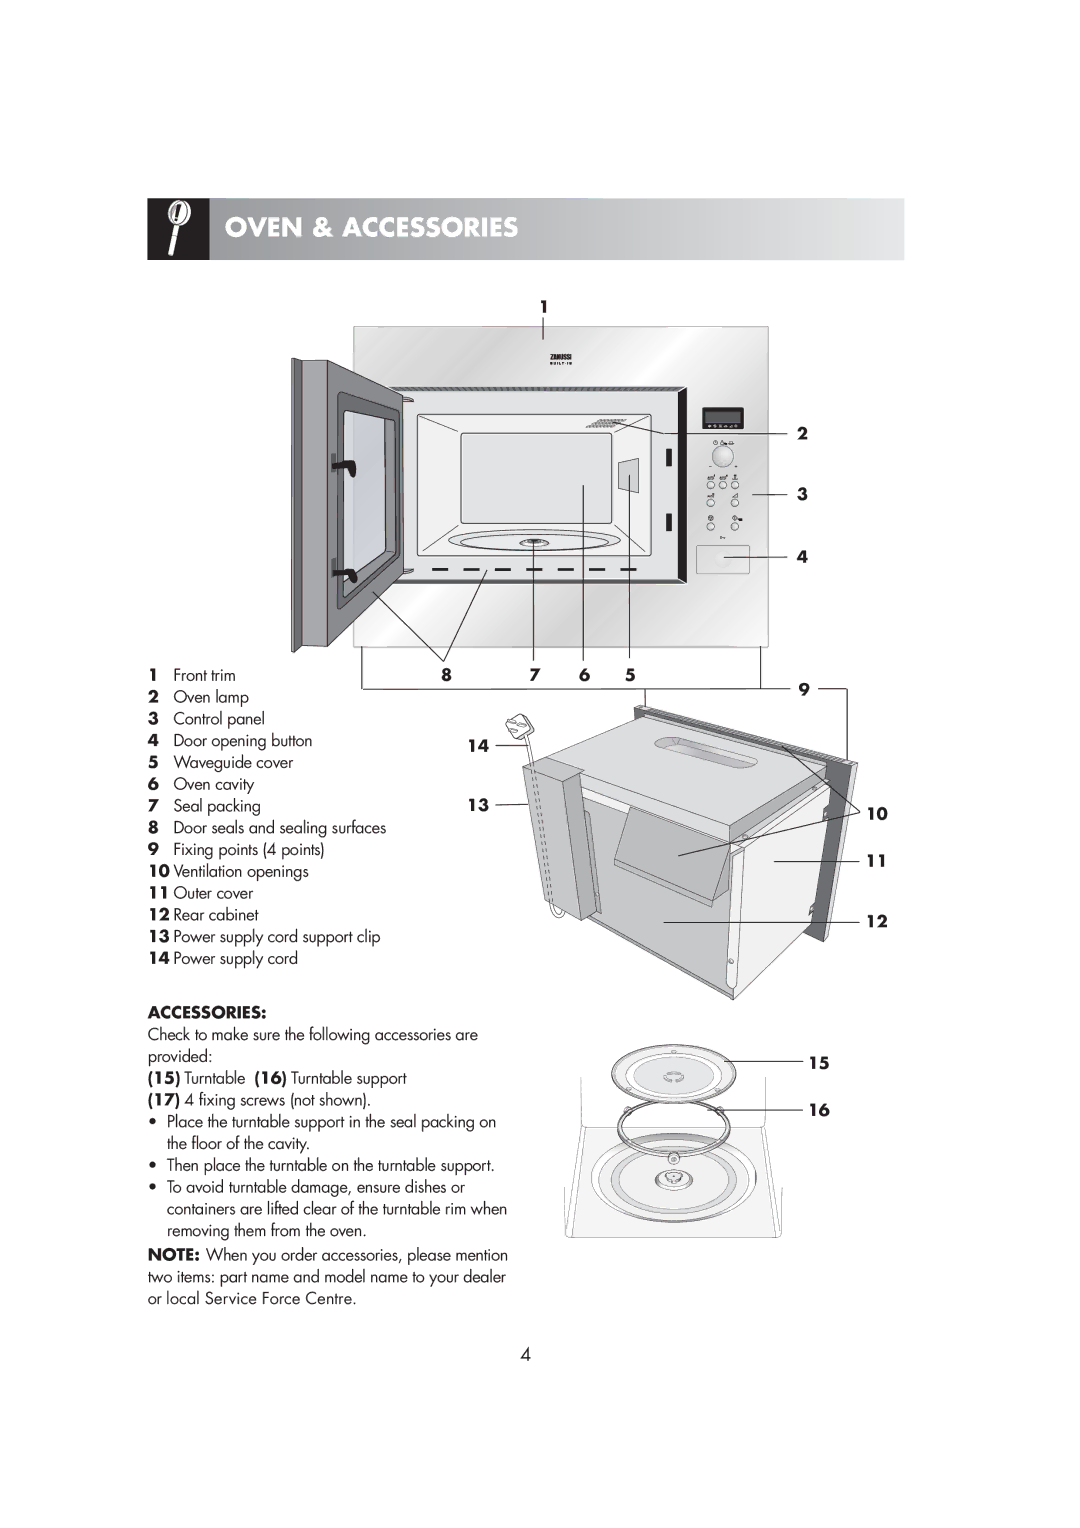
1 | Front trim | 8 | 7 | 6 | 5 |
2 | Oven lamp |
|
|
| 9 |
|
|
|
| ||
3 | Control panel |
|
|
| |
4 | Door opening button | 14 |
|
| |
5 | Waveguide cover |
|
|
| |
6 | Oven cavity |
| 13 |
|
|
7 | Seal packing |
| 10 | ||
8 | Door seals and sealing surfaces |
|
| ||
|
|
| |||
9 | Fixing points (4 points) |
|
| 11 | |
10 Ventilation openings |
|
| |||
|
|
| |||
11 Outer cover |
|
|
|
| |
12 Rear cabinet |
|
| 12 | ||
13 Power supply cord support clip |
|
| |||
|
|
| |||
14 Power supply cord |
|
|
| ||
ACCESSORIES: |
|
|
| ||
Check to make sure the following accessories are |
|
| |||
provided: |
|
|
| 15 | |
(15) Turntable | (16) Turntable support |
|
| ||
|
|
| |||
(17) 4 fixing screws (not shown). |
|
| 16 | ||
• | Place the turntable support in the seal packing on |
| |||
|
| ||||
| the floor of the cavity. |
|
|
| |
• | Then place the turntable on the turntable support. |
|
| ||
• | To avoid turntable damage, ensure dishes or |
|
|
| |
| containers are lifted clear of the turntable rim when |
|
| ||
| removing them from the oven. |
|
|
| |
NOTE: When you order accessories, please mention |
|
| |||
two items: part name and model name to your dealer |
|
| |||
or local Service Force Centre. |
|
|
| ||
4
