Channel Add/Delete/Blank
Fine-tuning the guest’s channel selection list
SETUP MENU
AUTO PROGRAM
ADD/DEL/BLNK ![]()
![]() CH 44 ADDED CH. LABELS
CH 44 ADDED CH. LABELS
CLOCK SET TIMER CAPTIONS LANGUAGE
1 | Press the MENU key on an Installer’s remote so the SETUP MENU |
|
| appears. | POWER |
2
3
4
5
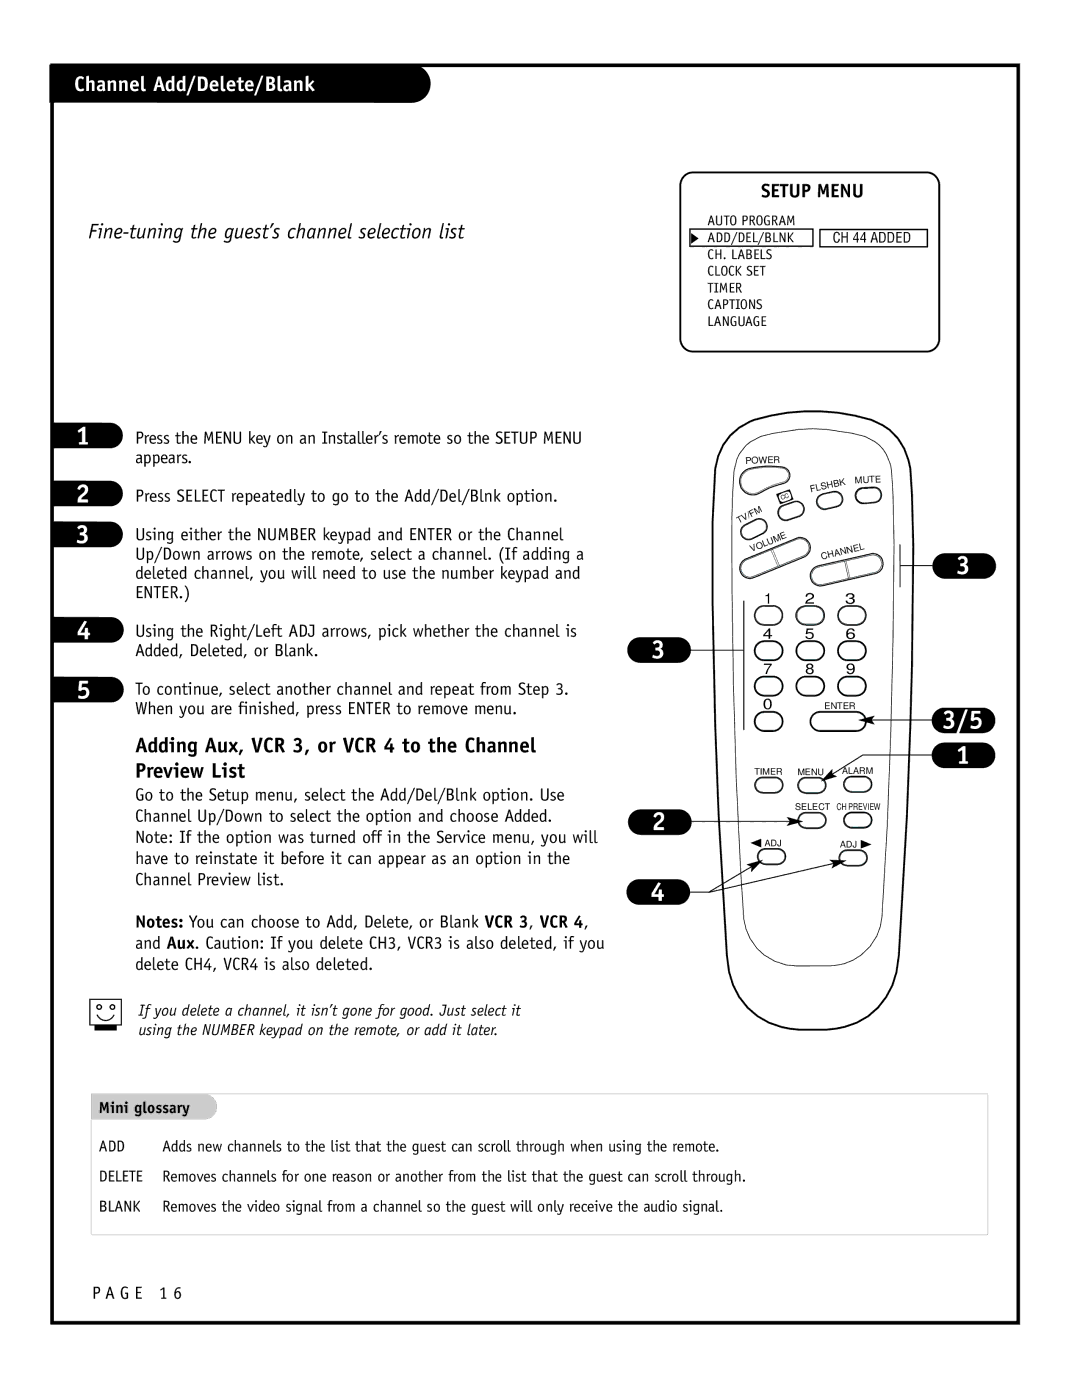
Press SELECT repeatedly to go to the Add/Del/Blnk option.
Using either the NUMBER keypad and ENTER or the Channel Up/Down arrows on the remote, select a channel. (If adding a deleted channel, you will need to use the number keypad and ENTER.)
Using the Right/Left ADJ arrows, pick whether the channel is Added, Deleted, or Blank.
To continue, select another channel and repeat from Step 3. When you are finished, press ENTER to remove menu.
Adding Aux, VCR 3, or VCR 4 to the Channel Preview List
Go to the Setup menu, select the Add/Del/Blnk option. Use Channel Up/Down to select the option and choose Added. Note: If the option was turned off in the Service menu, you will have to reinstate it before it can appear as an option in the Channel Preview list.
Notes: You can choose to Add, Delete, or Blank VCR 3, VCR 4,
and Aux. Caution: If you delete CH3, VCR3 is also deleted, if you delete CH4, VCR4 is also deleted.
| MUTE |
| FLSHBK |
CC |
|
TV/FM |
|
UME |
|
VOL | CHANNEL |
|
1 | 2 | 3 |
4 | 5 | 6 |
3 |
|
|
7 | 8 | 9 |
0 |
| ENTER |
TIMER | MENU | ALARM |
2 | SELECT CH PREVIEW | |
|
| |
ADJ |
| ADJ |
4
3
3/5
1
If you delete a channel, it isn’t gone for good. Just select it using the NUMBER keypad on the remote, or add it later.
Mini glossary
ADD | Adds new channels to the list that the guest can scroll through when using the remote. |
DELETE | Removes channels for one reason or another from the list that the guest can scroll through. |
BLANK | Removes the video signal from a channel so the guest will only receive the audio signal. |
